Lighting the First LED
Introduction
It is believed that most people start learning embedded microcontroller programming by lighting an LED. The WalnutPi learning journey is no exception. Lighting the first LED gives you some understanding of WalnutPi GPIO applications and programming methods, laying the foundation for future learning and more complex programs, and boosting your confidence.
Objective
Light up the onboard blue LED.
Explanation
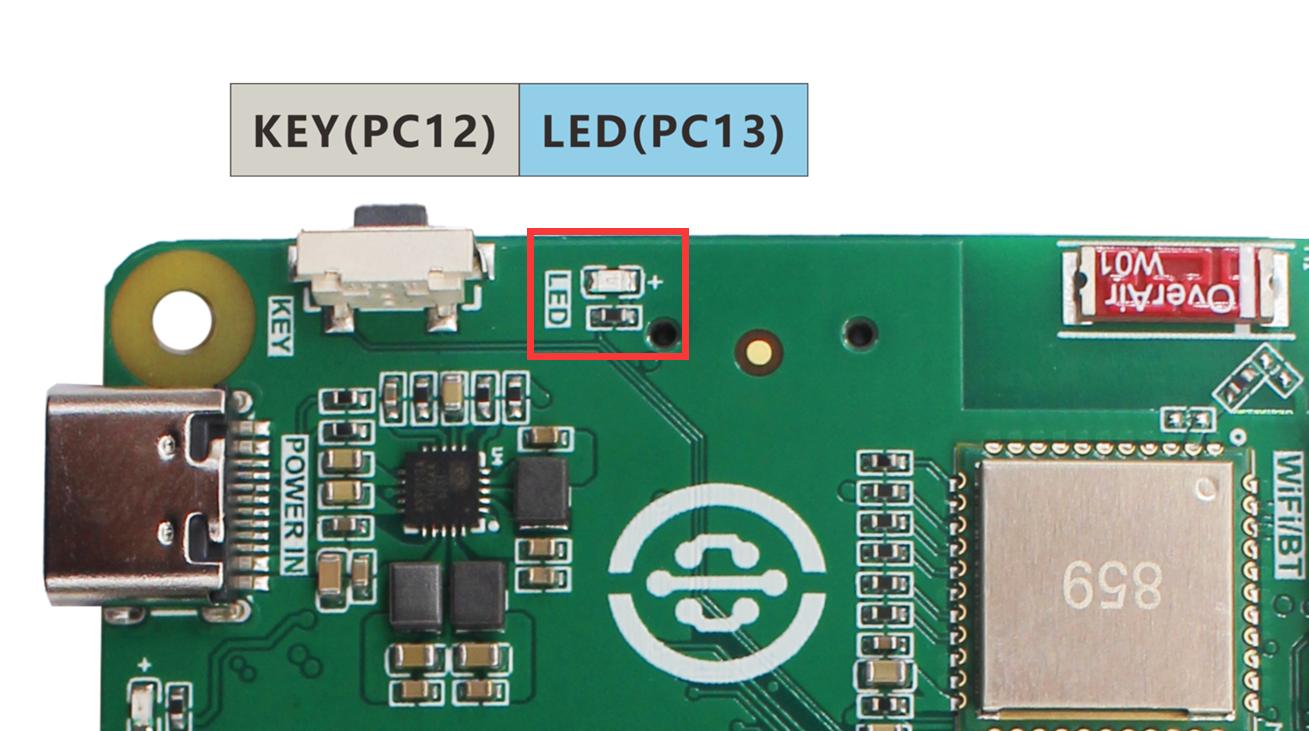
The WalnutPi has one onboard programmable LED, located next to the button:
From the WalnutPi schematic, we can see that the LED is connected to the controller pin PC13. It lights up when a HIGH level is output:
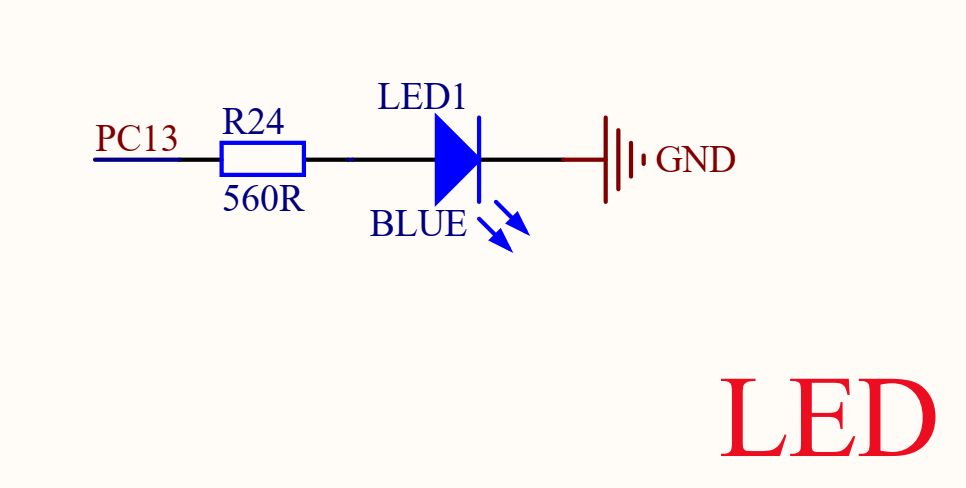
Since we are using the Python library, we only need to know the library pin name.
We can check pin names using Python commands in the terminal.
Enter python in the terminal to enter Python interactive mode:
python
Then type:
import board
Then type:
board.
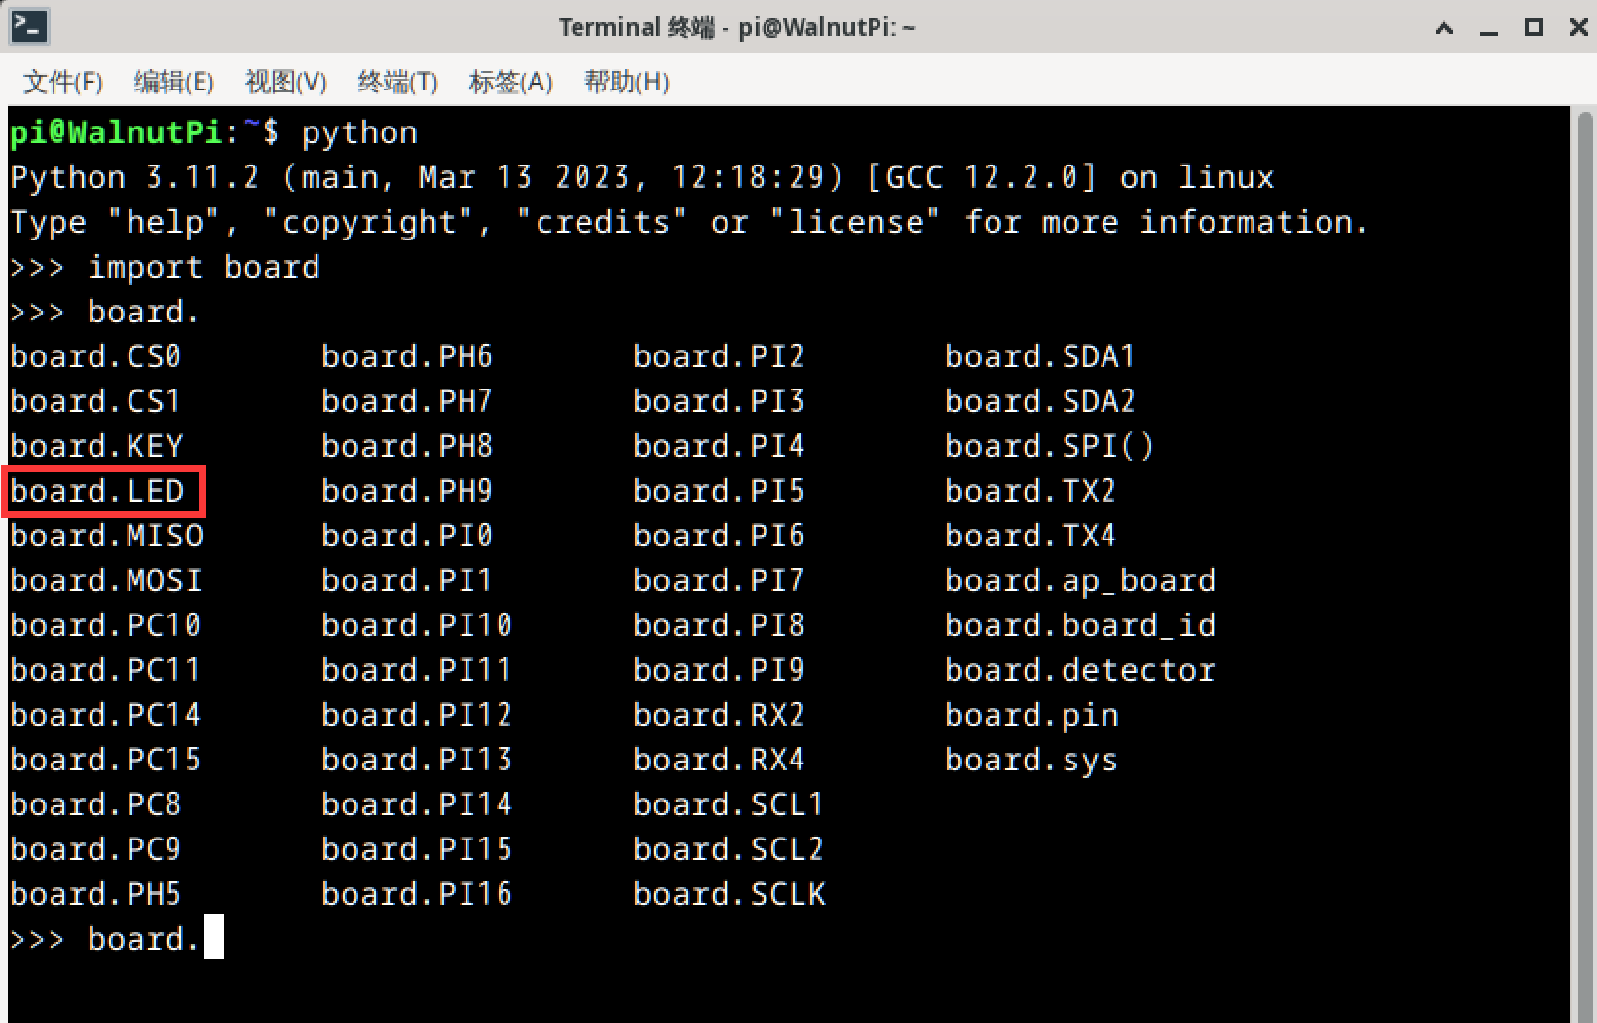
Press the Tab key to autocomplete and see all WalnutPi Python library pin names.
The LED's name in the Python library is board.LED:
The digitalio Object
In CircuitPython, you can directly use the digitalio (Digital IO) module to program IO output for lighting the LED. Details are as follows:
Constructor
led=digitalio.DigitalInOut(pin)
Parameter description:
pinBoard pin number. Example: board.PC8
Methods
led.direction = value
Define pin as input/output. Possible value values:
digitalio.Direction.INPUT: Input.digitalio.Direction.OUTPUT: Output.
led.pull = value
Set pull-up/pull-down resistor. Possible value values:
digitalio.Pull.UP: Pull-up.digitalio.Pull.DOWN: Pull-down.
led.value = value
GPIO output value. Possible value values:
Trueor1: HIGH.Falseor0: LOW.
For more usage, refer to the official documentation:
https://docs.circuitpython.org/en/latest/shared-bindings/digitalio/index.html
Above, we've explained the CircuitPython DigitalInOut object in detail. digitalio is the main module, while DigitalInOut, Direction, Pull, and DriveMode are sub-modules under digitalio. There are two ways to reference related modules in Python programming:
- Method 1:
import digitalio, then operate viadigitalio.DigitalInOut; - Method 2:
from digitalio import DigitalInOut, which means directly importing theDigitalInOutmodule fromdigitalio, then operating viaDigitalInOutdirectly. Method 2 is clearly more intuitive and convenient. This experiment also uses Method 2. The code writing flow is as follows:
Reference Code
'''
Experiment Name: Lighting the First LED
Experiment Platform: WalnutPi
'''

# Import related modules
import board
from digitalio import DigitalInOut, Direction

# Construct and initialize the LED object
led = DigitalInOut(board.LED) # Define pin number
led.direction = Direction.OUTPUT  # IO as output

led.value = 1 # Output HIGH, light up onboard blue LED

#led.value = 0 # Output LOW, turn off onboard blue LED
Result
Use Thonny to remotely run the above Python code on the WalnutPi. For instructions on running Python code on the WalnutPi, please refer to: Running Python Code
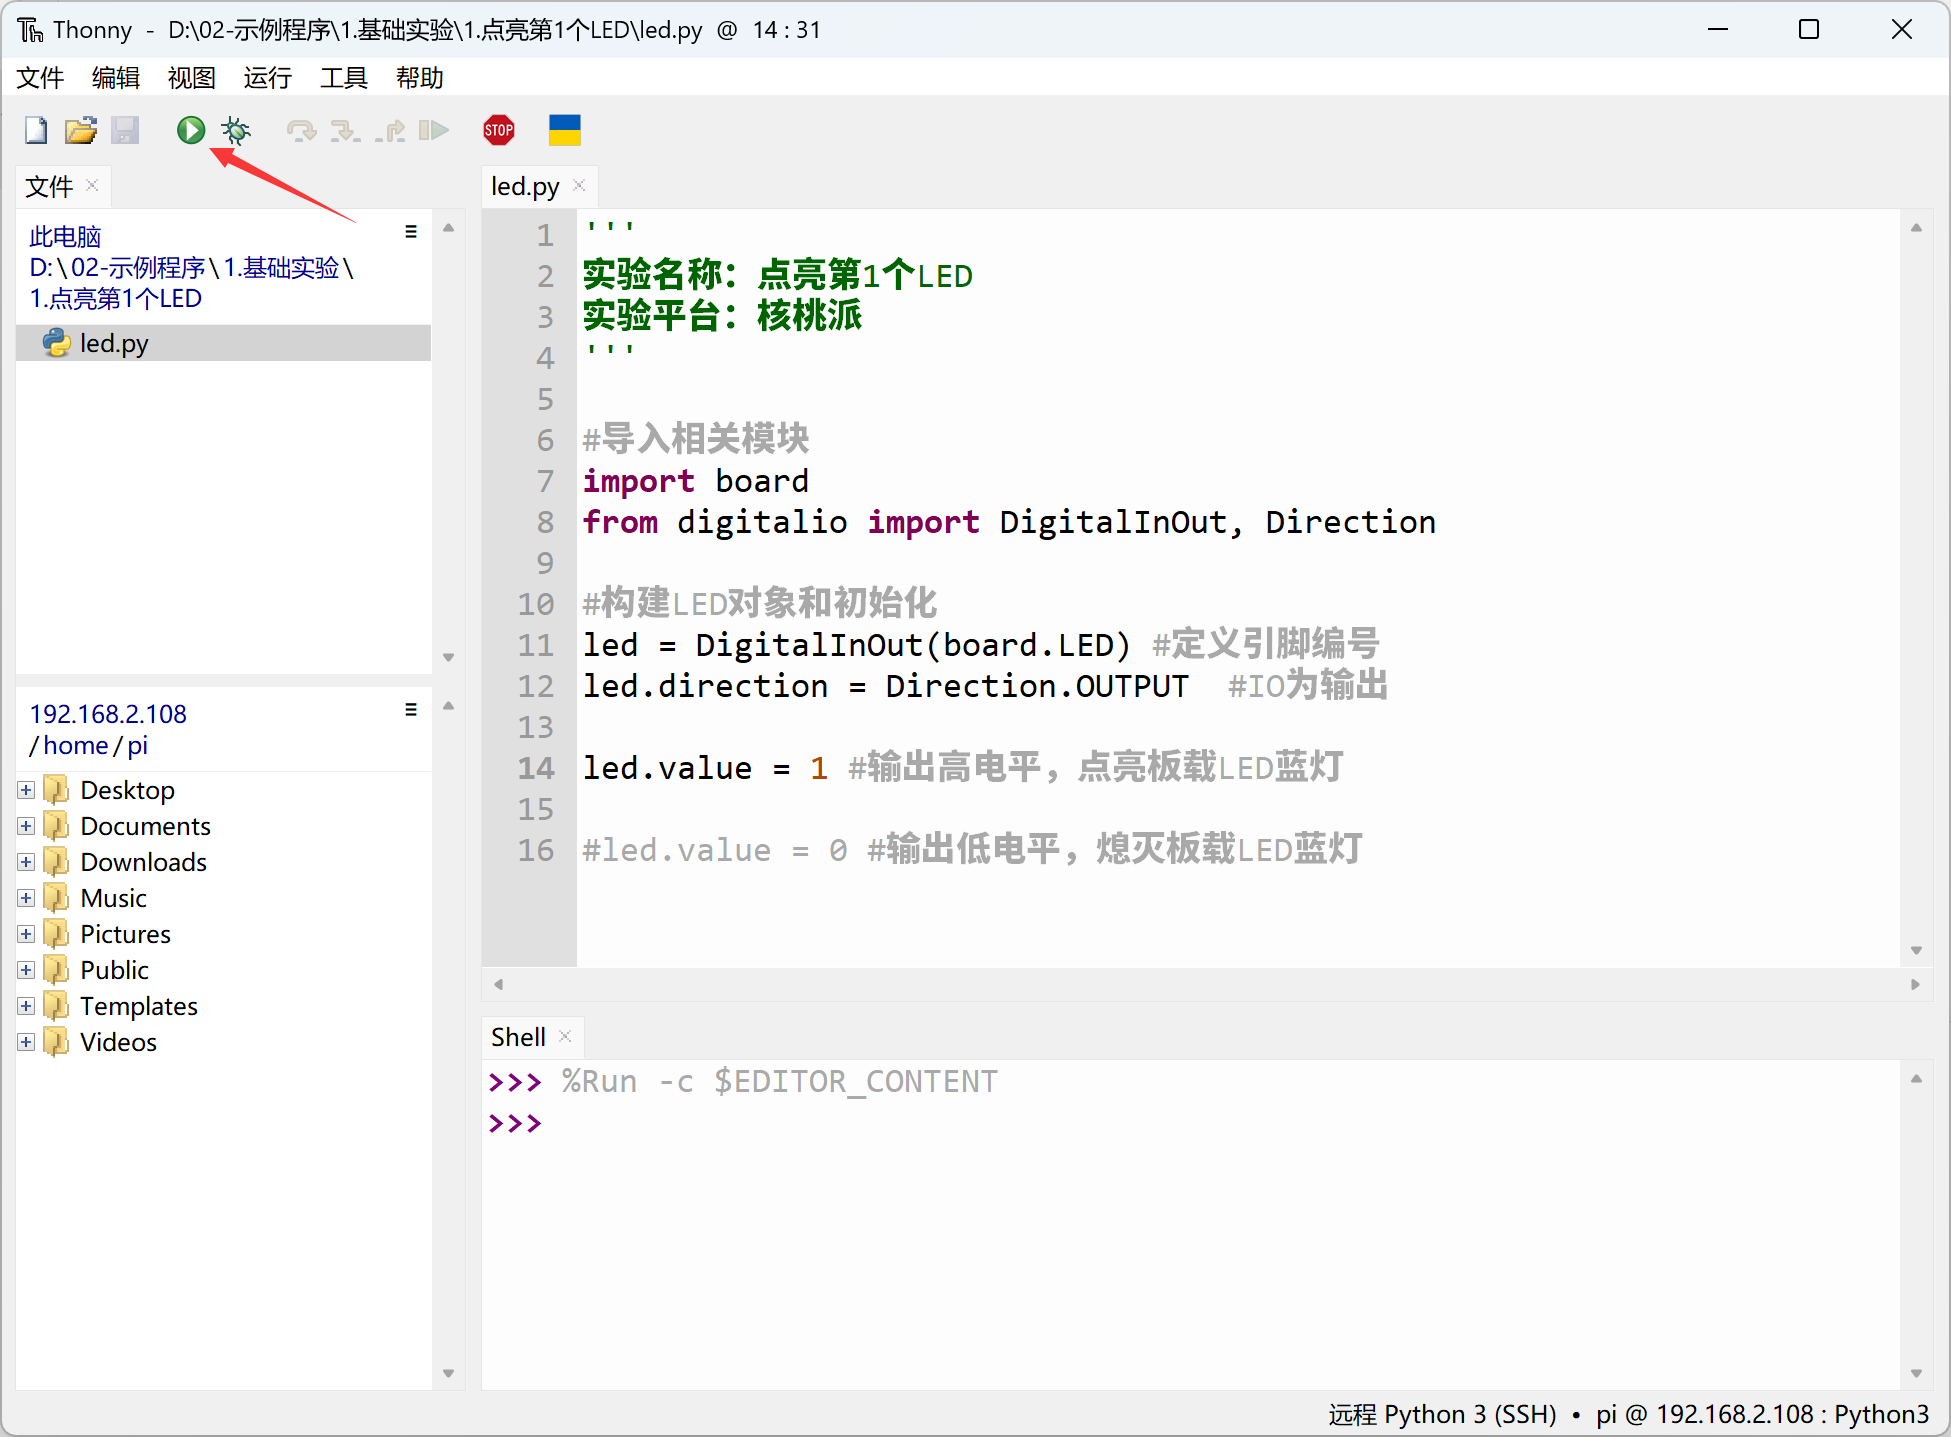
The LED is lit, but since the WalnutPi's blue LED is also used as a system boot indicator by default (lights up on successful boot), you might not notice the difference.
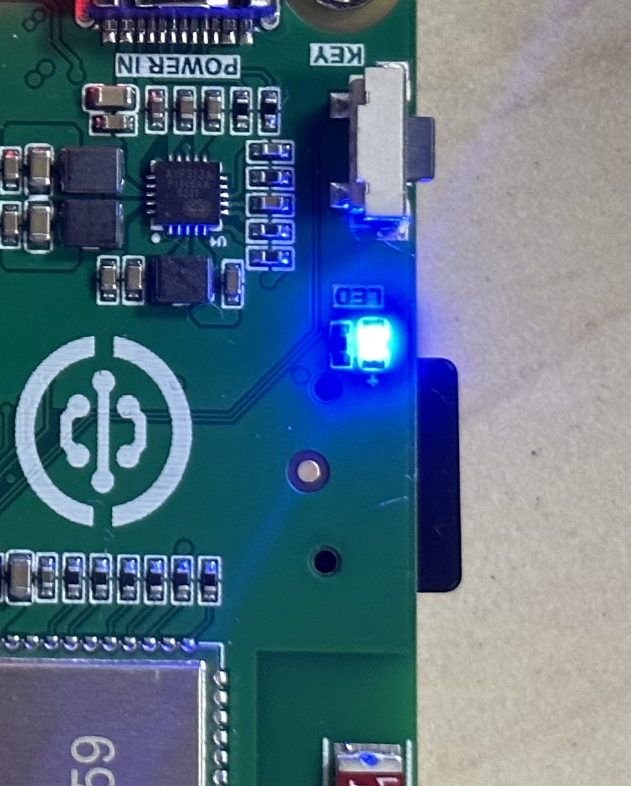
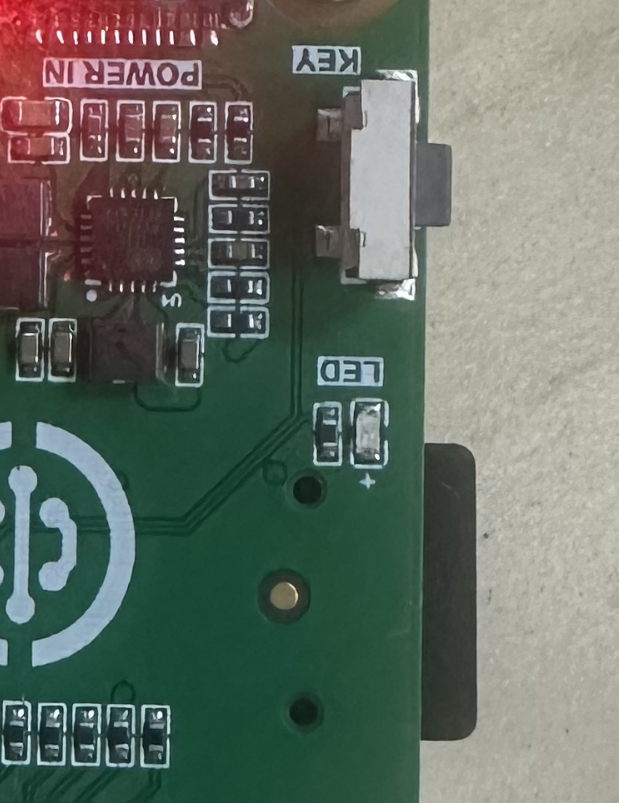
You can modify the code to turn the LED off:
led.value = 0 # Output LOW, turn off onboard blue LED
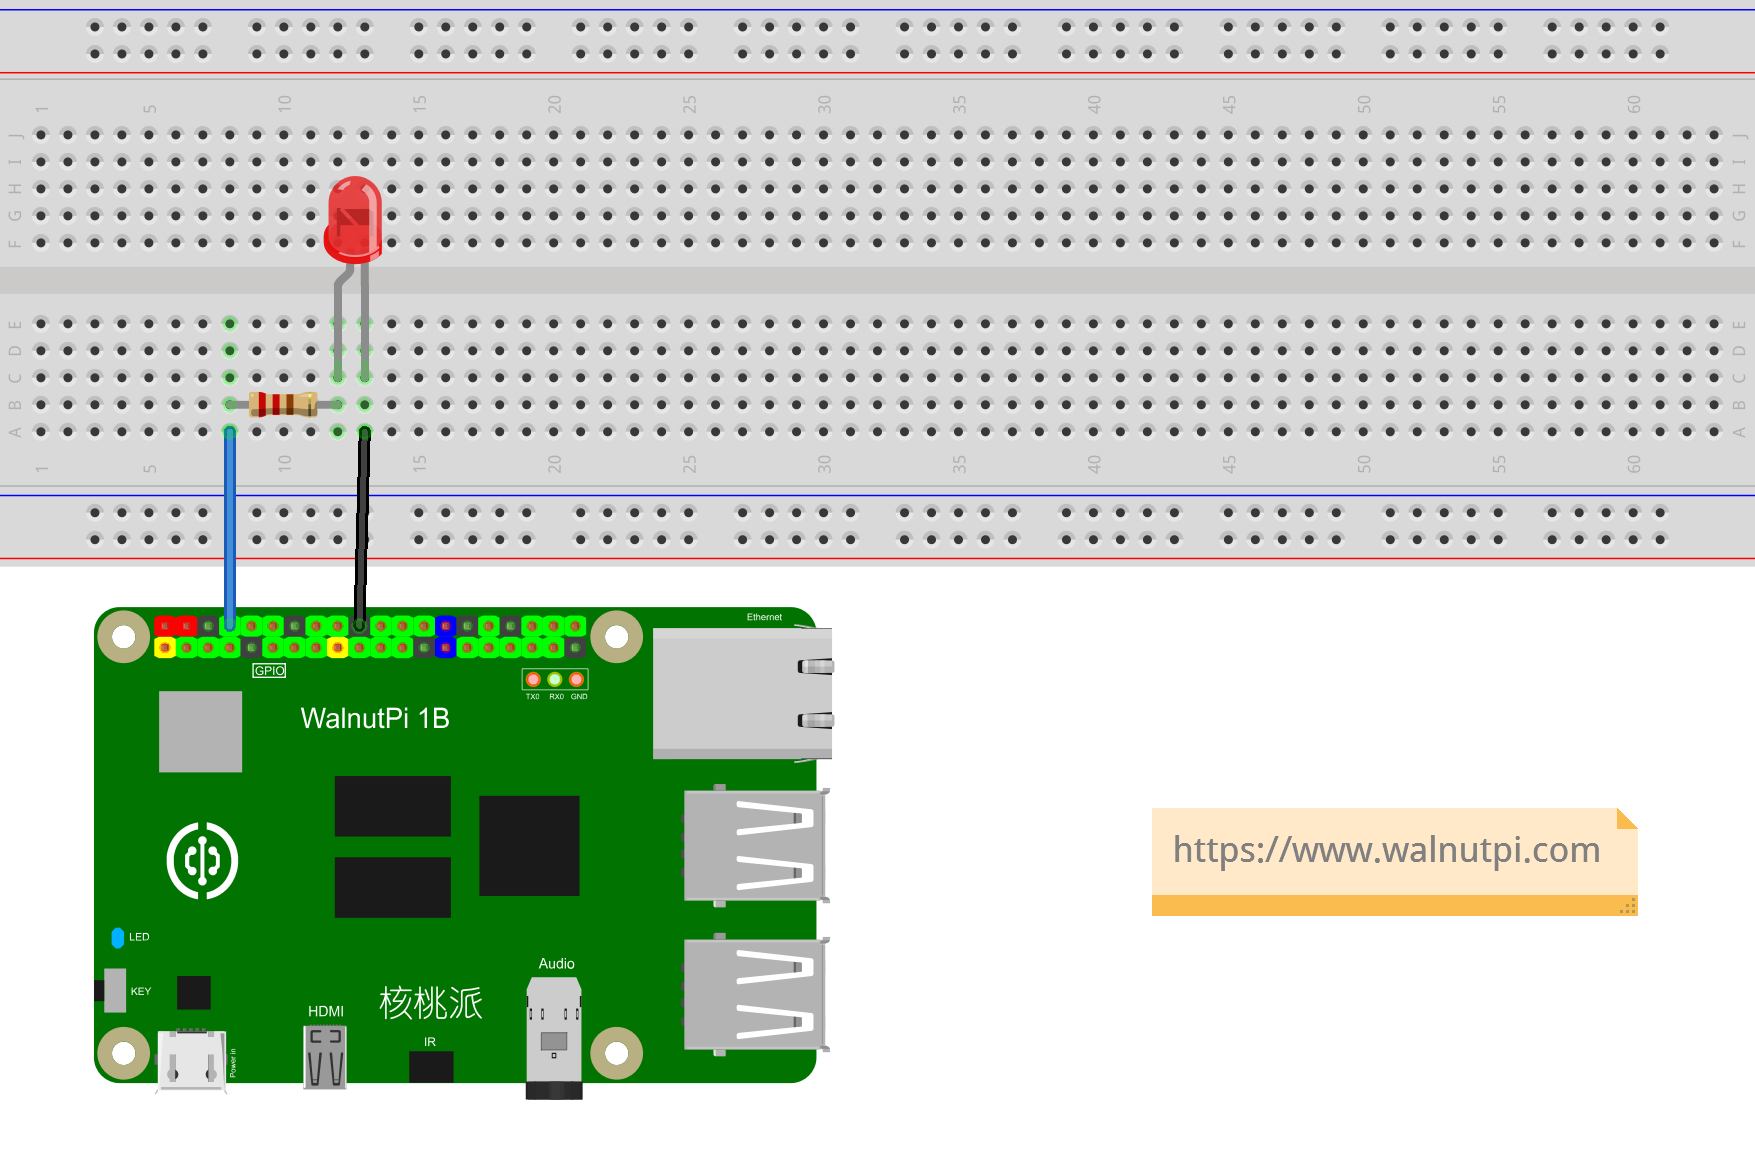
Besides using the onboard LED, you can also build your own circuit. Just remember to modify the GPIO pin number in the code accordingly.
From this first experiment, we can see that developing WalnutPi hardware with Python involves learning the constructors and methods of the Python libraries, and then controlling related objects through programming. With the support of powerful Python libraries, the experiment achieved lighting an LED with just a few simple lines of code.