VL53L1X Laser Distance Sensor
Introduction
The VL53L1X is a Time-of-Flight (ToF) ranging module with a precise measurement range of up to 4 meters, 1mm accuracy, and fast ranging frequency up to 50Hz. It communicates via I2C and has low power consumption. Compared to the HC-SR04 ultrasonic module discussed earlier, it offers higher precision, faster response, and stronger anti-interference capability. It is commonly used in high-precision and high-real-time ranging applications.
Objective
Use Python programming to implement distance measurement with the VL53L1X sensor!
Explanation
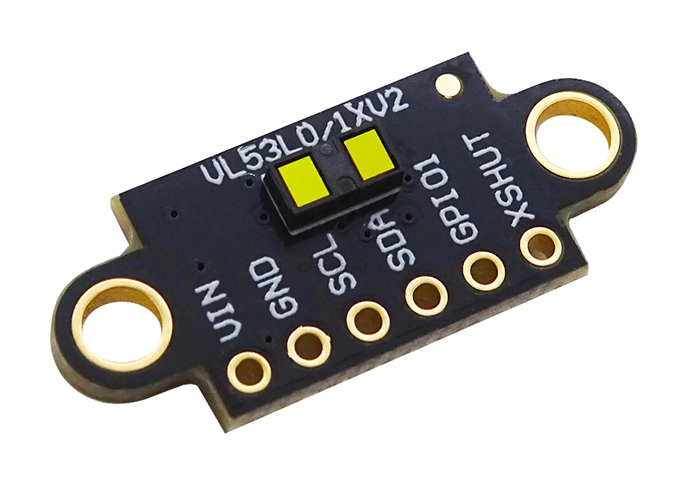
Most VL53L1X modules on the market are universal and communicate via the I2C bus. The image below shows a VL53L1X sensor module:
| Module Parameters | |
|---|---|
| Supply Voltage | 3.3V |
| Communication | I2C bus (default address: 0x29) |
| Measuring Range | 4cm - 4m |
| Accuracy | 1mm |
| Pin Description | VCC: Connect to 3.3V GND: Ground SDA: I2C data pin SCL: I2C clock pin |
From the description above, we can see that the VL53L1X is a sensor driven via the I2C interface. We can communicate with this module by programming the WalnutPi's I2C interface.
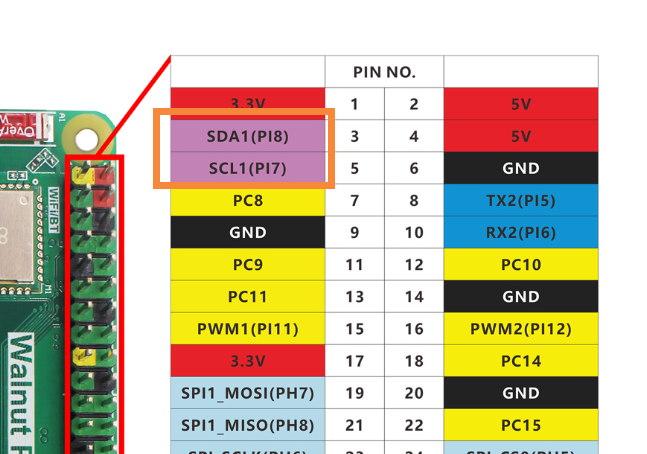
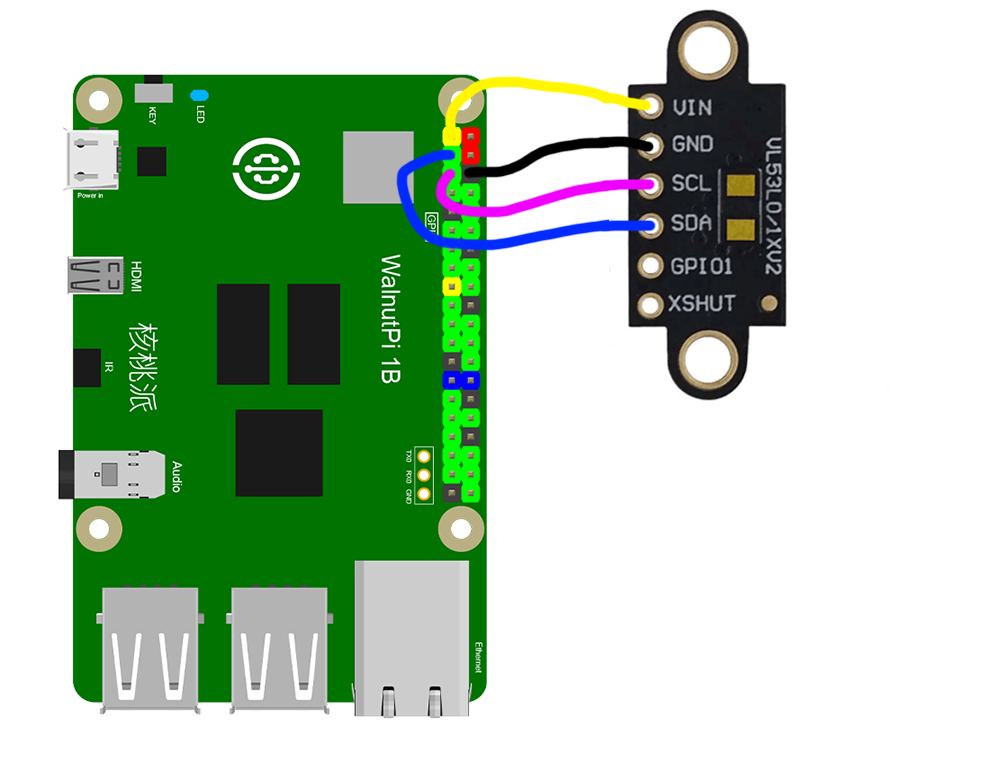
This routine uses the WalnutPi's I2C1 to connect the VL53L1X sensor:
The VL53L1X Object
In CircuitPython, you can directly use a pre-written Python library to obtain VL53L1X sensor data. Details are as follows:
Constructor
vl53 = adafruit_vl53l1x.VL53L1X(i2c, address=0x29)
Constructs a VL53L1X object.
Parameter description:
i2cRequires constructing an i2c object, refer to: I2C Object Description; not repeated here.addressModule I2C address. Default: 0x29;
Methods
vl53.distance_mode = value
value: Mode value1: Short distance mode2: Long distance mode
vl53.timing_budget = value
-
value: Ranging duration, in ms.Increasing the ranging duration increases the device's maximum ranging distance and improves repeatability error. Power consumption increases accordingly. Allowable values: ms = 15 (short distance mode only), 20, 33, 50, 100, 200, 500. Default is 50.
vl53.start_ranging()
Start measurement.
vl53.data_ready
Sensor measurement status. Returns 1: measurement data available; Returns 0: no measurement data.
vl53.distance
Read measurement result. Unit: cm, data type float.
After understanding the VL53L1X sensor principles and object usage, we can organize the programming approach. The flowchart is as follows:
Reference Code
'''
Experiment Name: VL53L1X Laser Distance Sensor
Experiment Platform: WalnutPi 1B
'''

import time, busio, board, adafruit_vl53l1x

# Construct I2C object, controlled by WalnutPi I2C1
i2c = busio.I2C(board.SCL1, board.SDA1)

vl53 = adafruit_vl53l1x.VL53L1X(i2c, address=0x29)

# Parameter settings
vl53.distance_mode = 1  # 1: Short distance mode; 2: Long distance mode.
vl53.timing_budget = 100 # Ranging duration, in ms.

# Sensor information
print("VL53L1X Simple Test.")
print("--------------------")
model_id, module_type, mask_rev = vl53.model_info
print("Model ID: 0x{:0X}".format(model_id))
print("Module Type: 0x{:0X}".format(module_type))
print("Mask Revision: 0x{:0X}".format(mask_rev))
print("Distance Mode: ", end="")
if vl53.distance_mode == 1:
    print("SHORT")
elif vl53.distance_mode == 2:
    print("LONG")
else:
    print("UNKNOWN")
print("Timing Budget: {}".format(vl53.timing_budget))
print("--------------------")

# Start measurement
vl53.start_ranging()

while True:

    if vl53.data_ready:
        print("Distance: {} cm".format(vl53.distance))
        vl53.clear_interrupt()
        time.sleep(0.5)
Result
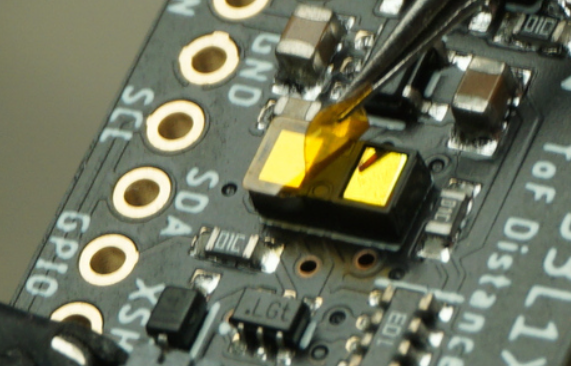
If needed, you can peel off the protective film on the VL53L1X sensor. Be careful not to scratch the surface — the accuracy may improve slightly.
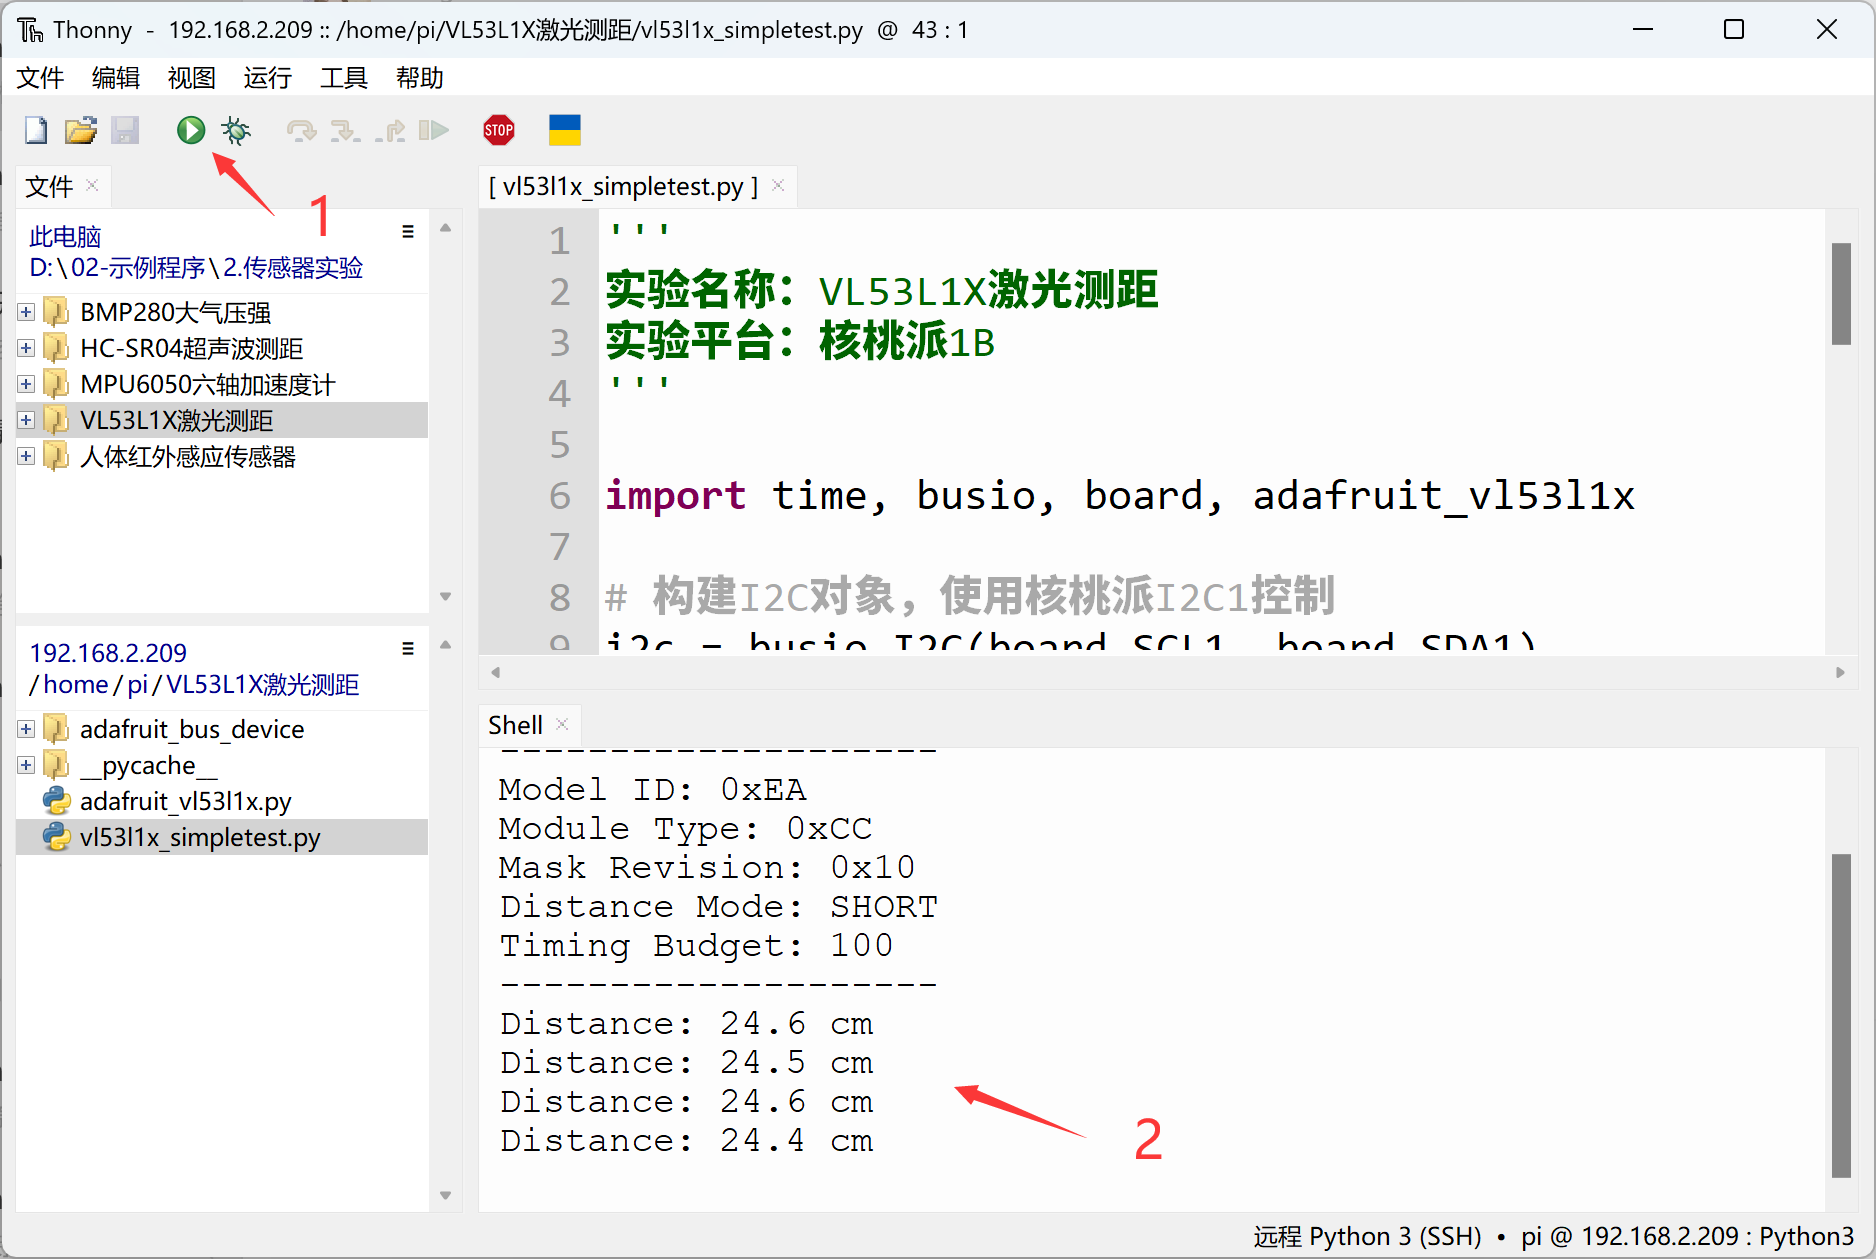
Connect the VL53L1X sensor to the WalnutPi as shown — SDA1 to module SDA pin, SCL1 to module SCL pin:
Since this code depends on other .py library files, you need to upload the entire example folder to the WalnutPi:
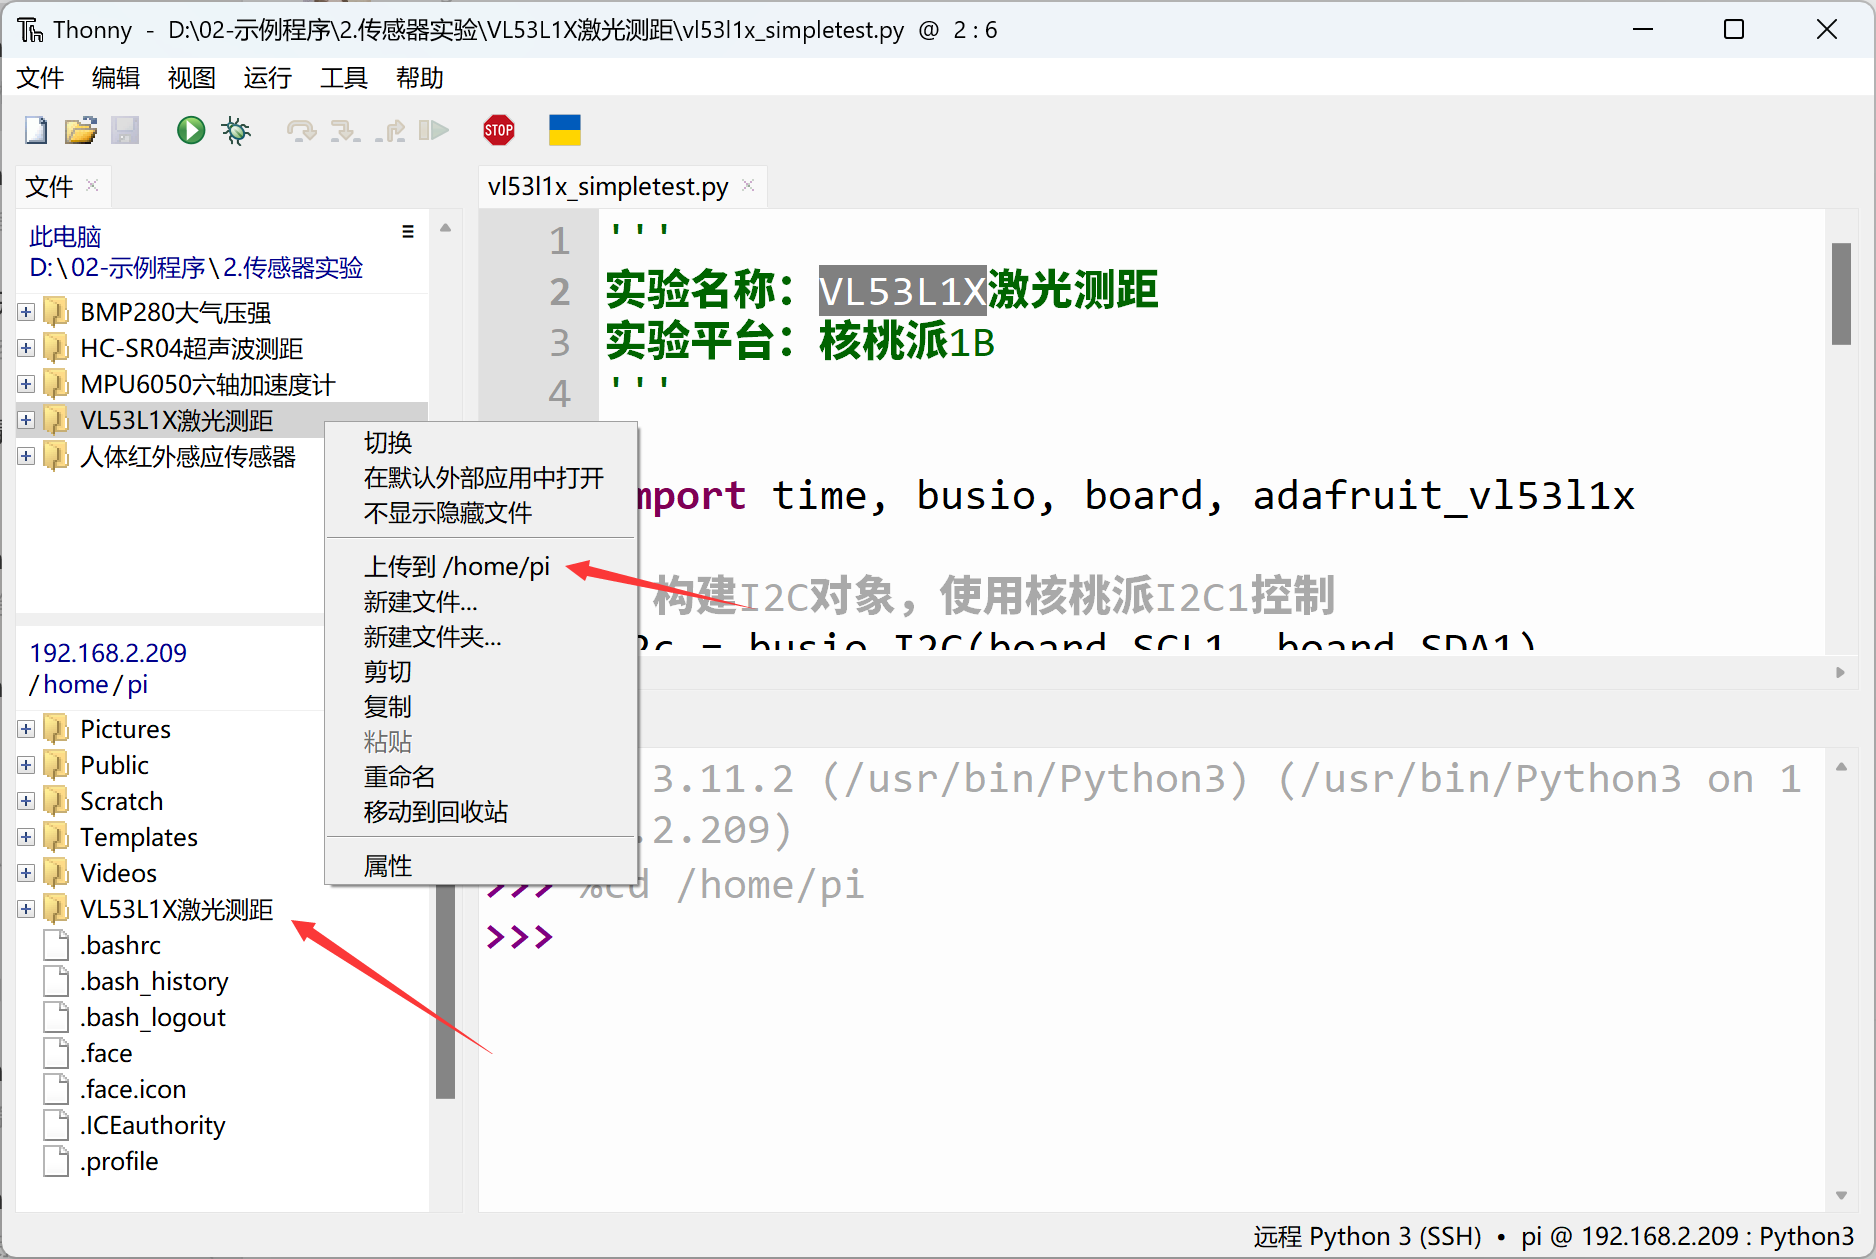
After successful transfer, you need to open and run the .py file from the remote directory (WalnutPi), because running it will import other library files in the folder. Therefore, running this type of code locally on a PC is ineffective.
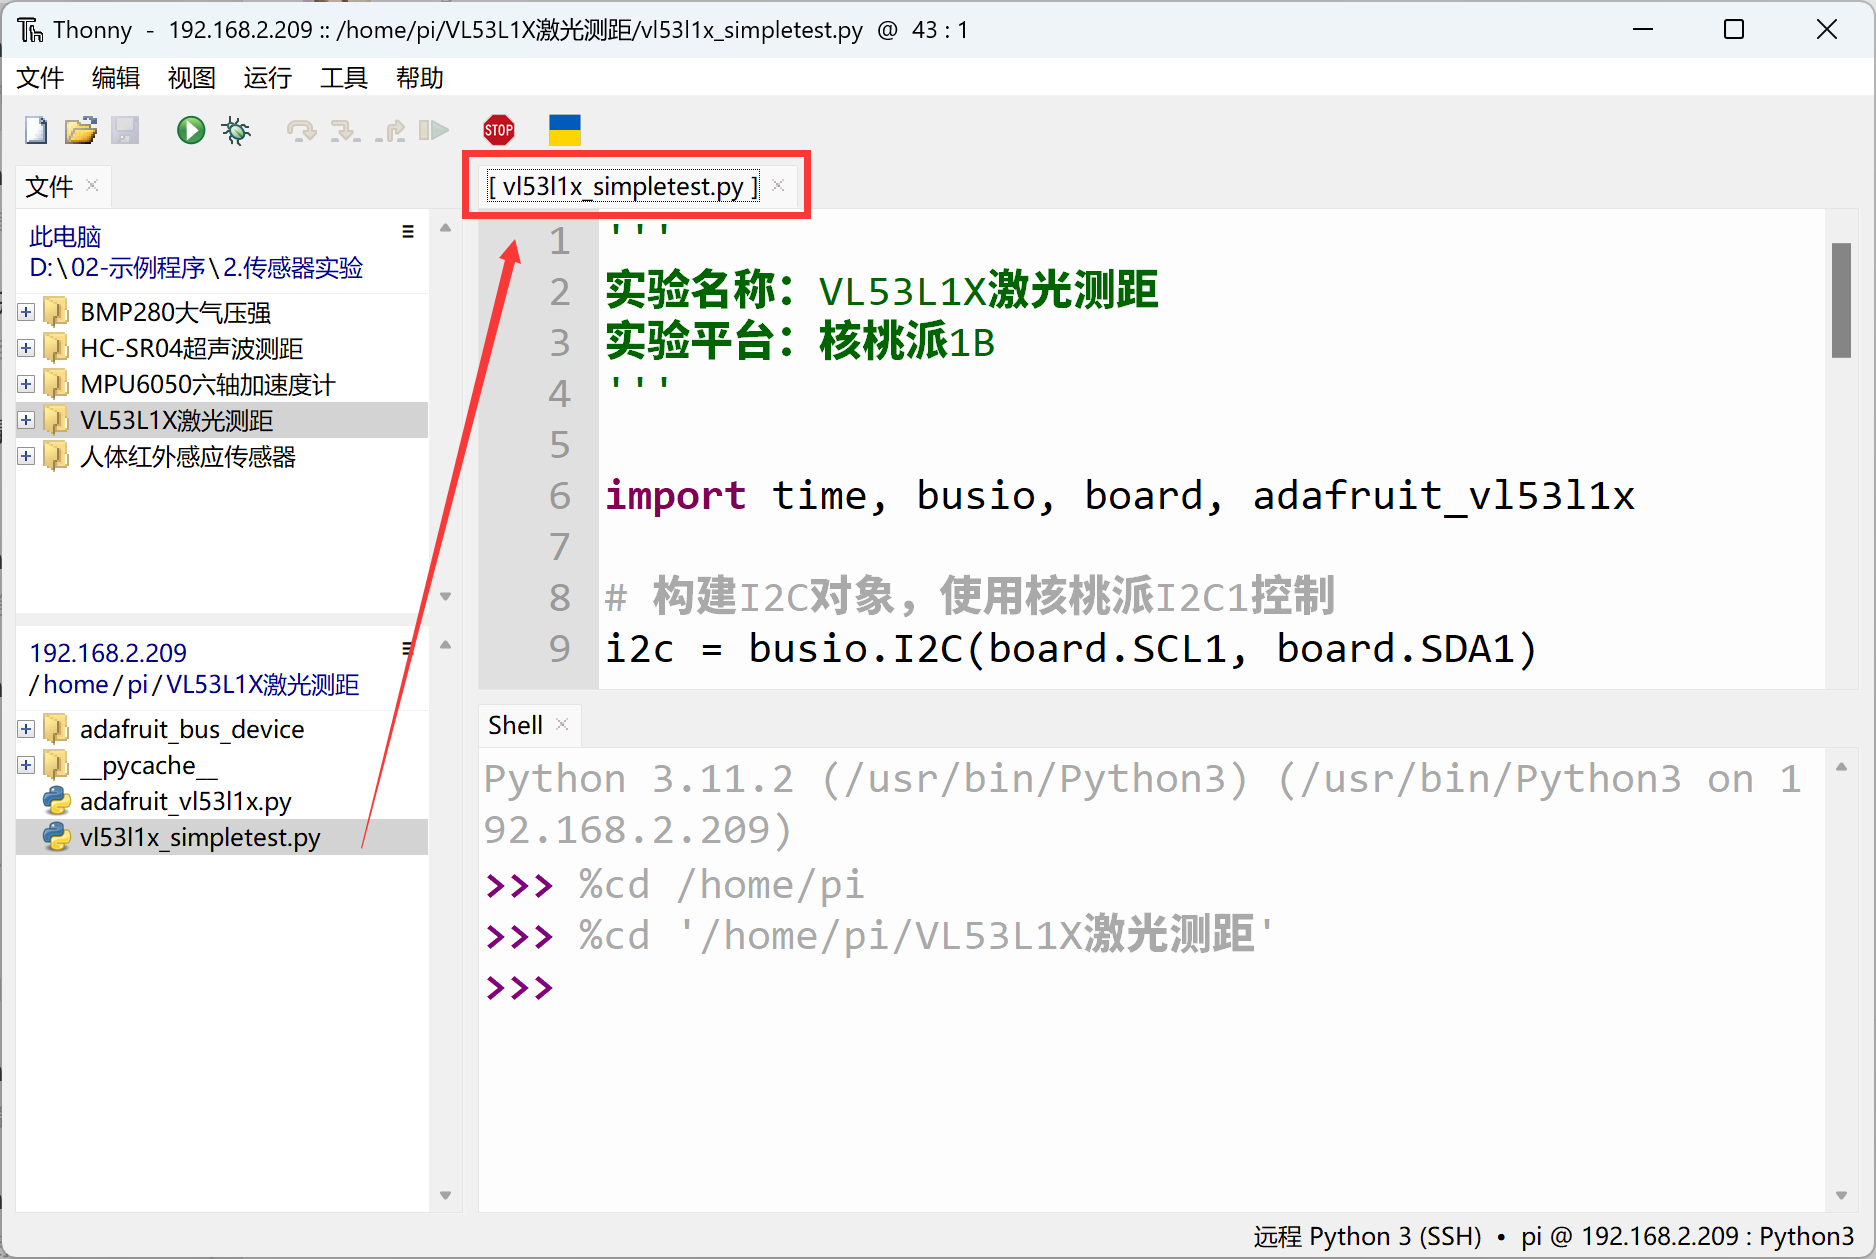
Use Thonny to remotely run the above Python code on the WalnutPi. For instructions on running Python code on the WalnutPi, please refer to: Running Python Code. After successful execution, the terminal will print distance information: