Auto-Run Python Code on Boot
In the previous sections, we learned many Python embedded programming cases. Some of you may wonder: can we place our already-written Python code on the WalnutPi and have it automatically execute on boot? The answer is yes, and it's a very practical feature. This section will explain it in detail.
Method for Desktop Systems
First, let's write a piece of test Python code that uses the onboard LED blinking effect as a demonstration, along with a "Hello WalnutPi!" print message. The code is as follows (available in the WalnutPi development board resource package → Example Programs → Other Usage Tips):
'''
Experiment Name: LED Blinking
Experiment Platform: WalnutPi
'''

# Import related modules
import board,time
from digitalio import DigitalInOut, Direction

# Construct and initialize LED object
led = DigitalInOut(board.LED) # Define pin number
led.direction = Direction.OUTPUT  # IO as output

while True:

    led.value = 1 # Output HIGH, turn on onboard blue LED

    time.sleep(0.5)

    led.value = 0 # Output LOW, turn off onboard blue LED

    time.sleep(0.5)

    print("Hello WalnutPi!") # Output print message
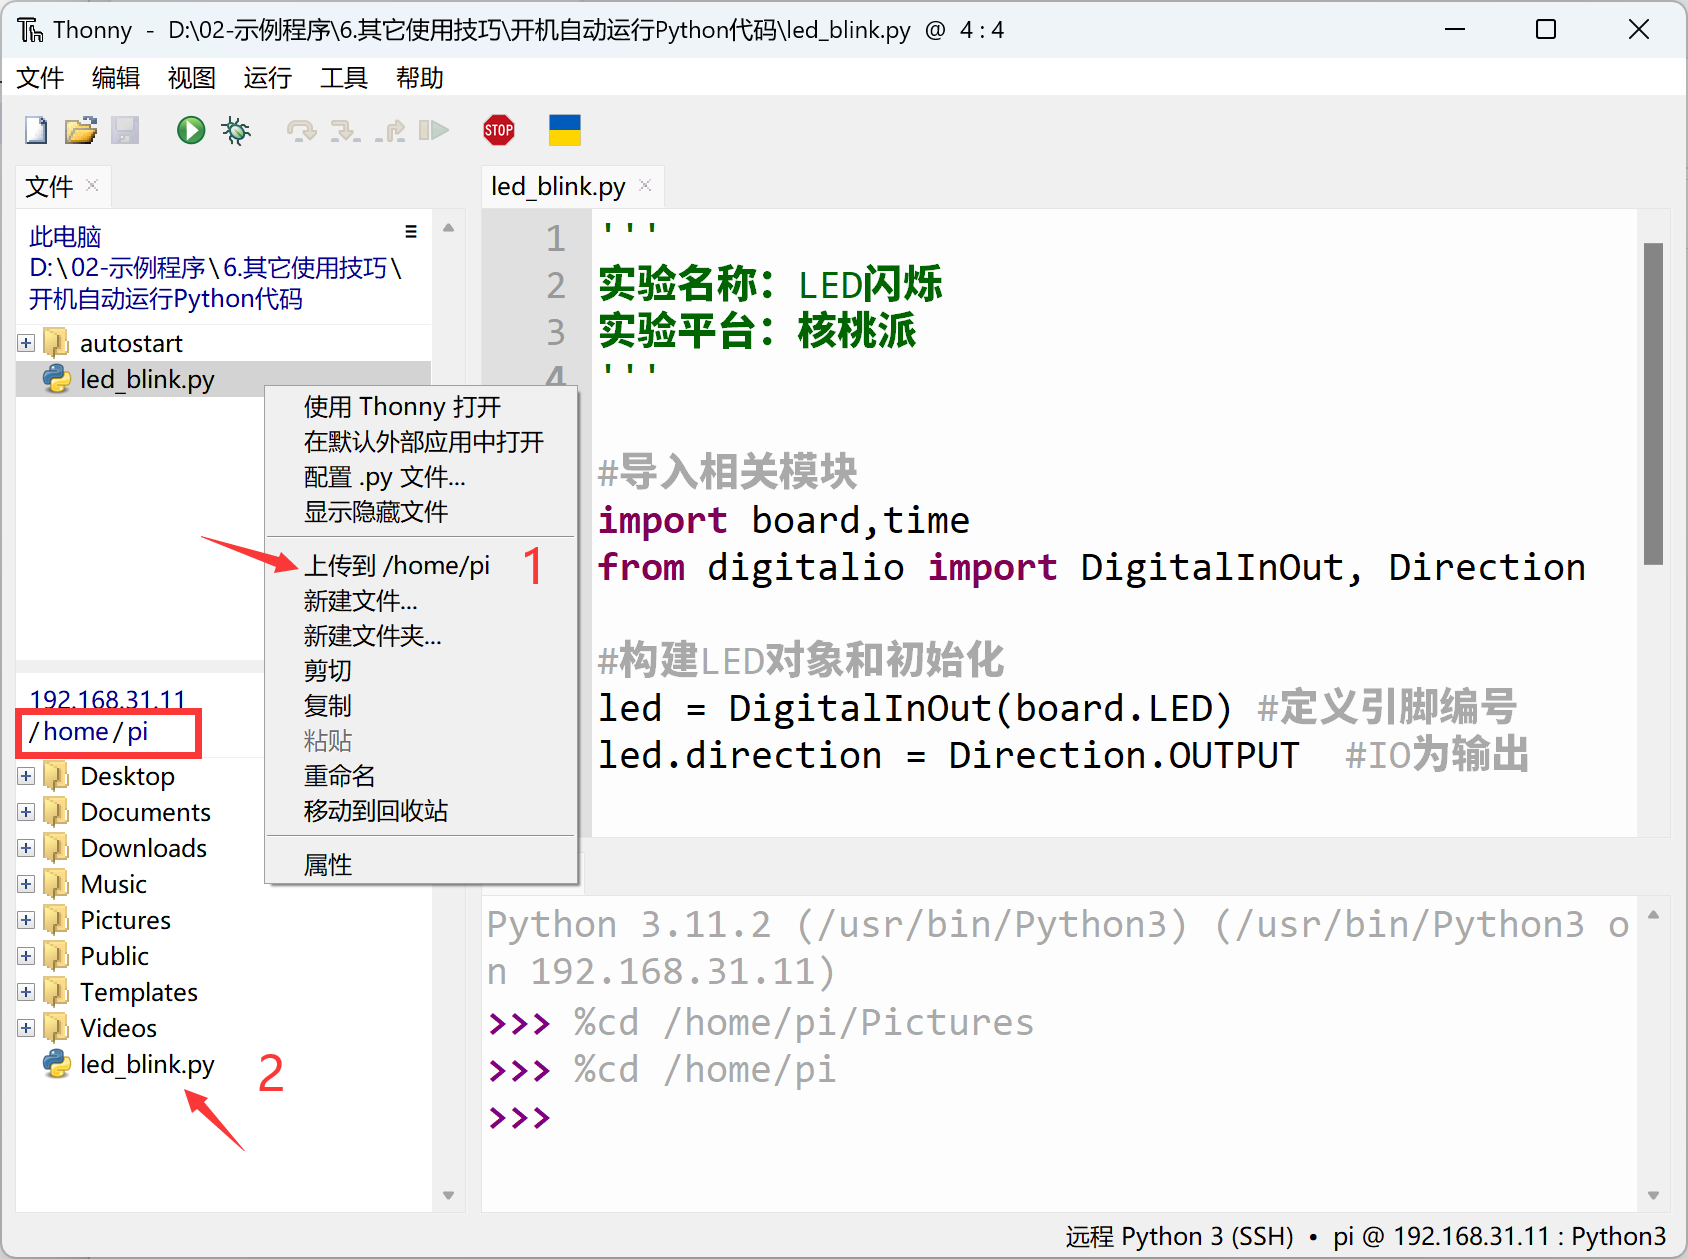
Save the above code as led_blink.py and place it in the WalnutPi's /home/pi directory for testing. You can transfer it using Thonny or copy it directly to the directory using a USB drive.
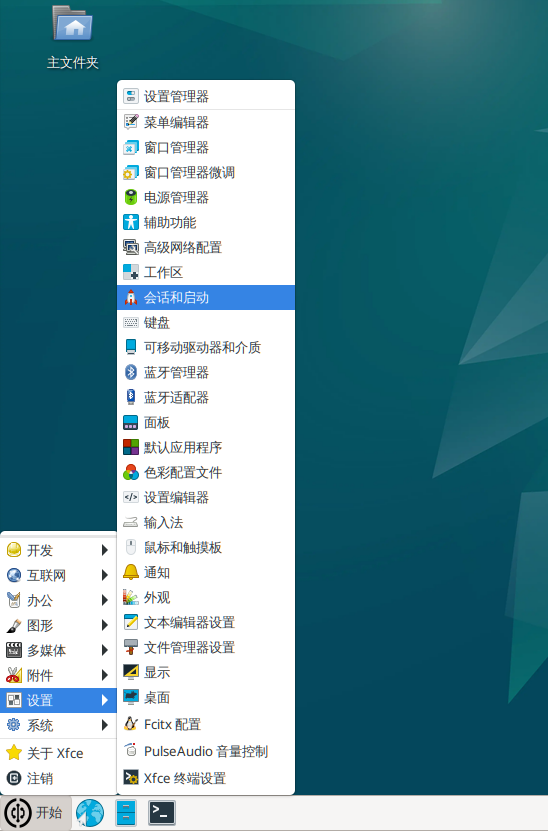
Then, on the WalnutPi desktop, click Start Menu → Settings → Session and Startup.
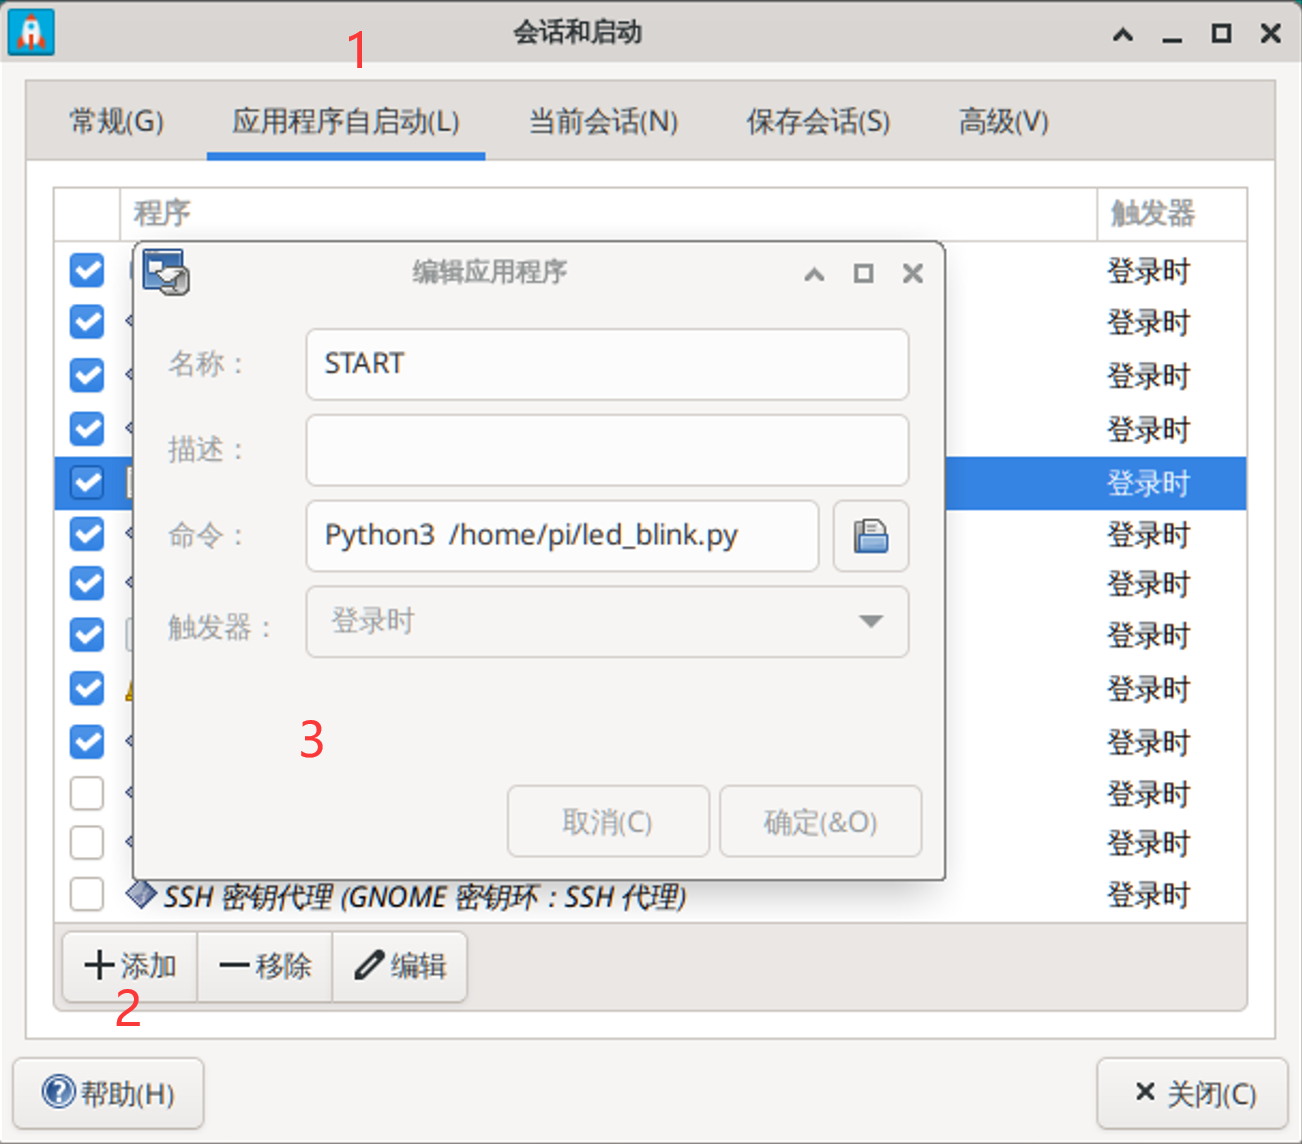
After it opens, click Application Autostart, then click + Add at the bottom left. In the popup dialog, configure the following:
Name: Define the application name. We'll use START here; you can change it as desired.Description: A description of this application; can be left blank.Command: Use the following Python terminal command to start the.pyscript. Be sure to use Python3 (note capitalization), because this program has elevated privileges on the WalnutPi, giving it admin permissions to run Python scripts and avoiding permission issues.
Python3 /home/pi/led_blink.py
Trigger: Select "on login".
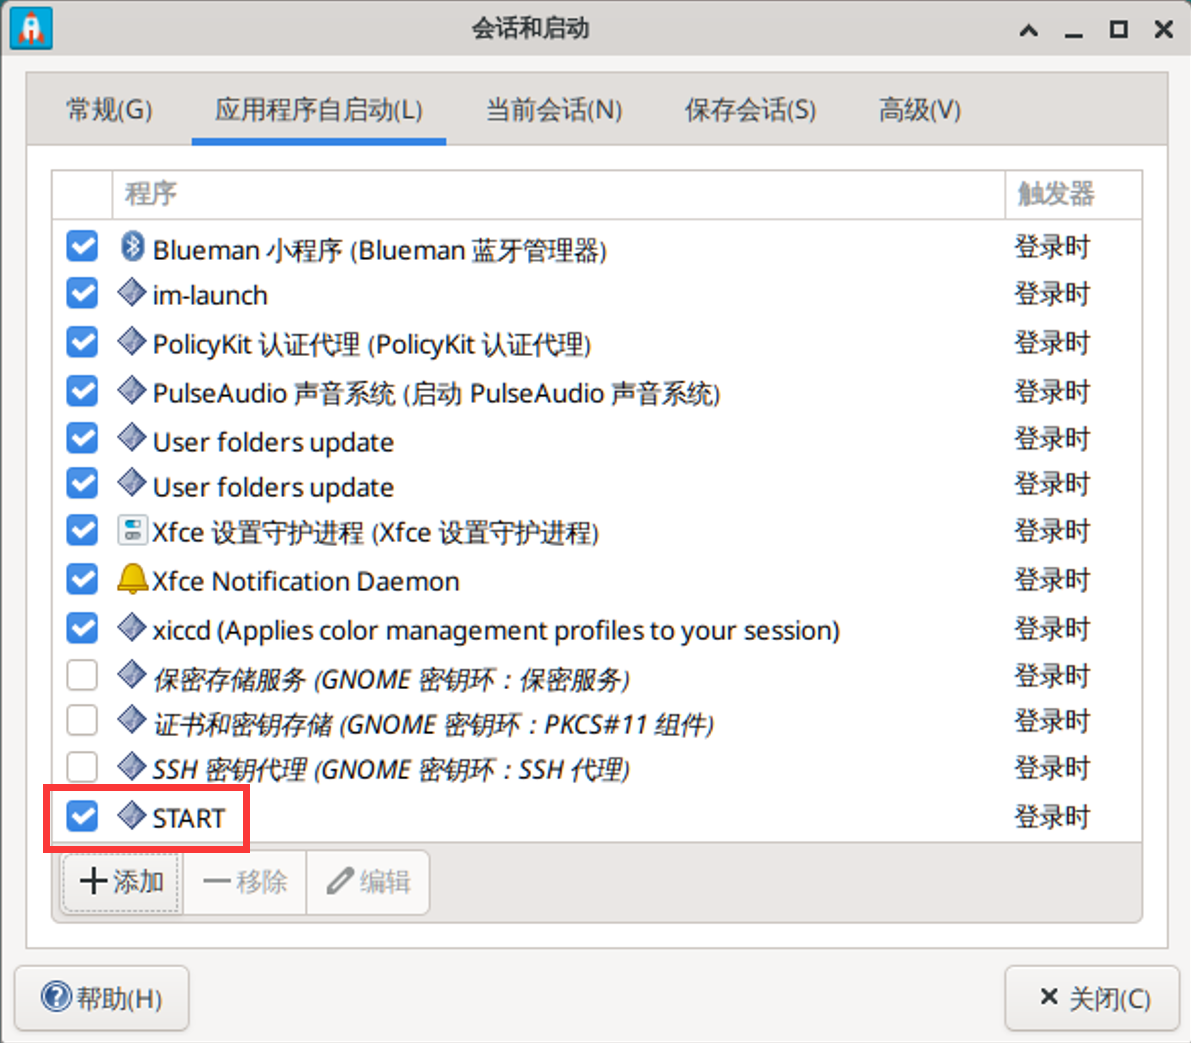
After confirming, you can see the START program appear in the list.
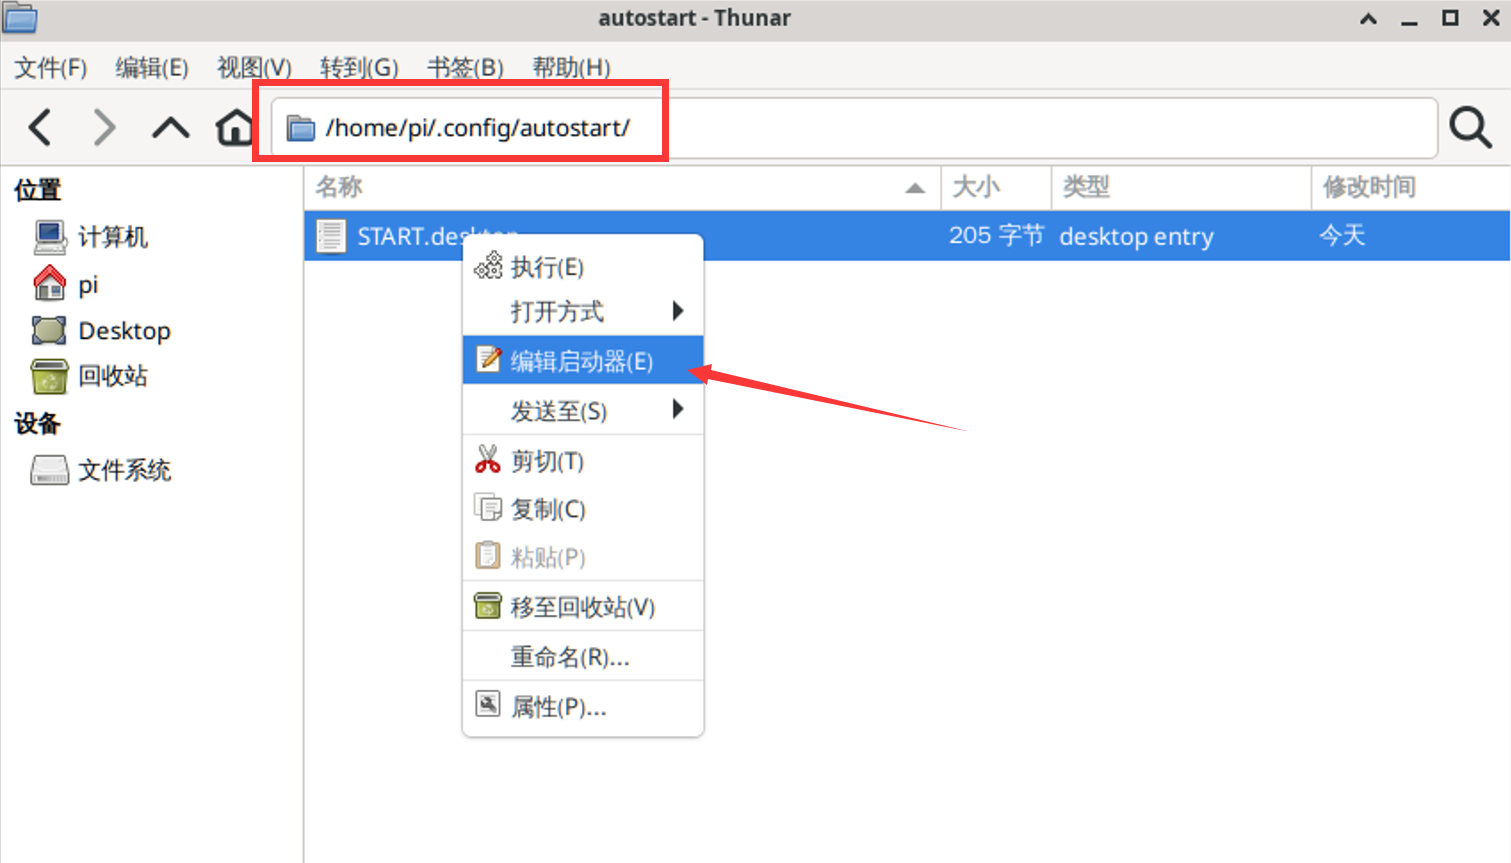
After creation, you'll notice a startup file in the /home/pi/.config/autostart directory. Right-click and select "Edit Launcher" for more editing options.
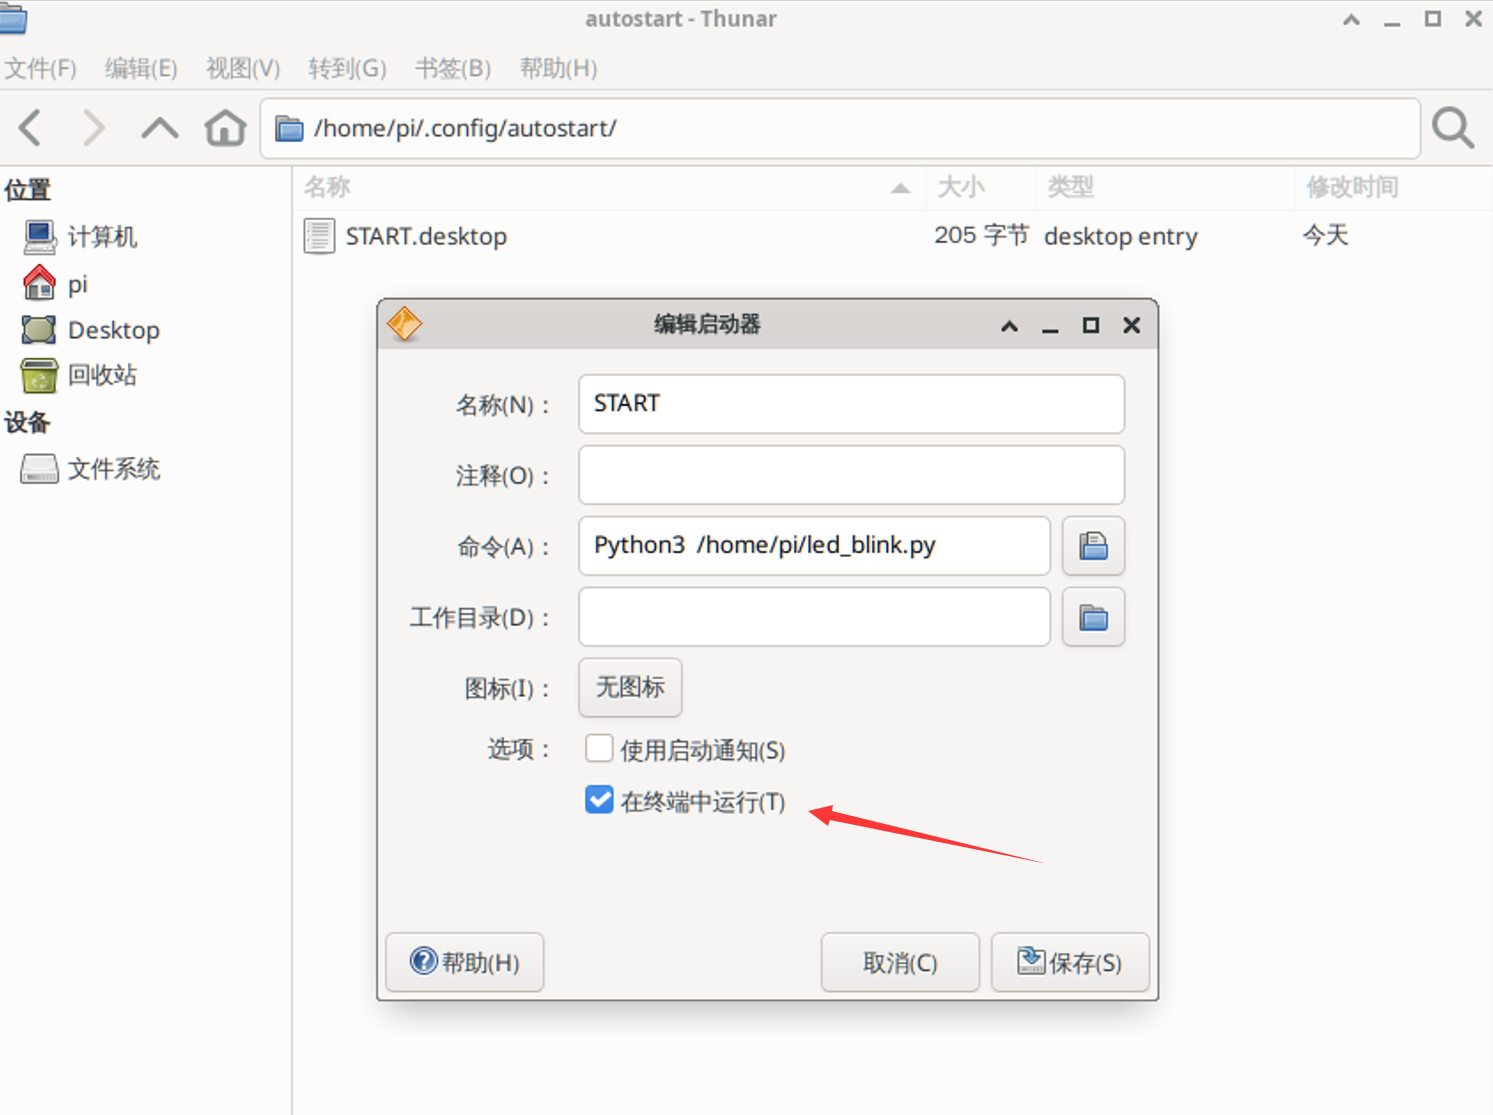
As shown below, you can check the Run in terminal option so that opening this application will pop up a new terminal on the desktop for viewing debug information. If unchecked, it runs in the background.
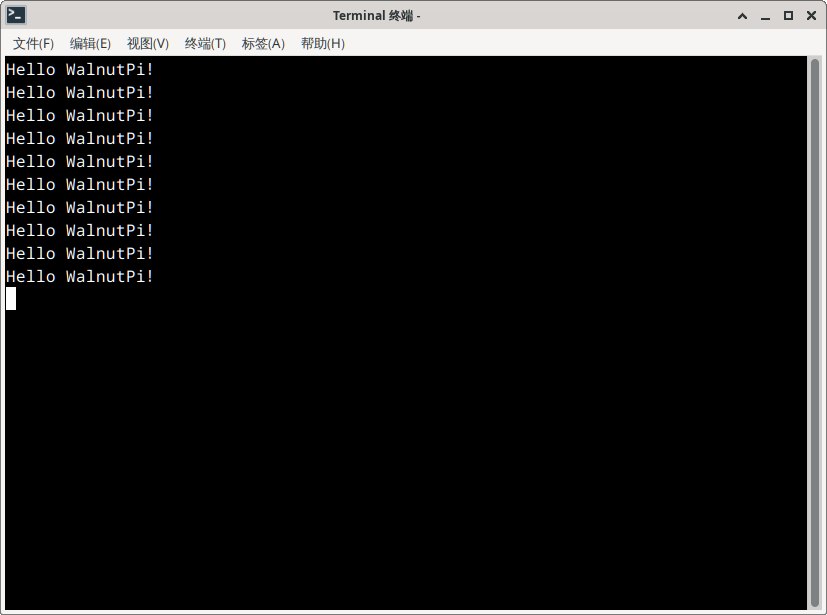
After saving, you can double-click the application to test it. You'll see a new terminal pop up on the desktop, printing the output from led_blink.py.
The onboard LED blinks periodically!
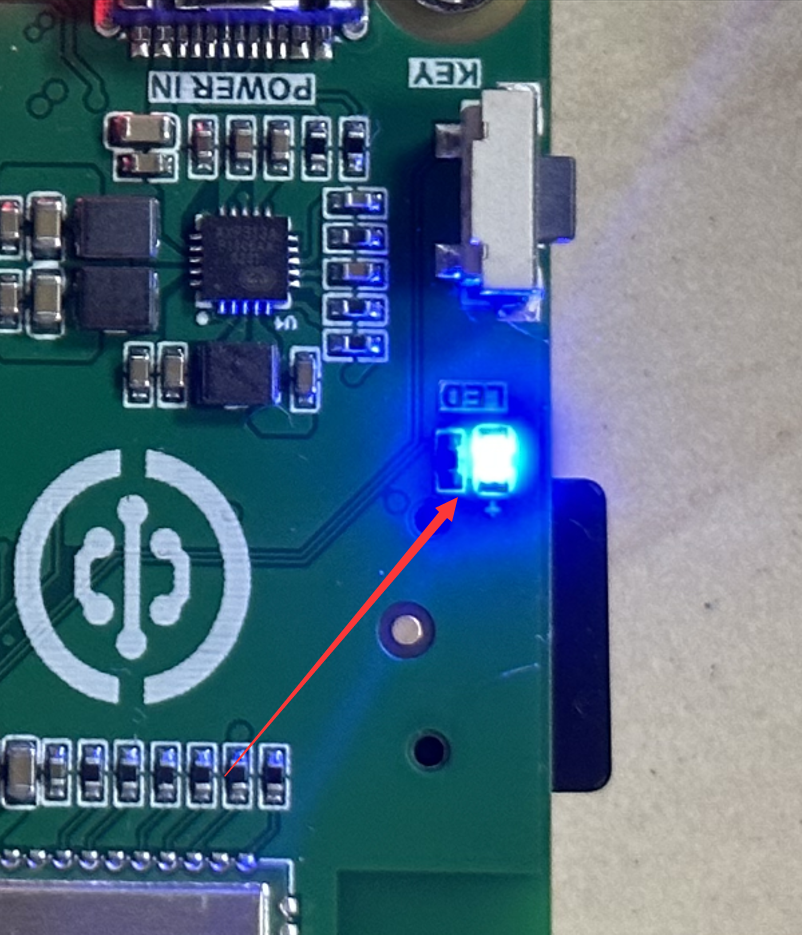
Execute the reboot command and you'll see the WalnutPi board pop up a terminal printing "Hello WalnutPi!" and the LED blinking, indicating the Python code auto-runs successfully on boot.
sudo reboot
Method for Headless (No Desktop) Systems
The previous section covered the method for WalnutPi desktop systems. Here's the method for headless systems, using a boot startup service. This method also works for desktop systems!
As before, first write a piece of test Python code using the onboard LED blinking effect as a demonstration, along with a "Hello WalnutPi!" print message. The code is as follows (available in the WalnutPi development board resource package → Example Programs → Other Usage Tips):
'''
Experiment Name: LED Blinking
Experiment Platform: WalnutPi
'''

# Import related modules
import board,time
from digitalio import DigitalInOut, Direction

# Construct and initialize LED object
led = DigitalInOut(board.LED) # Define pin number
led.direction = Direction.OUTPUT  # IO as output

while True:

    led.value = 1 # Output HIGH, turn on onboard blue LED

    time.sleep(0.5)

    led.value = 0 # Output LOW, turn off onboard blue LED

    time.sleep(0.5)

    print("Hello WalnutPi!") # Output print message
Save the above code as led_blink.py and place it in the WalnutPi's /home/pi directory for testing. You can transfer it using Thonny or copy it directly using a USB drive.
Create a new start.service file in the /lib/systemd/system directory. (This file is available in the WalnutPi development board resource package → Example Programs → Other Usage Tips → Headless System Method directory.)
sudo nano /lib/systemd/system/start.service
Modify the content as follows:
[Unit]
Description=Expand partition size

[Service]
Type=oneshot
ExecStart=Python3 /home/pi/led_blink.py
RemainAfterExit=yes
StandardOutput=null

[Install]
WantedBy=multi-user.target
After saving, give the file full permissions:
sudo chmod 777 /lib/systemd/system/start.service

Enable the service:
sudo systemctl enable start.service

Execute the reboot command. You'll see the LED blinking after the WalnutPi restarts, indicating the Python code auto-runs successfully. Since this method runs in the background, you won't see the "Hello WalnutPi!" print message!
sudo reboot
Both methods above work by launching the Python script via a command. Users can modify the command to run specific Linux commands or software on boot as needed.