Binarization
Introduction
We previously learned about grayscale image conversion. Compared to color images, grayscale images have the advantage of less information, and the single-channel 0~255 value range enables faster processing speeds. The binarized images in this section are further processed from grayscale images: values below a certain threshold are converted to 0 (pure black), and values above a certain threshold are converted to 255 (pure white). This more clearly preserves the main contours of the image.
Experiment Objective
Perform binarization processing on an image.
Experiment Explanation
The OpenCV Python library provides the threshold() function for threshold processing, thereby achieving image binarization.
threshold() Usage
retval, img = cv2.threshold(src, thresh, maxval, type)
Threshold processing. Returns retval indicating the threshold used during processing; returns img indicating the threshold-processed image.
src: Original image.thresh: Threshold, usually set to 125~150.maxval: Maximum value used in threshold processing, usually set to 255.type: Processing type.cv2.THRESH_BINARY: Binary threshold processing.cv2.THRESH_BINARY_INV: Inverse binary threshold processing.cv2.THRESH_TOZERO: Below threshold to zero processing.cv2.THRESH_TOZERO_INV: Above threshold to zero processing.cv2.THRESH_TRUNC: Truncation threshold processing.
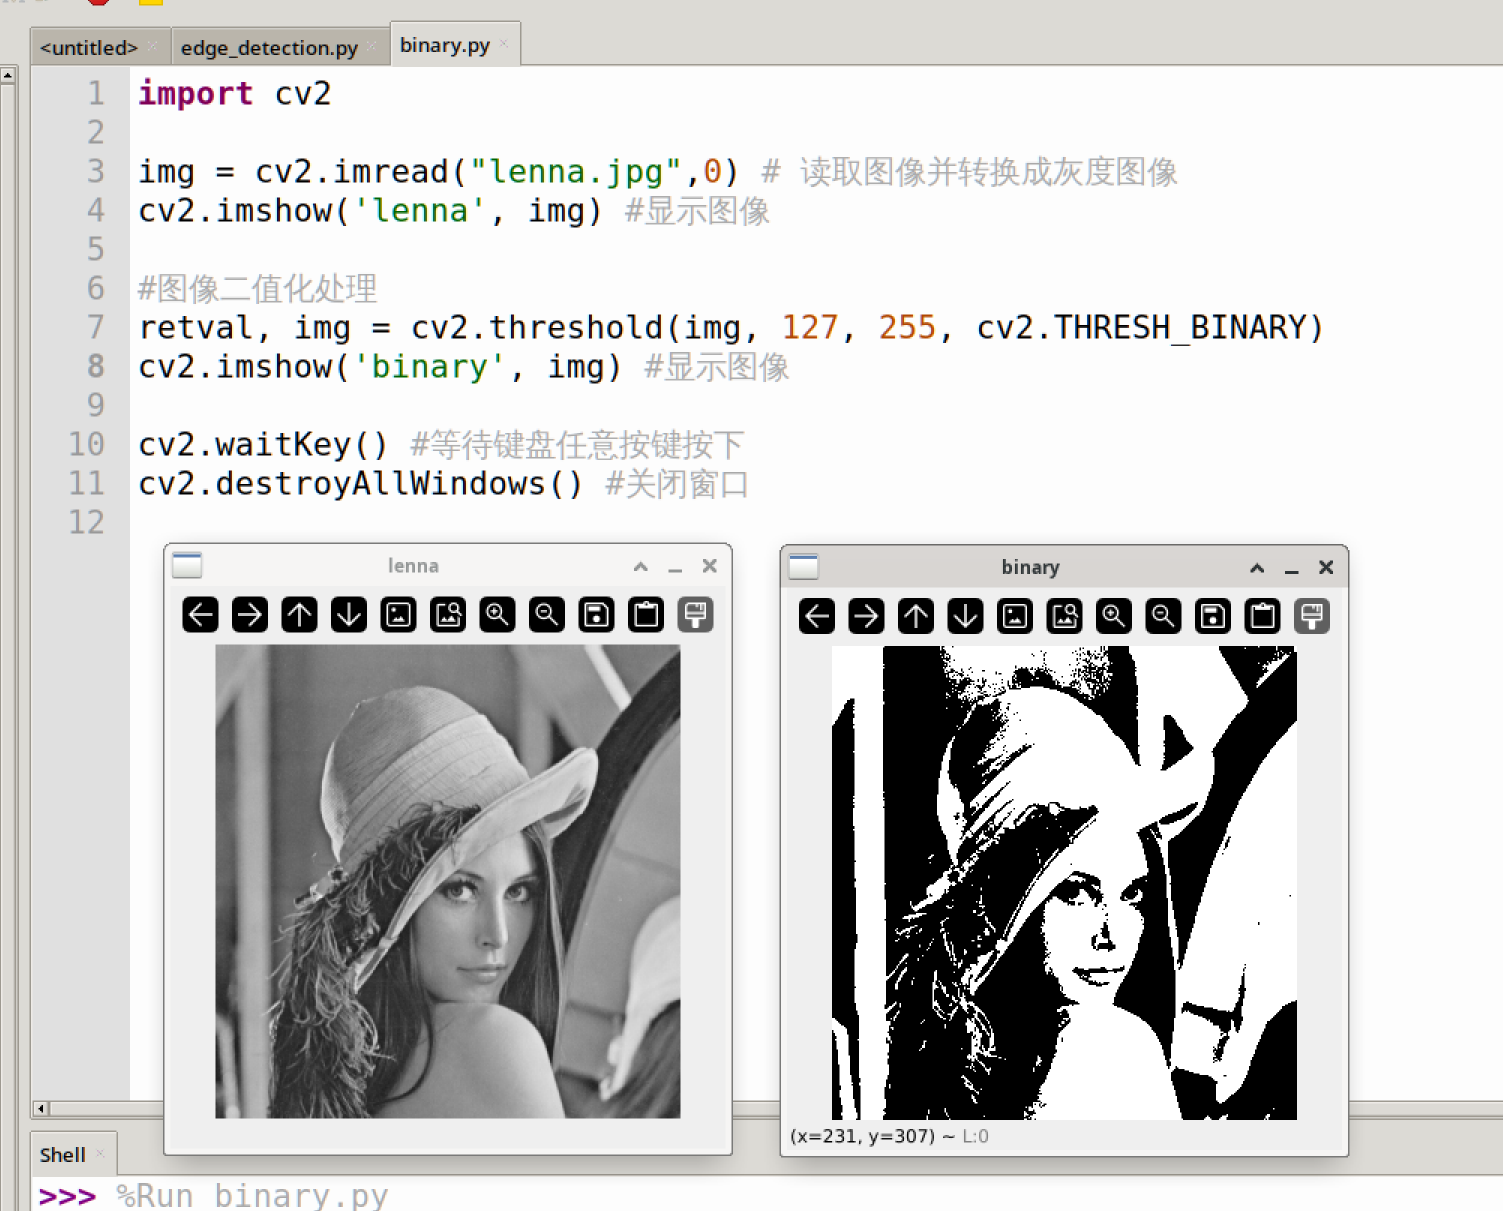
This experiment uses cv2.THRESH_BINARY binary threshold processing to achieve image binarization. With threshold = 127 and maxval = 255, pixels in the image < 127 will be changed to 0, and those greater than 127 will be changed to 255, resulting in a purely black-and-white image.
The code writing flow is as follows:
Reference code is as follows:
'''
Experiment Name: Image Binarization
Experiment Platform: WalnutPi
'''

import cv2

img = cv2.imread("lenna.jpg",0) # Read the image and convert to grayscale
cv2.imshow('lenna', img) # Display the image

# Image binarization processing
retval, img = cv2.threshold(img, 127, 255, cv2.THRESH_BINARY)
cv2.imshow('binary', img) # Display the image

cv2.waitKey() # Wait for any key press
cv2.destroyAllWindows() # Close the window
Experiment Results
Run the above code on the WalnutPi, and you can see the experimental results as shown below (multiple windows may overlap, just drag them apart with the mouse):