Flip
Introduction
This section learns to use OpenCV for image flipping, supporting flipping along the X-axis or Y-axis to achieve mirror effects.
Experiment Objective
Flip an image and display it.
Experiment Explanation
The OpenCV Python library provides the flip() function to implement image flipping.
flip() Usage
img = cv2.flip(src, flipCode)
Image flipping.
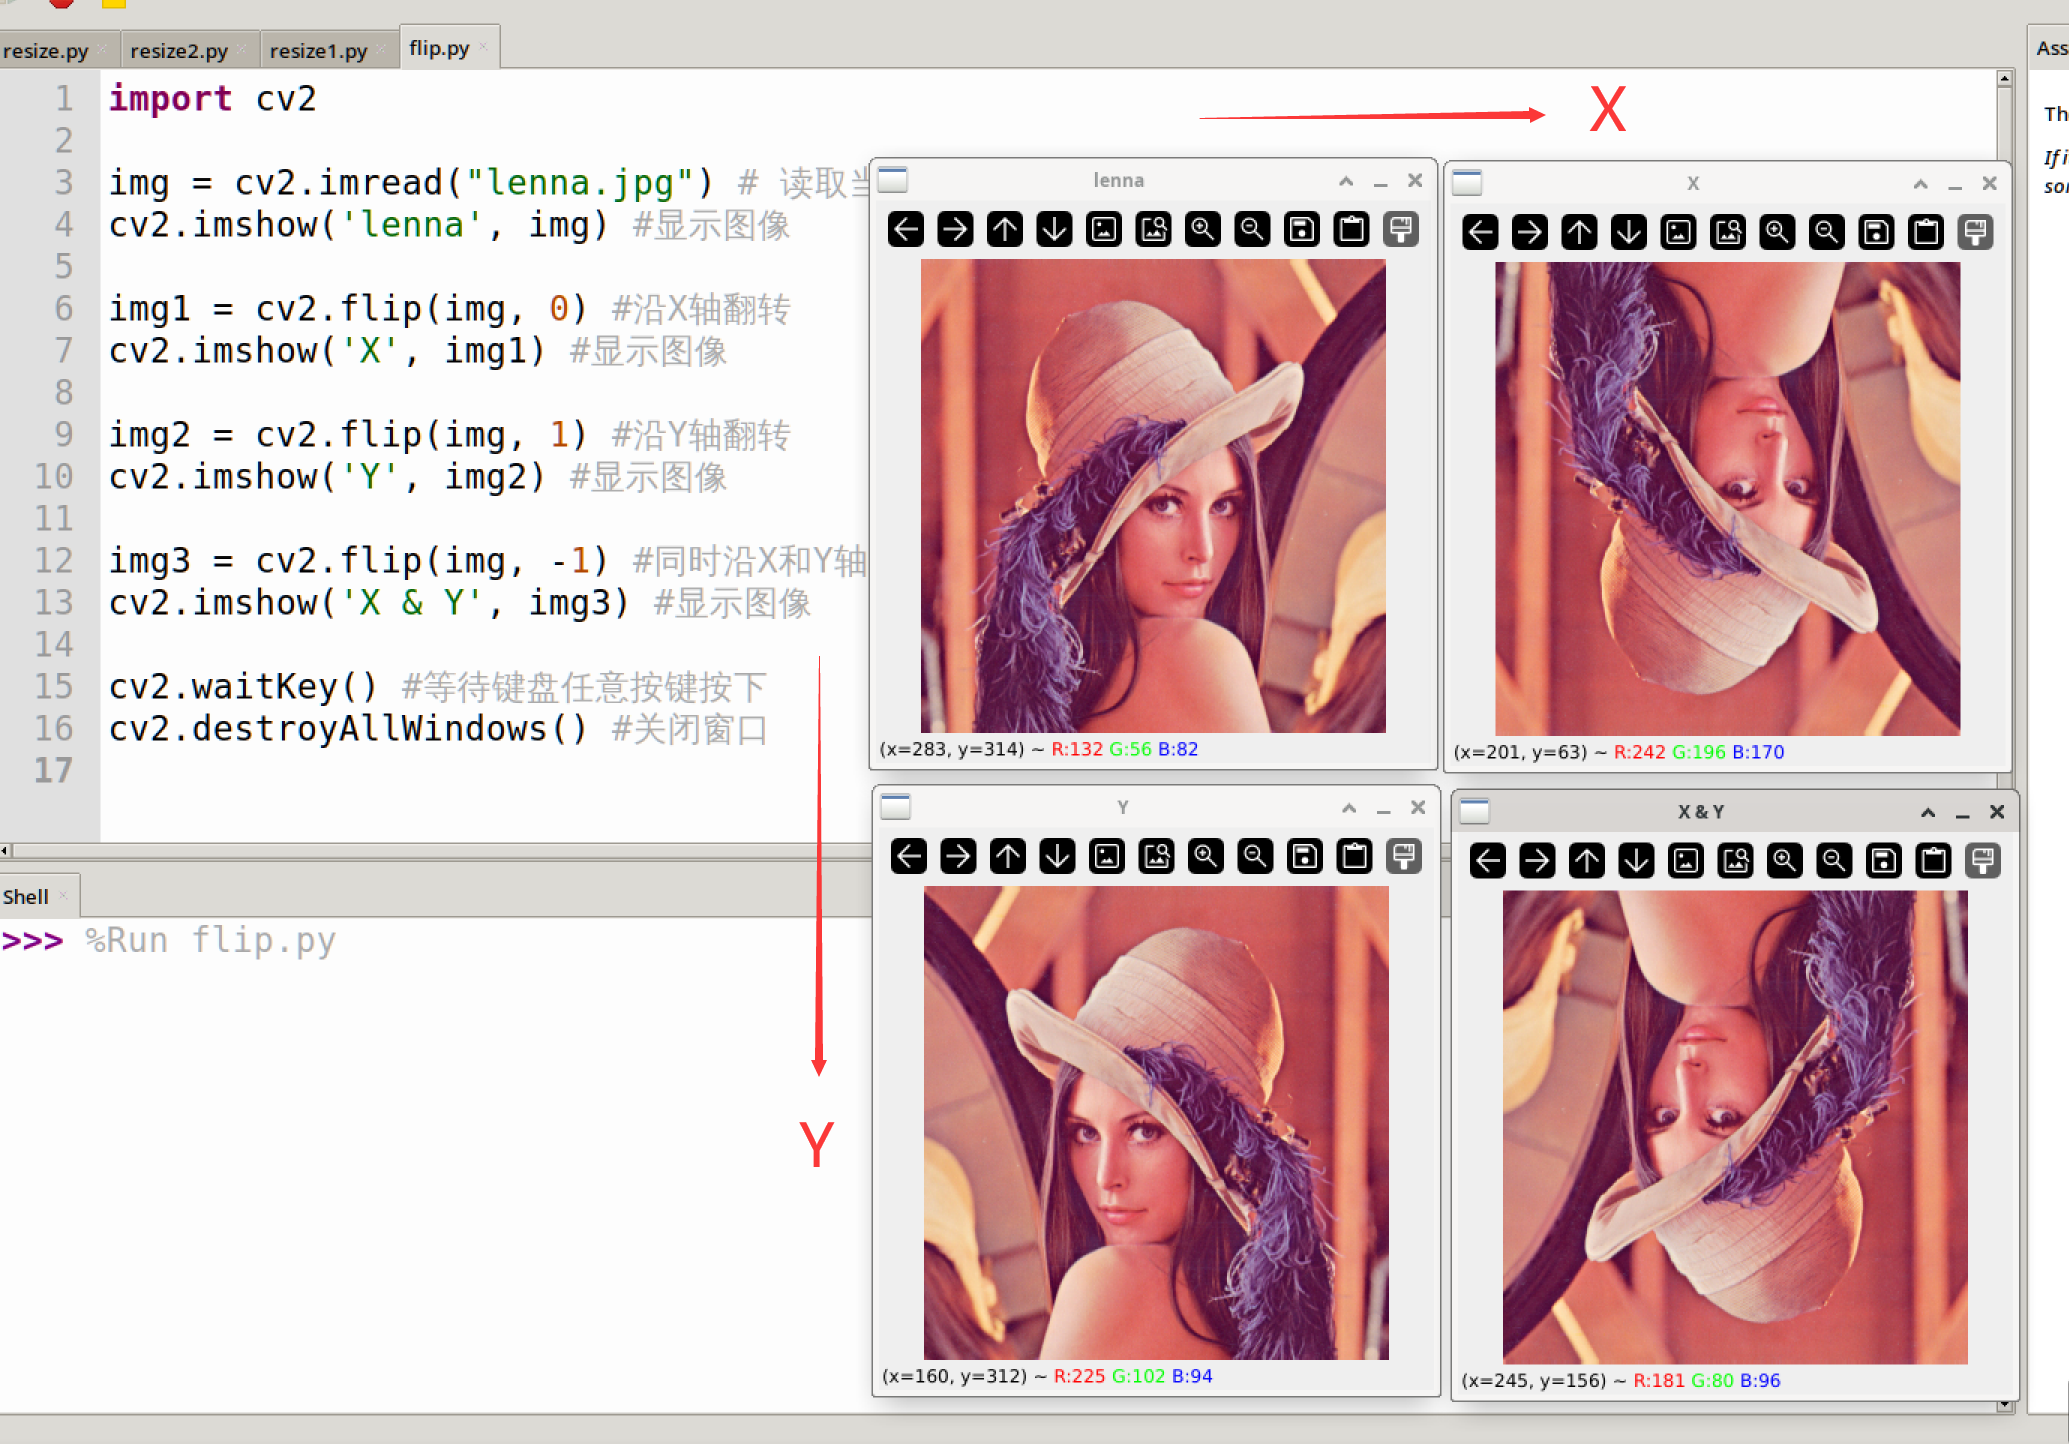
src: Original image.flipCode: Flipping type.0: Flip along the X-axis.1: Flip along the Y-axis.-1: Flip along both the X and Y axes.
In this section, we will apply the 3 flipping methods to the image separately and display them. The code writing flow is as follows:
Reference code is as follows:
'''
Experiment Name: Image Flipping
Experiment Platform: WalnutPi
'''

import cv2

img = cv2.imread("lenna.jpg") # Read the image lenna.jpg in the current directory
cv2.imshow('lenna', img) # Display the image

img1 = cv2.flip(img, 0) # Flip along the X-axis
cv2.imshow('X', img1) # Display the image

img2 = cv2.flip(img, 1) # Flip along the Y-axis
cv2.imshow('Y', img2) # Display the image

img3 = cv2.flip(img, -1) # Flip along both X and Y axes
cv2.imshow('X & Y', img3) # Display the image

cv2.waitKey() # Wait for any key press
cv2.destroyAllWindows() # Close the window
Experiment Results
Run the above code on the WalnutPi, and you can see the experimental results as shown below (multiple windows may overlap, just drag them apart with the mouse):