Flip
Introduction
This section teaches how to use OpenCV to flip images, supporting flipping along the X-axis or Y-axis to achieve mirroring functionality.
Experiment Objective
Flip an image and display it.
Experiment Explanation
The OpenCV Python library provides the flip() function for image flipping.
flip() Usage
img = cv2.flip(src, flipCode)
Image flipping.
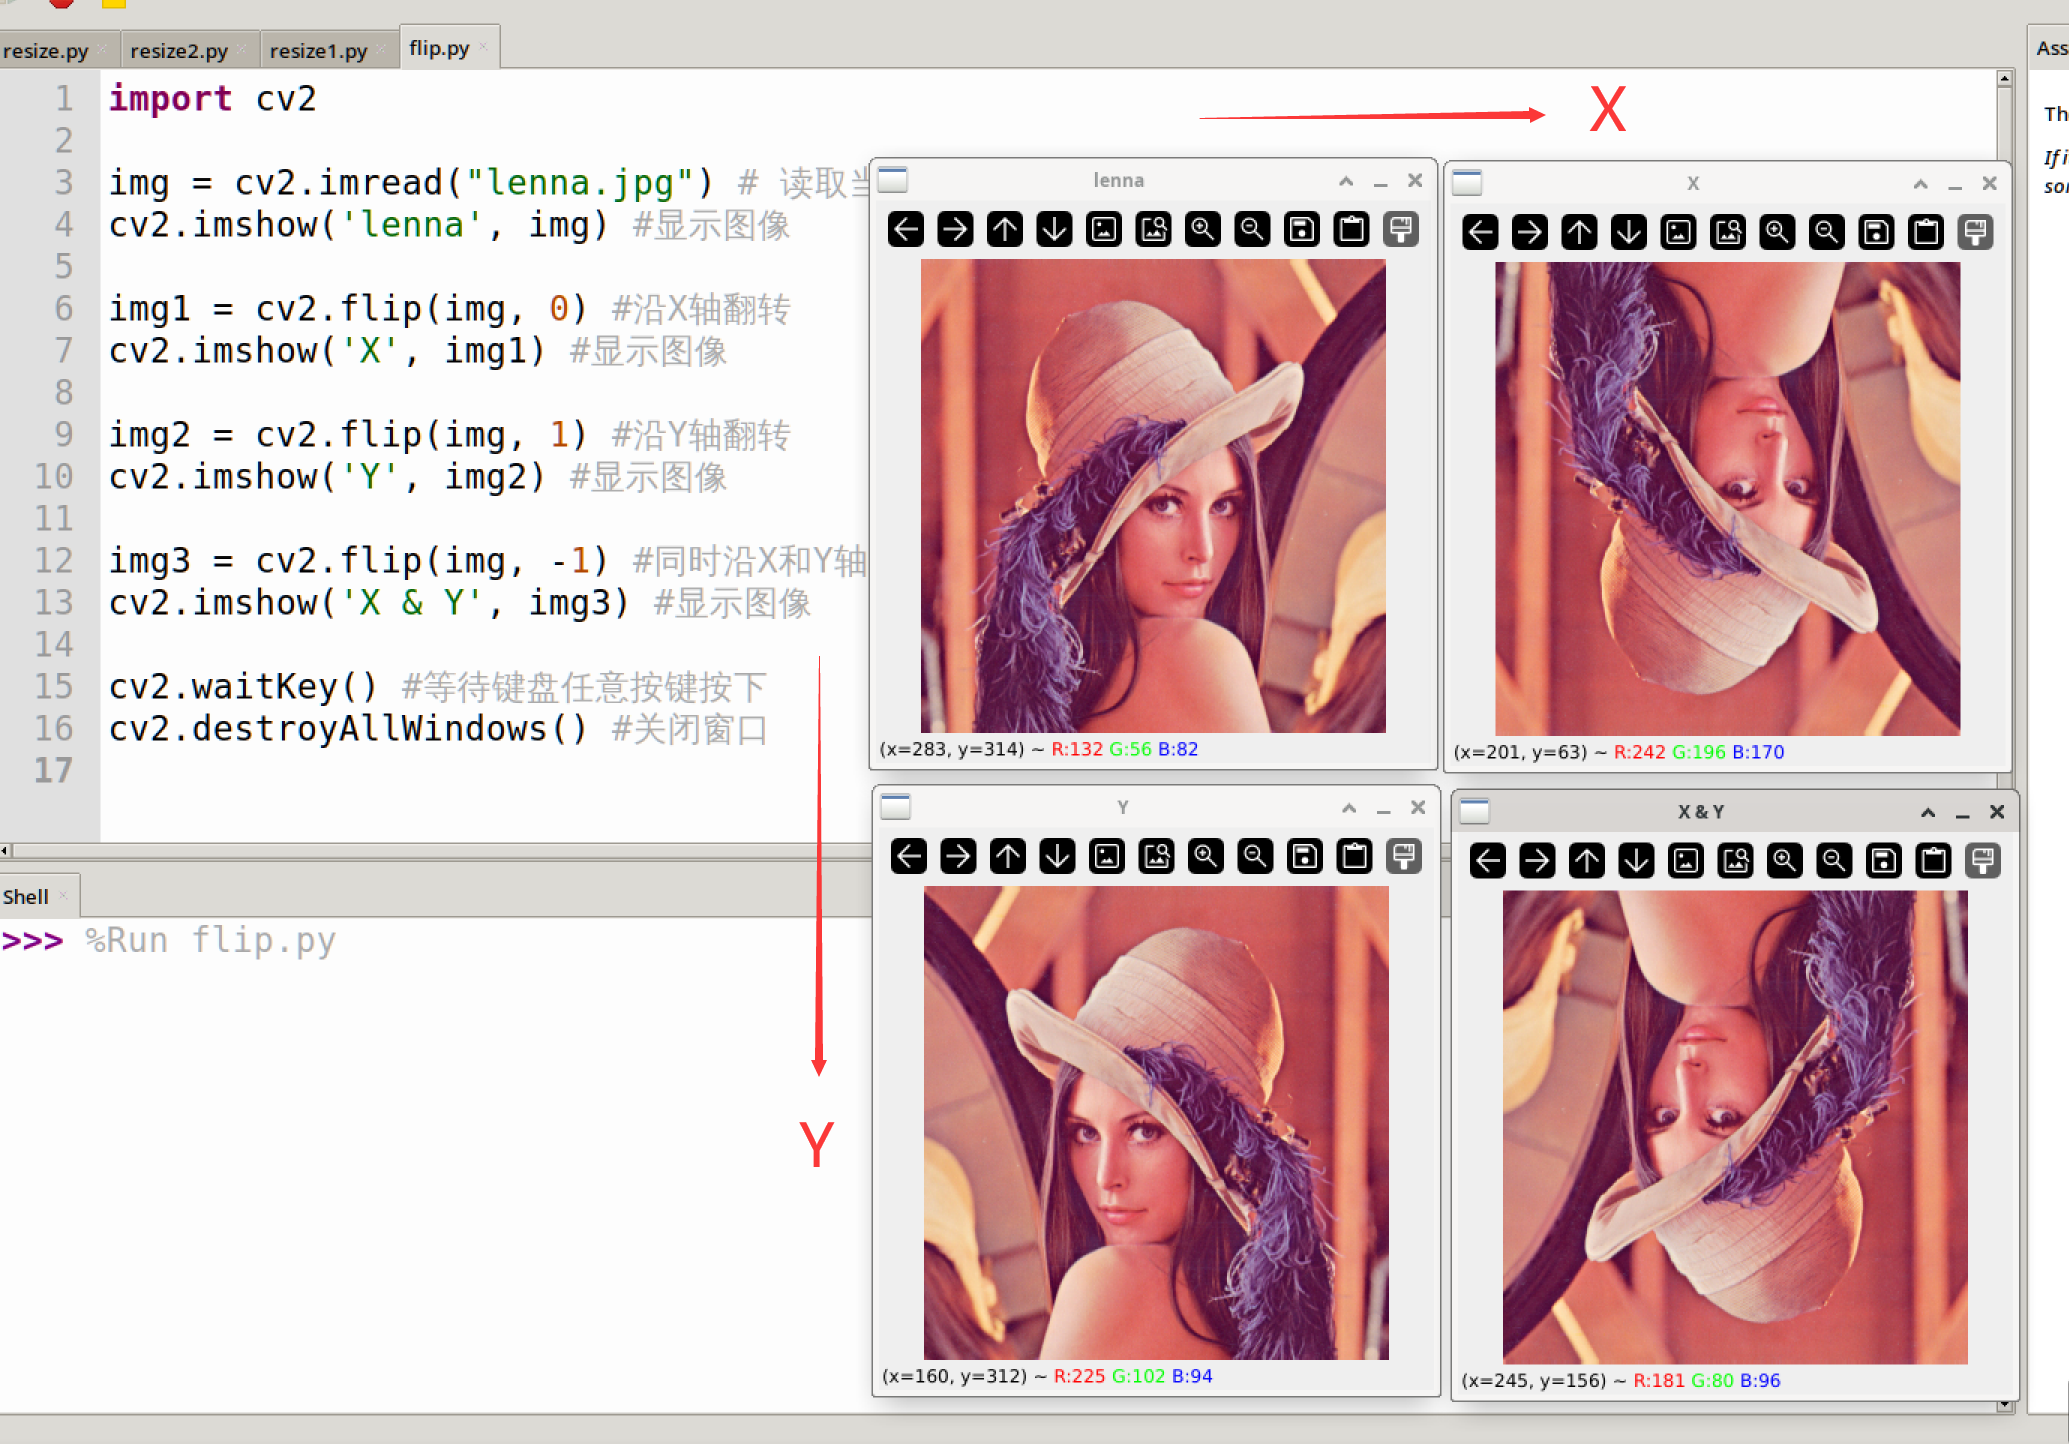
src: Original image.flipCode: Flip type.0: Flip along the X-axis.1: Flip along the Y-axis.-1: Flip along both the X and Y axes simultaneously.
In this section, we will apply all three flip modes to an image and display the results. The code flow is as follows:
The reference code is as follows:
'''
Experiment Name: Image Flip
Experiment Platform: WalnutPi 1B
'''

import cv2

img = cv2.imread("lenna.jpg") # Read the image lenna.jpg from the current directory
cv2.imshow('lenna', img) # Display the image

img1 = cv2.flip(img, 0) # Flip along the X-axis
cv2.imshow('X', img1) # Display the image

img2 = cv2.flip(img, 1) # Flip along the Y-axis
cv2.imshow('Y', img2) # Display the image

img3 = cv2.flip(img, -1) # Flip along both X and Y axes
cv2.imshow('X & Y', img3) # Display the image

cv2.waitKey() # Wait for any keyboard key to be pressed
cv2.destroyAllWindows() # Close the window
Experiment Results
Run the above code on the WalnutPi; the experiment results are as shown below (multiple windows may overlap — use the mouse to drag them apart):