Contour Detection
Introduction
This section learns to use OpenCV for image contour detection. Contours refer to the edge lines of shapes or objects in an image.
Experiment Objective
Detect image contours and draw them for display.
Experiment Explanation
The OpenCV Python library provides the findContours() function for finding contours and the drawContours() function for drawing contours.
findContours() Usage
contours, hierarchy = cv2.findContours(image, mode, methode)
Find edge coordinates in the image. Returns contours as a list of contour point coordinates; hierarchy indicates hierarchical relationships.
iamge: 8-bit single-channel binary image.mode: Detection mode.cv2.RETR_EXTERNAL: Only detect outer contours.cv2.RETR_LIST: Detect all contours, do not establish hierarchical relationships.cv2.RETR_CCOMP: Detect all contours, establish 2-level hierarchical relationships.cv2.RETR_TREE: Detect all contours, establish tree-like hierarchical relationships.
methode: Detection method.cv2.CHAIN_APPROX_NONE: Save all contour points.cv2.CHAIN_APPROX_SIMPLE: Save only the endpoints of horizontal, vertical, or diagonal contours.
drawContours() Usage
img = cv2.drawContours(image, contours, contourIdx, color, thickness, lineType, hierarchy, maxLevel, offset)
Draw contours. Returns contours as a list of contour point coordinates; hierarchy indicates hierarchical relationships.
iamge: Original image.contours: The list obtained from findContours().contourIdx: Index method, -1 means draw all contours.color: Color.thickness: Thickness, -1 means solid fill.lineType: Contour line type (optional).hierarchy: Hierarchical relationships obtained from findContours() (optional).maxLevel: Hierarchical depth (optional).offset: Offset, changes the position of the drawn result (optional).
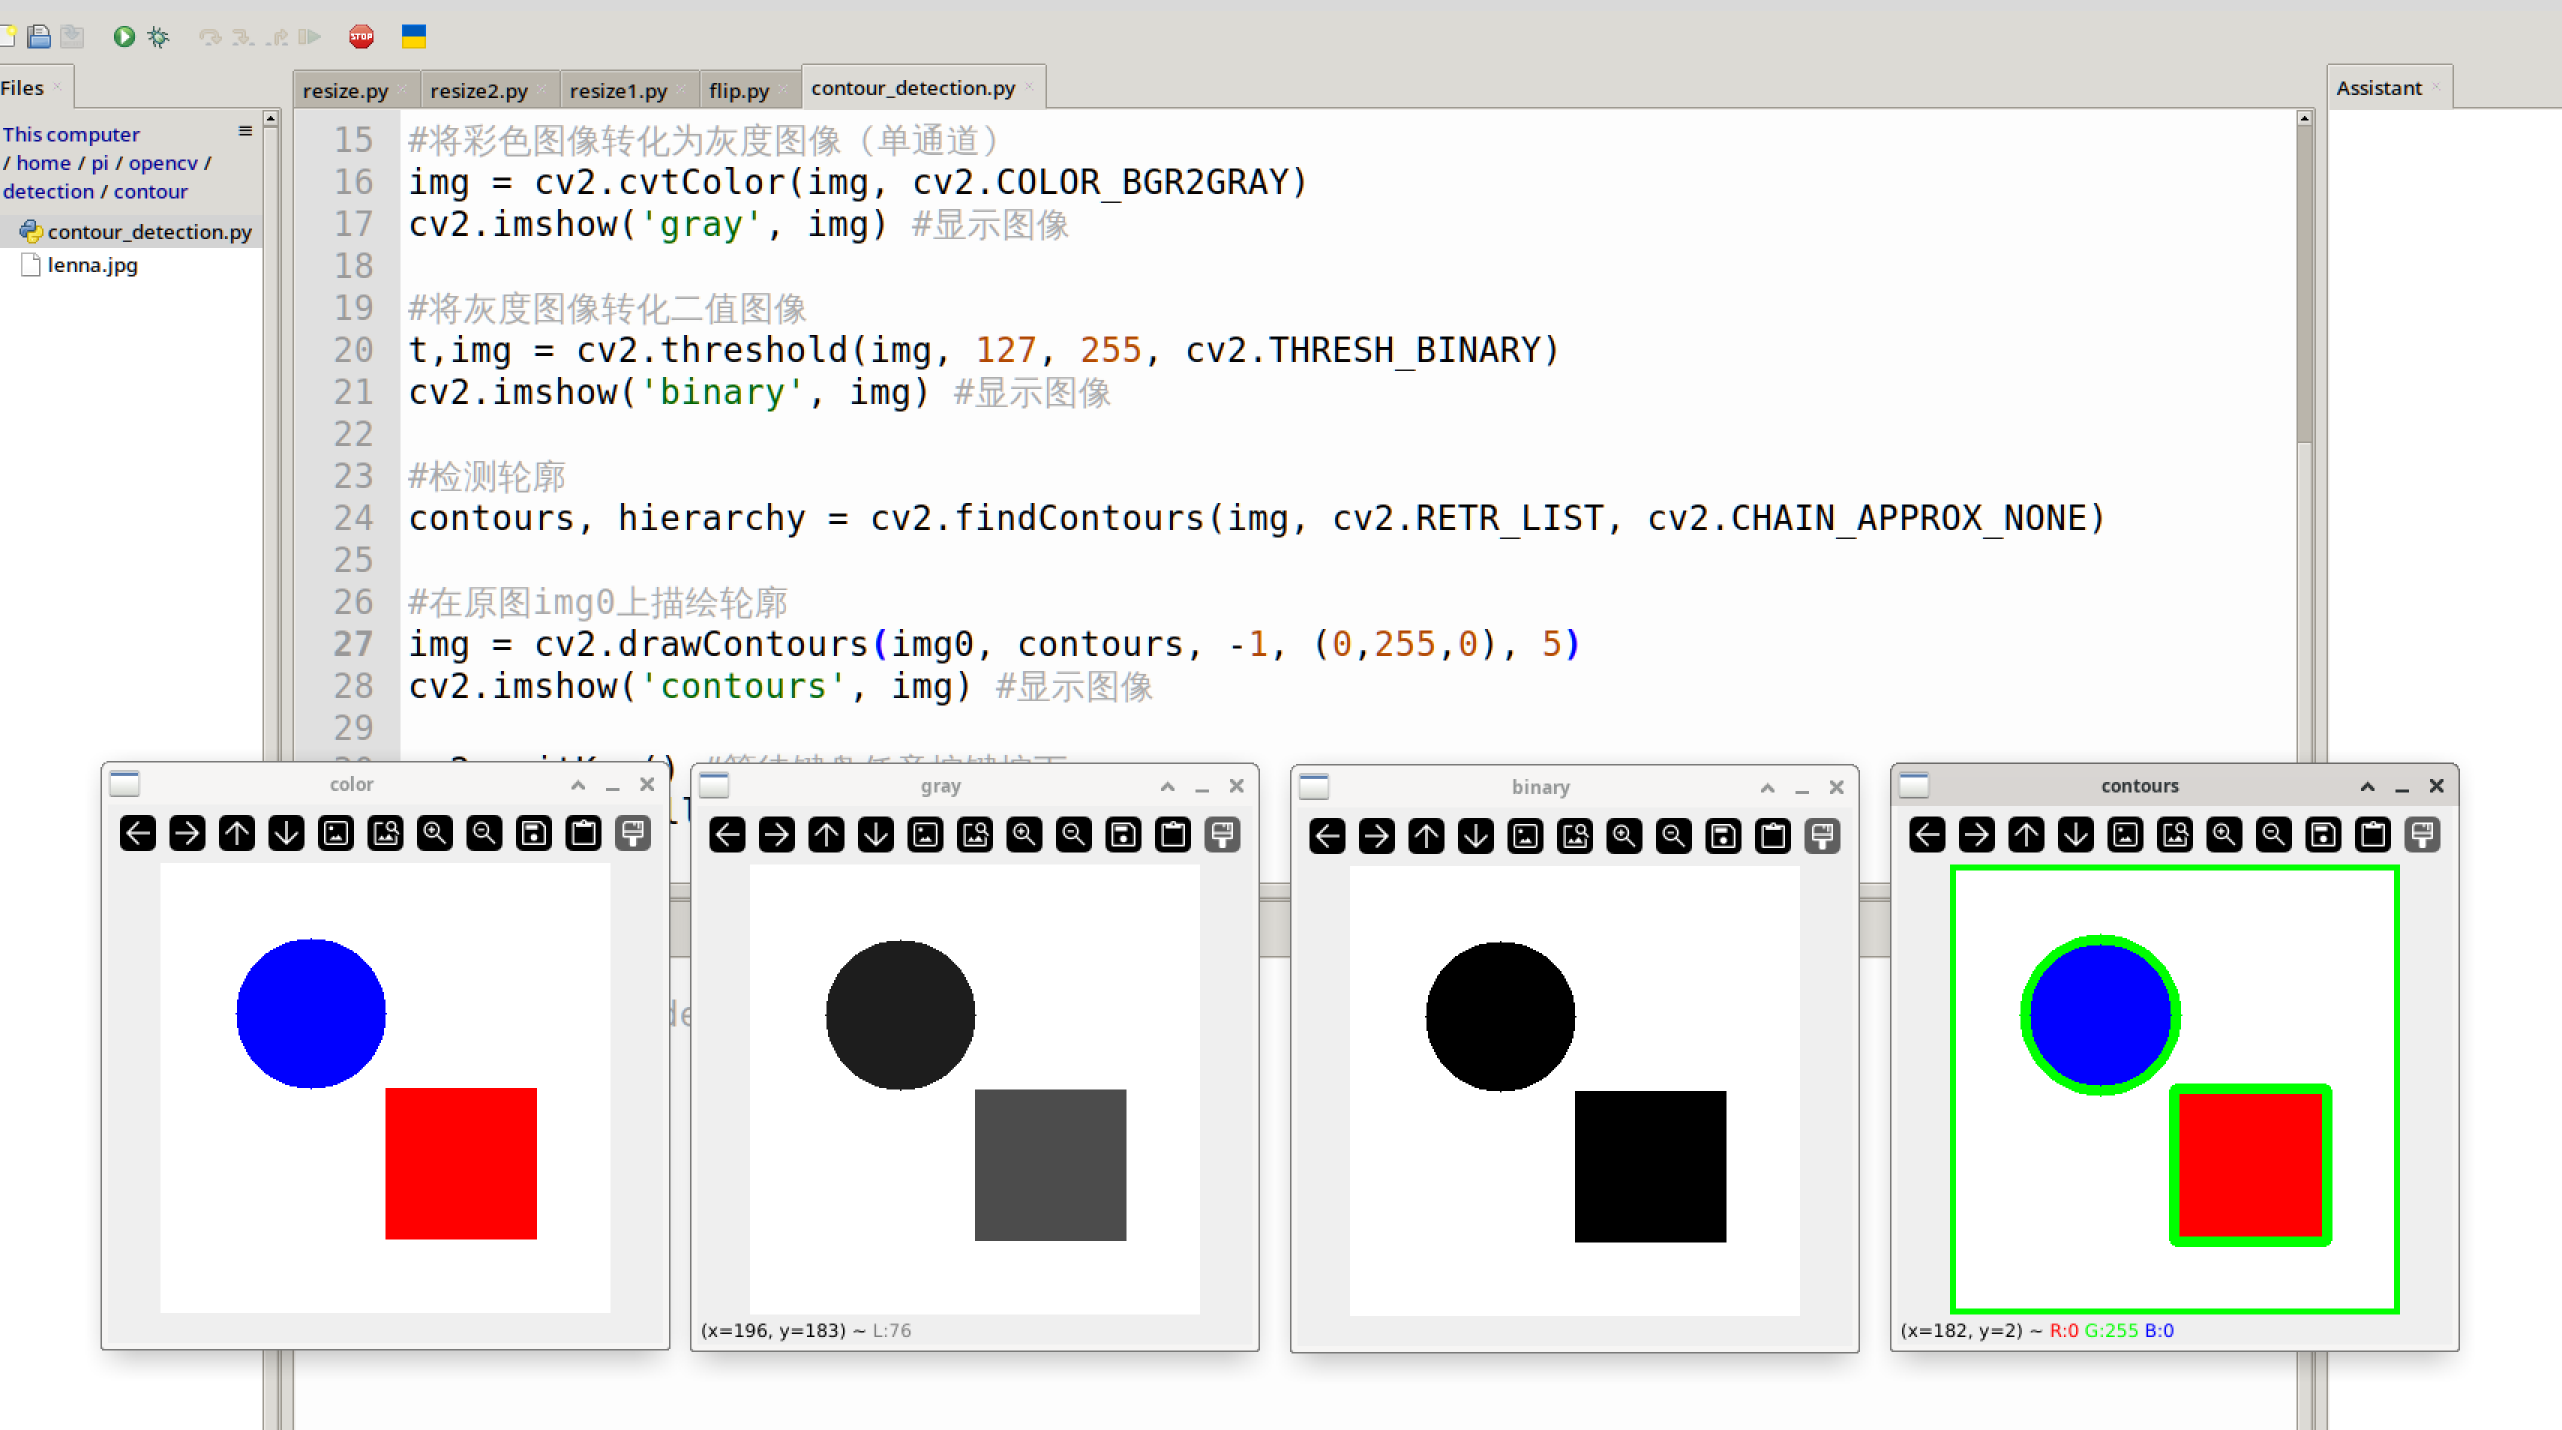
Here we can draw a solid circle and a solid rectangle, then binarize the image, then find and draw contours. The code writing flow is as follows:
Reference code is as follows:
'''
Experiment Name: Contour Detection
Experiment Platform: WalnutPi
'''

import cv2
import numpy as np

# Create a new 300x300 pixel RGB888 pure white image
img = np.ones((300,300,3),np.uint8)*255

# Draw a blue solid circle img0
img0 = cv2.circle(img, (100, 100), 50, (255,0,0), -1)

# Draw a red solid rectangle
img = cv2.rectangle(img0, (150, 150), (250, 250), (0,0,255), -1)

cv2.imshow('color', img) # Display the image

# Convert the color image to grayscale (single channel)
img = cv2.cvtColor(img, cv2.COLOR_BGR2GRAY)
cv2.imshow('gray', img) # Display the image

# Convert the grayscale image to binary image
t,img = cv2.threshold(img, 127, 255, cv2.THRESH_BINARY)
cv2.imshow('binary', img) # Display the image

# Detect contours
contours, hierarchy = cv2.findContours(img, cv2.RETR_LIST, cv2.CHAIN_APPROX_NONE)

# Draw contours on the original image img0, green
img = cv2.drawContours(img0, contours, -1, (0,255,0), 5)
cv2.imshow('contours', img) # Display the image

cv2.waitKey() # Wait for any key press
cv2.destroyAllWindows() # Close the window
Experiment Results
Run the above code on the WalnutPi, and you can see the change process of the experimental images. The final contour drawing result is shown below:
Extension
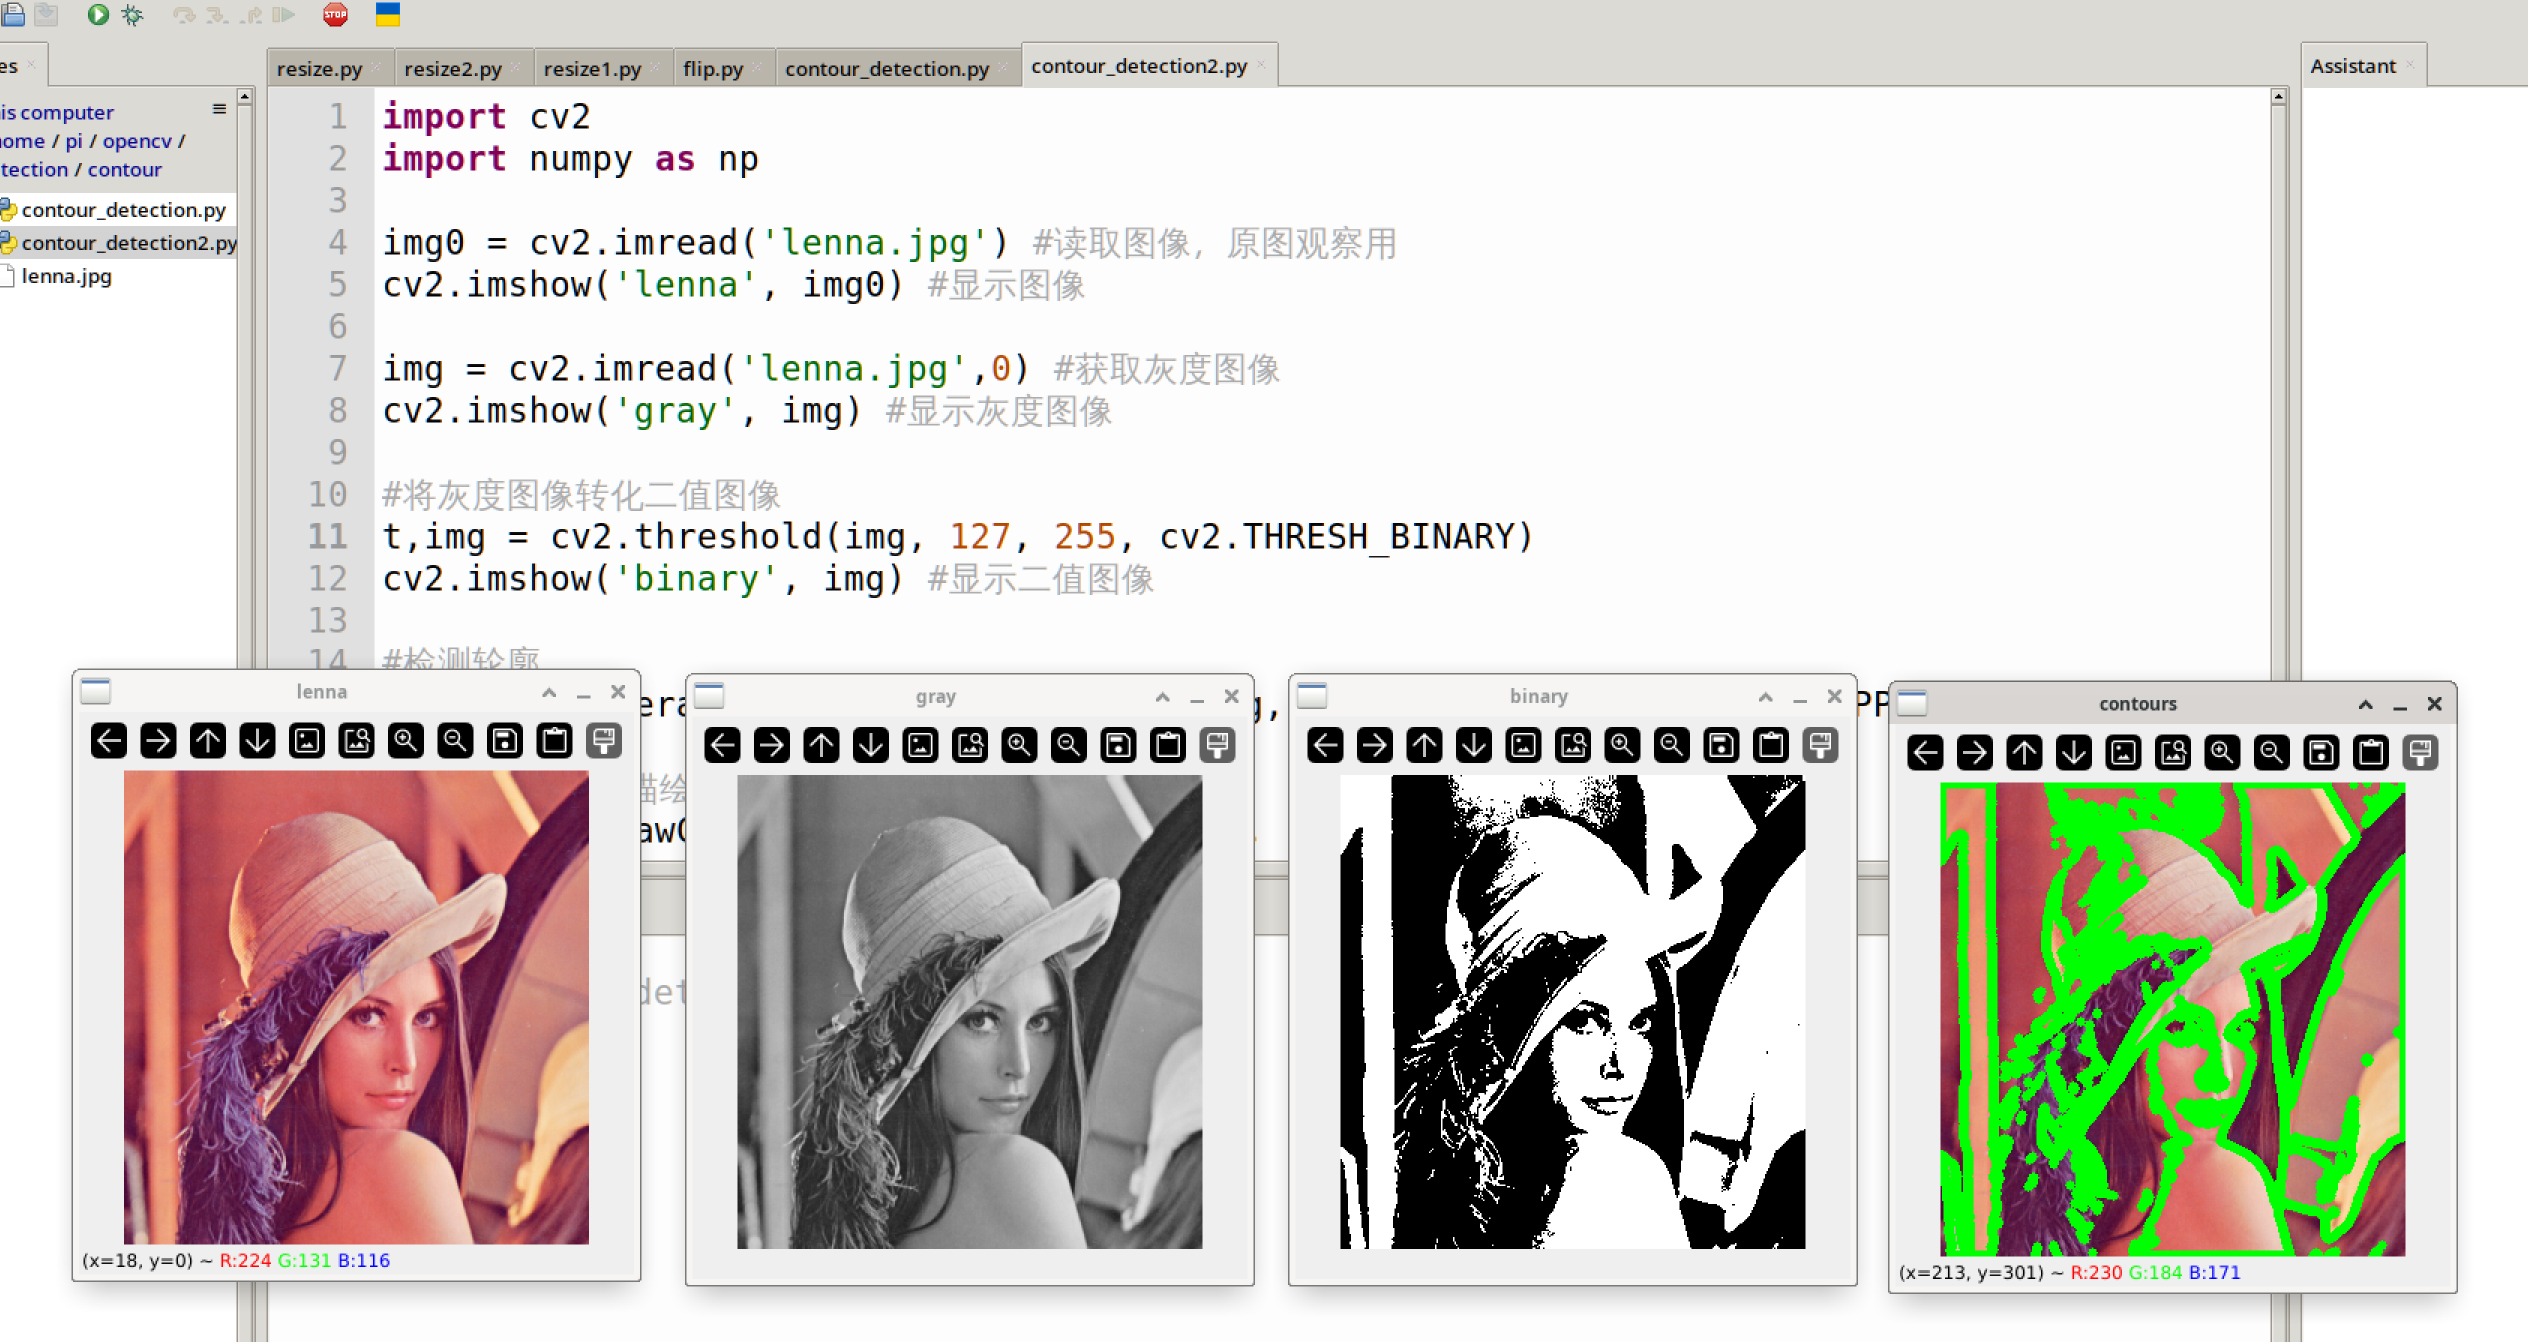
We use lenna.jpg to draw contours and observe the results. The code is as follows:
'''
Experiment Name: Contour Detection 2
Experiment Platform: WalnutPi
'''
import cv2
import numpy as np

img0 = cv2.imread('lenna.jpg') # Read the image for original observation
cv2.imshow('lenna', img0) # Display the image

img = cv2.imread('lenna.jpg',0) # Get the grayscale image
cv2.imshow('gray', img) # Display the grayscale image

# Convert the grayscale image to binary image
t,img = cv2.threshold(img, 127, 255, cv2.THRESH_BINARY)
cv2.imshow('binary', img) # Display the binary image

# Detect contours
contours, hierarchy = cv2.findContours(img, cv2.RETR_LIST, cv2.CHAIN_APPROX_NONE)

# Draw contours on the original image img0
img = cv2.drawContours(img0, contours, -1, (0,255,0), 5)
cv2.imshow('contours', img) # Display the contour image

cv2.waitKey() # Wait for any key press
cv2.destroyAllWindows() # Close the window
Experiment results are as follows: