Line Detection
Introduction
This section learns to use OpenCV to detect line segments in an image.
Experiment Objective
Detect line segments in an image and draw them for display.
Experiment Explanation
The OpenCV Python library provides two line detection methods: HoughLines() for detecting straight lines (infinite length) and HoughLinesP() for detecting line segments. This section mainly uses HoughLinesP(), which only supports binary grayscale images.
HoughLinesP() Usage
lines = cv2.HoughLinesP(image, rho, theta, threshold, minLineLength, maxLineGap)
Line segment detection. Returns lines as an array of all line segment coordinates. Example: [[x0,y0,x1,y1],[x0,y0,x1,y1]]
iamge: Original image. Requires a binary grayscale image.rho: Detection radius step. Default value is 1, meaning detect all radius steps.theta: Angle of detected lines. Default value is π/180, meaning detect all angles.threshold: Threshold. The smaller the value, the more lines detected.minLineLength: Minimum length. Line segments shorter than this length are not detected.maxLineGap: Minimum distance between line segments.
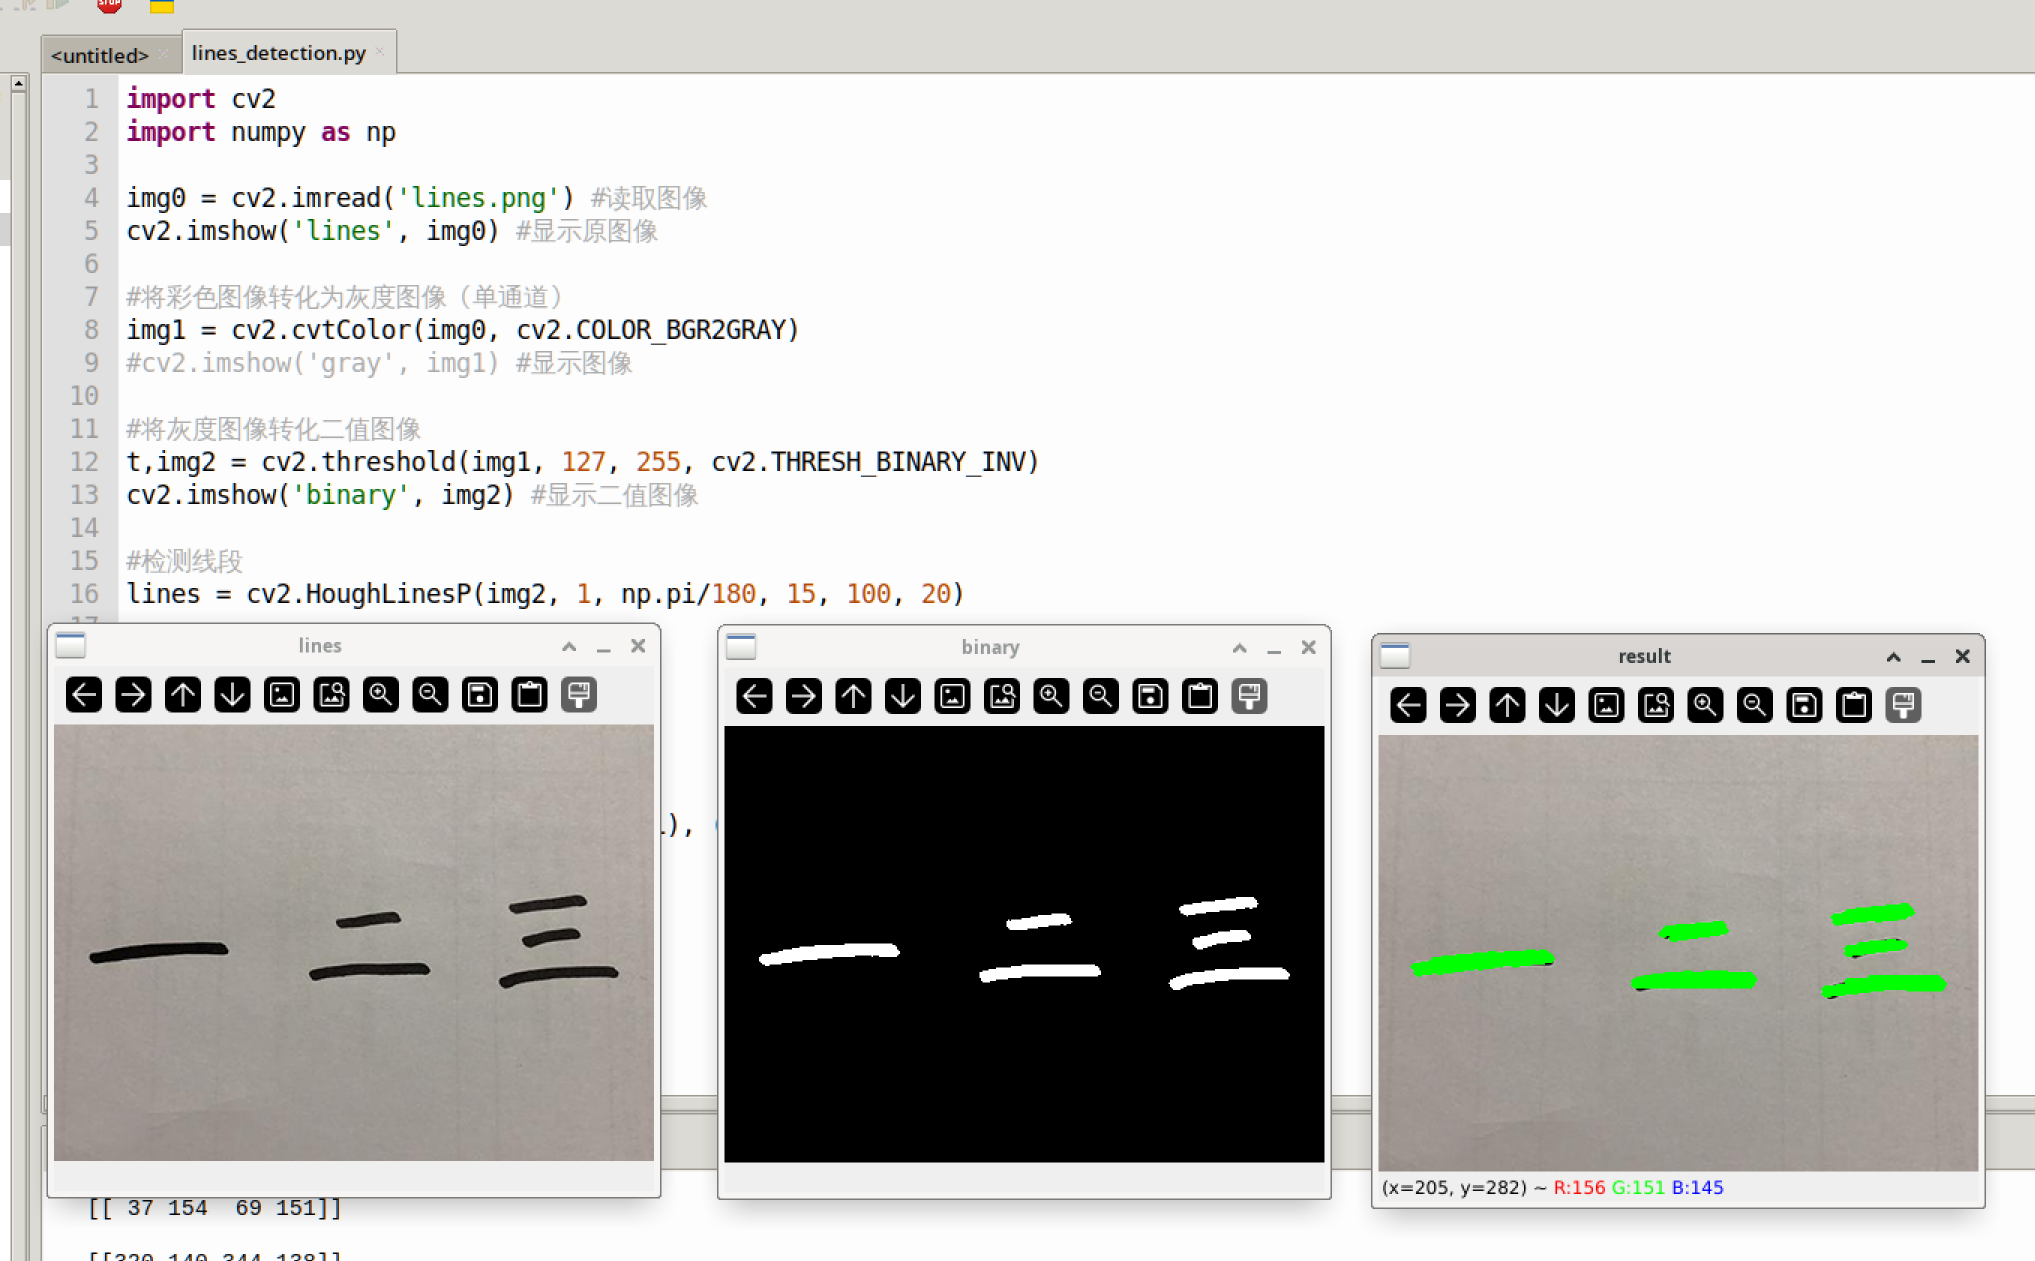
Read the image, convert it to a binary grayscale image, then perform line segment detection. The code writing flow is as follows:
Reference code is as follows:
'''
Experiment Name: Line Detection
Experiment Platform: WalnutPi
'''

import cv2
import numpy as np

img0 = cv2.imread('lines.png') # Read the image
cv2.imshow('lines', img0) # Display the original image

# Convert the color image to grayscale (single channel)
img1 = cv2.cvtColor(img0, cv2.COLOR_BGR2GRAY)
#cv2.imshow('gray', img1) # Display the image

# Convert the grayscale image to binary image
t,img2 = cv2.threshold(img1, 127, 255, cv2.THRESH_BINARY_INV)
cv2.imshow('binary', img2) # Display the binary image

# Detect line segments
lines = cv2.HoughLinesP(img2, 1, np.pi/180, 15, 100, 20)

print(lines) # Print line segment information

# Draw line segments on the original grayscale image
for l in lines:
    x0, y0, x1, y1 = l[0]
    cv2.line(img0, (x0, y0), (x1, y1), (0,255,0), 3)

cv2.imshow('result', img0)

cv2.waitKey() # Wait for any key press
cv2.destroyAllWindows() # Close the window
Experiment Results
Run the above code on the WalnutPi, and the experimental results are as follows: