Edge Detection
Introduction
This section learns to use OpenCV for image edge detection, using the Canny edge detection algorithm. Compared to the previous contour detection, this only requires a few simple lines of code to achieve.
Experiment Objective
Detect image edges and display them.
Experiment Explanation
The OpenCV Python library provides the Canny() function to implement edge detection.
Canny() Usage
edges = cv2.Canny(image, threshold1, threshold2, apertureSize, L2gradient)
Canny edge detection. Returns edges as a binary image.
iamge: Original image.threshold1: The first threshold used in calculation, usually the minimum threshold.threshold2: The second threshold used in calculation, usually the maximum threshold.
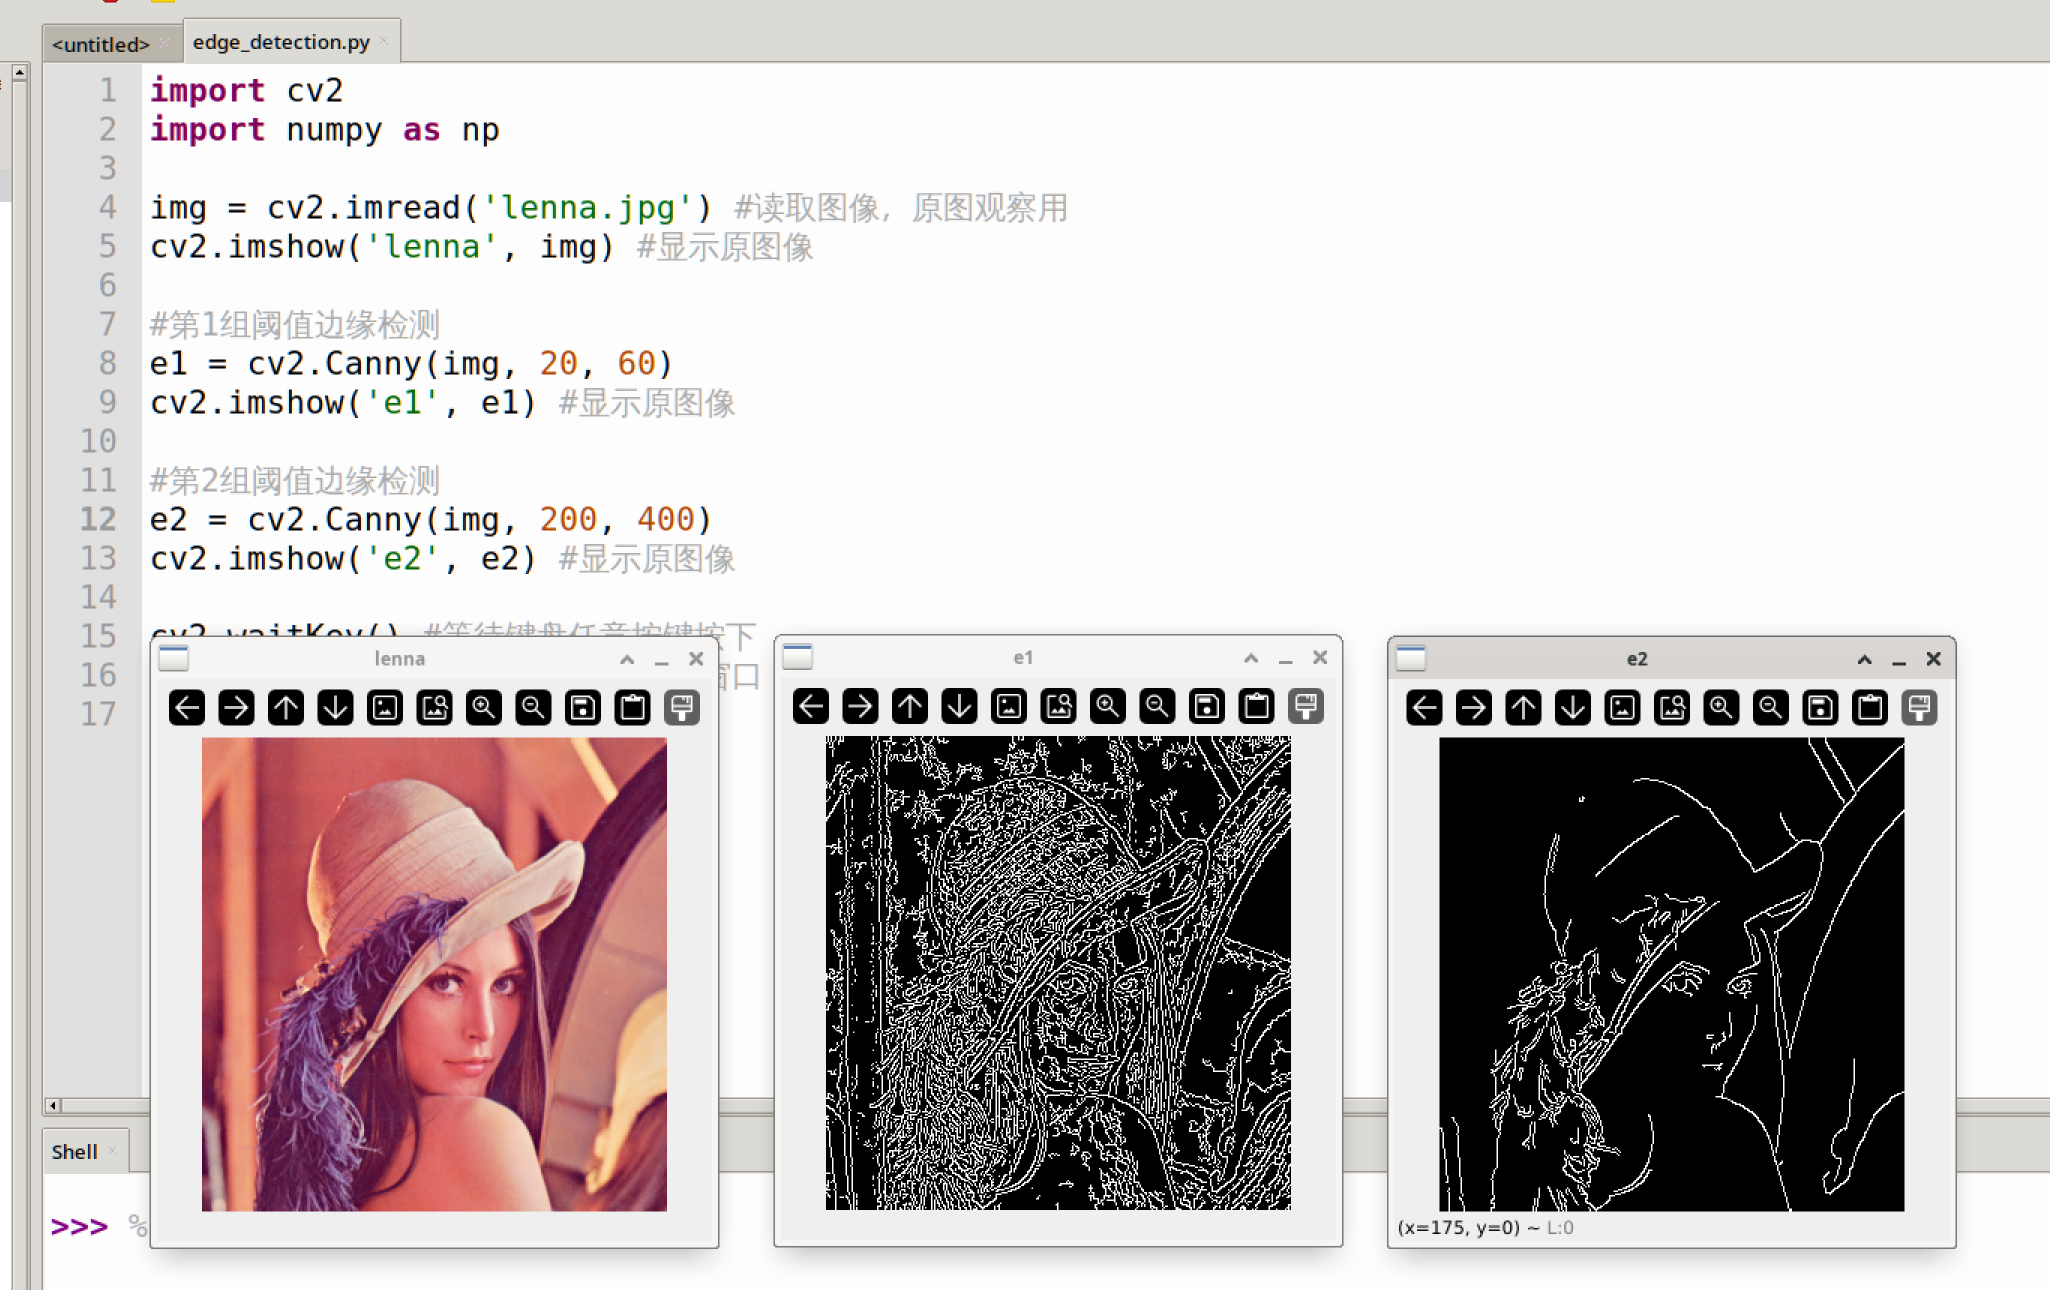
From the above, we can see that the Canny method is very simple to use. We just need to set appropriate thresholds based on requirements. We can use 2 sets of thresholds for comparative experiments. The code writing flow is as follows:
Reference code is as follows:
'''
Experiment Name: Edge Detection
Experiment Platform: WalnutPi
'''

import cv2

img = cv2.imread('lenna.jpg') # Read the image for original observation
cv2.imshow('lenna', img) # Display the original image

# Edge detection with threshold set 1
e1 = cv2.Canny(img, 20, 60)
cv2.imshow('e1', e1) # Display the image

# Edge detection with threshold set 2
e2 = cv2.Canny(img, 200, 400)
cv2.imshow('e2', e2) # Display the image

cv2.waitKey() # Wait for any key press
cv2.destroyAllWindows() # Close the window
Experiment Results
Run the above code on the WalnutPi, and you can see the edge detection results of the 2 sets of thresholds as shown below. Different thresholds result in different levels of detail: