GPIO Control
Please use WalnutPi OS v2.3 or above.
About Pin Numbering
Run the following command to check the status of each pin. In subsequent programming, use the Physical number from this table to refer to pins:
gpio pins
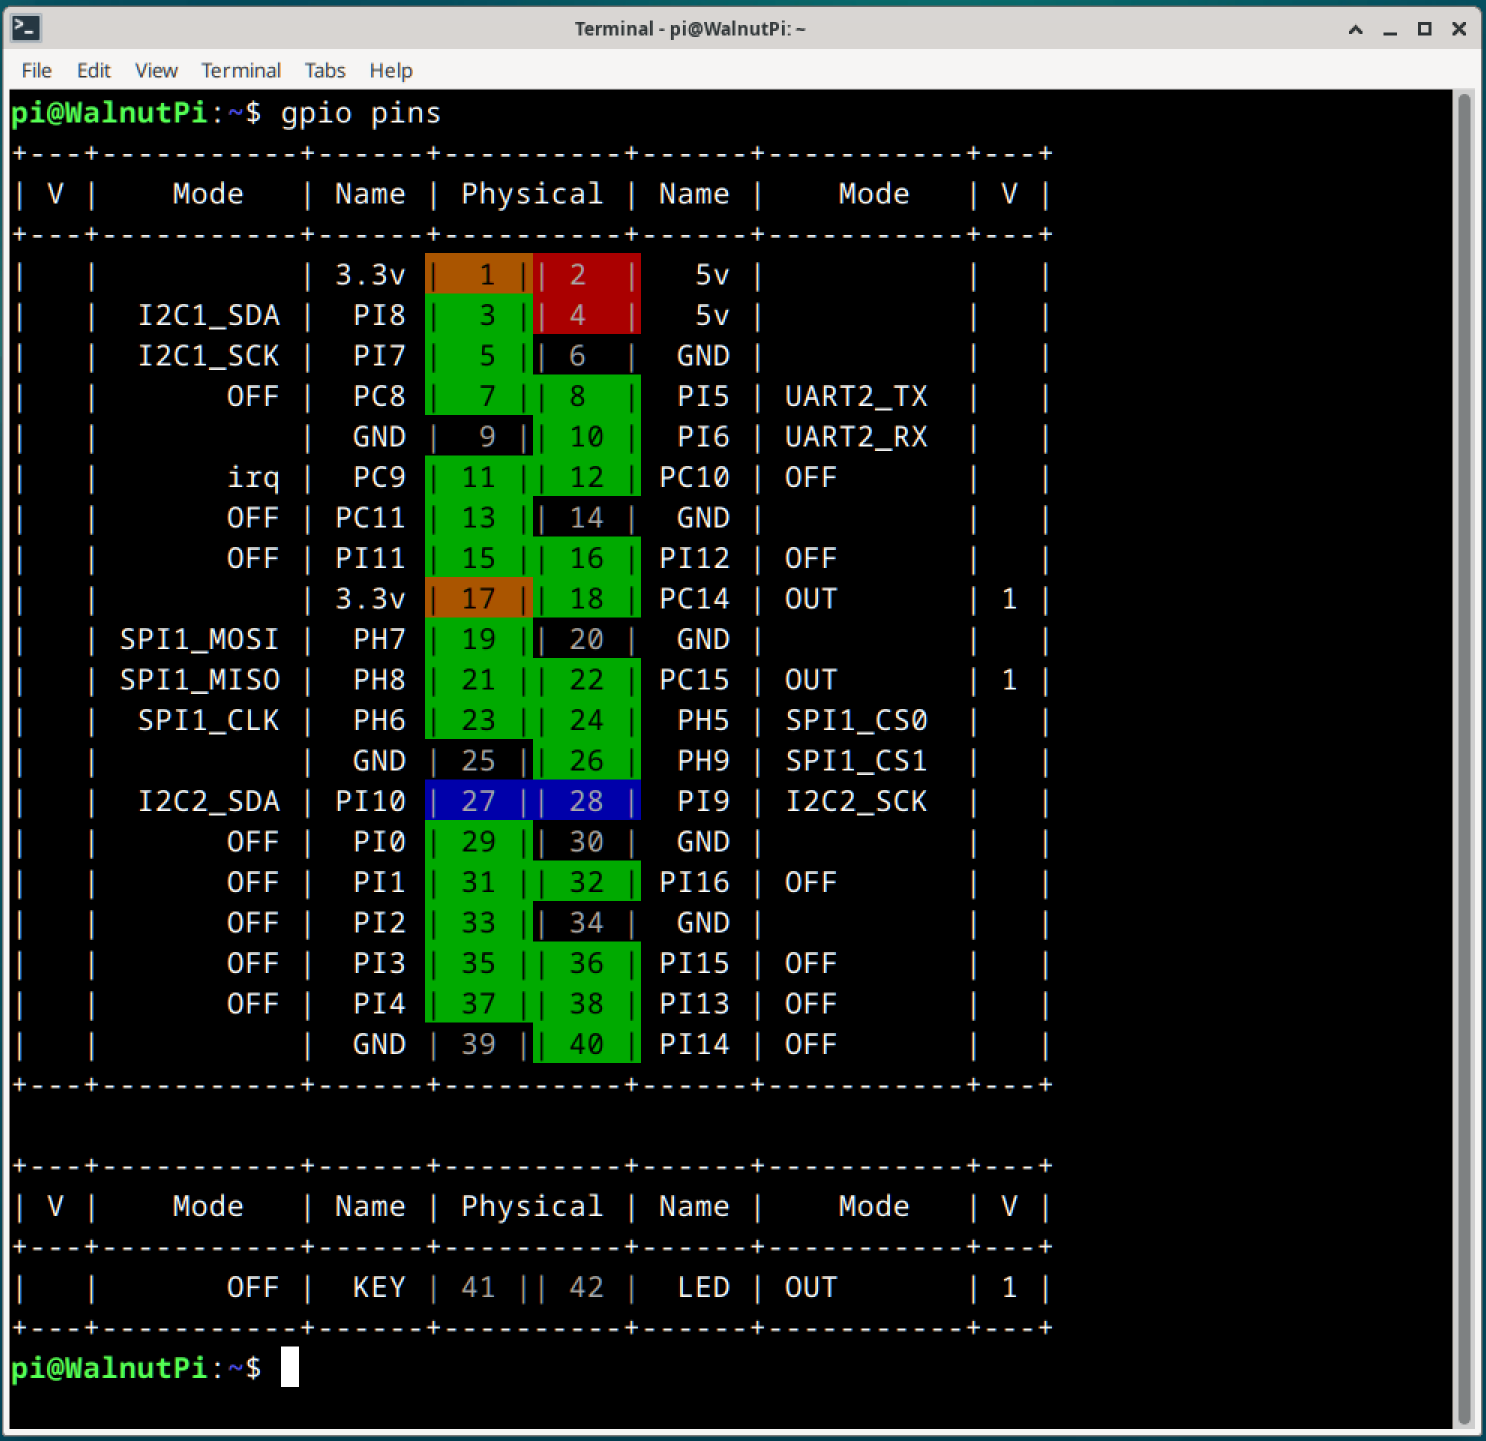
For detailed operations, please refer to: GPIO Command-Line Operations. This will not be repeated here.
Sample Code
Here is a sample program: when the button on the WalnutPi board is pressed, the LED turns on; when released, the LED turns off.
#include <stdio.h>
#include <unistd.h>
#include "gpio.h" // GPIO control library

#define KEY 41
#define LED 42
// These pin numbers are obtained using the gpio pins command

int main()
{
    pin_set_mode(LED, OUTPUT);
    pin_set_mode(KEY, INPUT);
    pin_set_pullUpDn(KEY, PULL_UP); // Enable internal pull-up
    while (1)
    {
        if (pin_read(KEY) == 0)
            pin_write(LED, 1);
        else
            pin_write(LED, 0);
    }
    return 0;
}
Command-Line Compilation and Execution
To compile the code, since the GPIO library exists as a dynamic library, you need to add -lgpio to the compilation command. The following command compiles test.c in the current directory into an executable named test:
gcc -Wall -o test test.c -lgpio
Run the compiled program. Note that you need administrator privileges to control GPIO:
sudo ./test
Geany IDE Compilation
For instructions on using Geany IDE, refer to this tutorial: Compiling C Code on the Board
If you are using the Geany IDE that comes pre-installed with the WalnutPi desktop system, you need to make the following configuration changes.
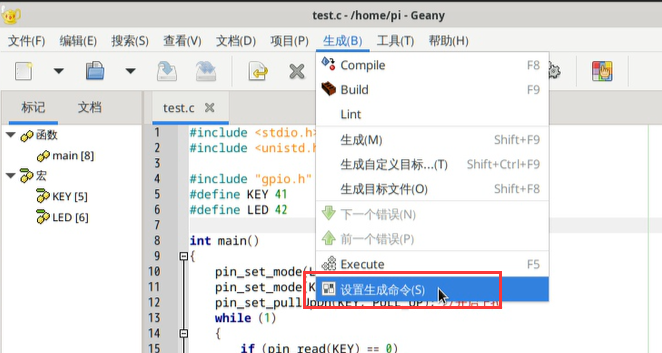
Open Build > Set Build Commands:
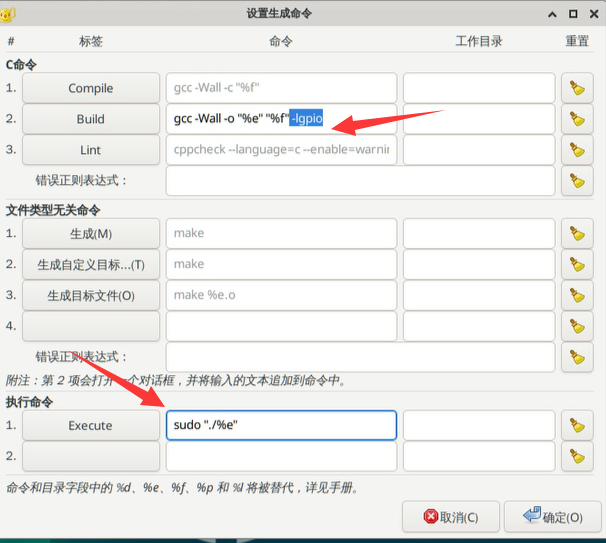
Add -lgpio at the end of the Build command so that the GPIO library is included during compilation when you click the Build button:
gcc -Wall -o "%e" "%f" -lgpio
Add sudo before the Execute command so that the program runs with administrator privileges when you click the Run button:
sudo "./%e"
Click OK to save.