Online Model Training
The WalnutPi online model training website is designed for users who need to train their own visual models. Without any coding, simply drag and drop images to build a dataset, and with a few simple steps, you can generate a powerful YOLO11 visual model. Upon completion of training, model files and Python scripts are automatically generated and can be directly run on the development board.
Online training website link: https://ai.01studio.cc
Currently supported platform: WalnutPi 2B (Please use Debian image v1.4 or above)
Supported visual recognition types: Image Classification, Image Detection
Registration and Login
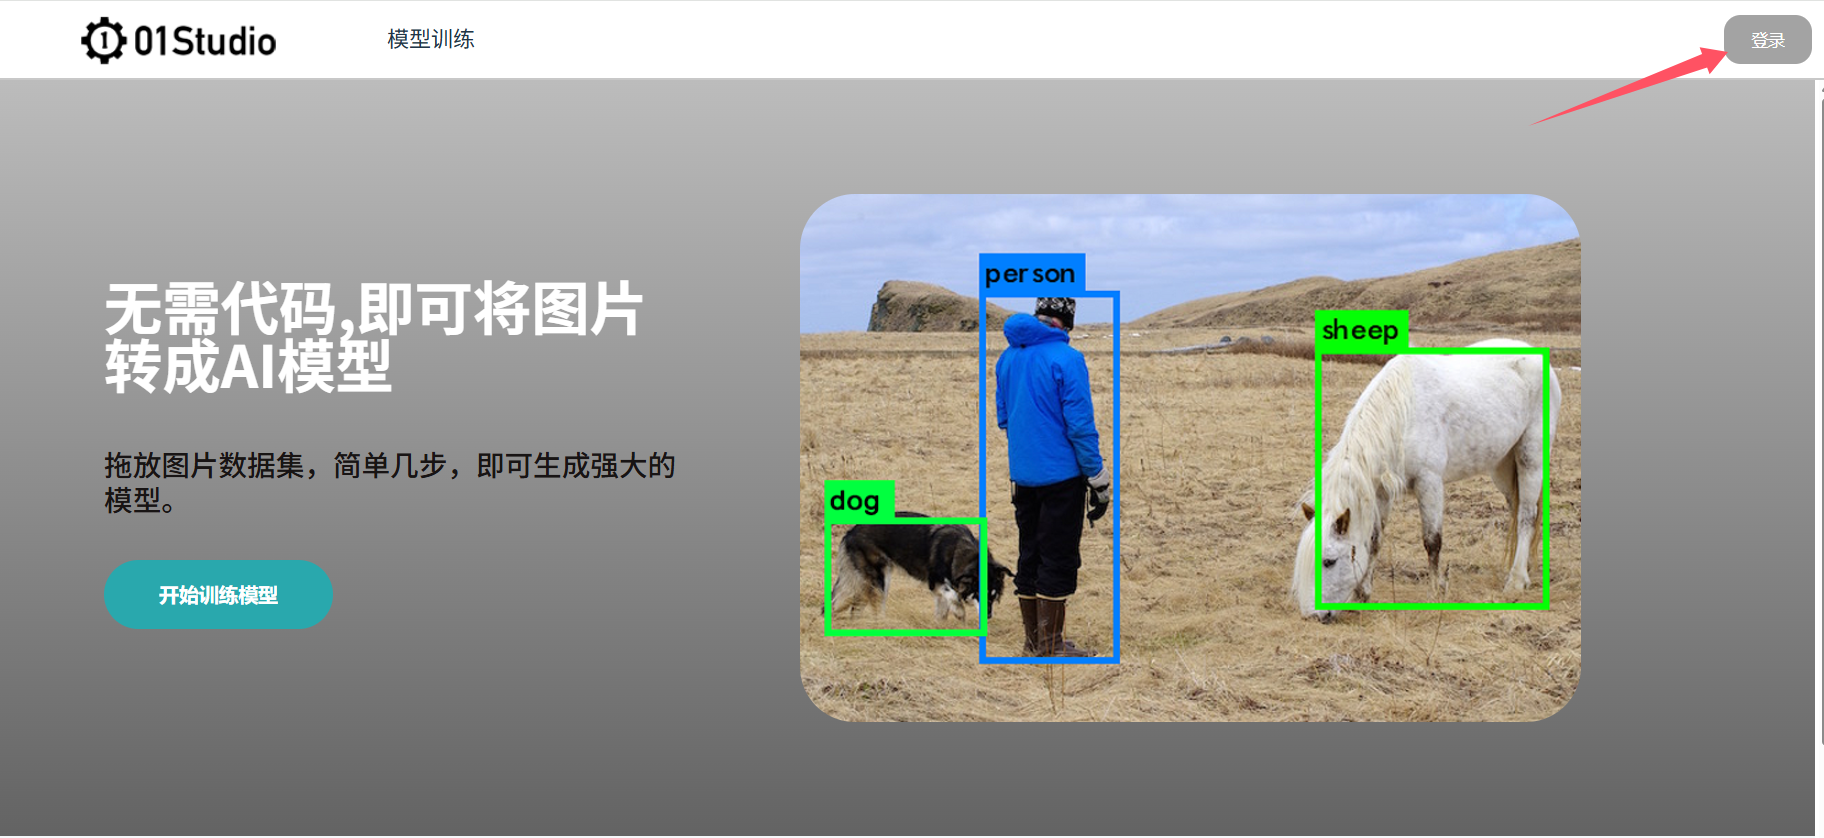
Open https://ai.01studio.cc and click the login button in the top right corner.
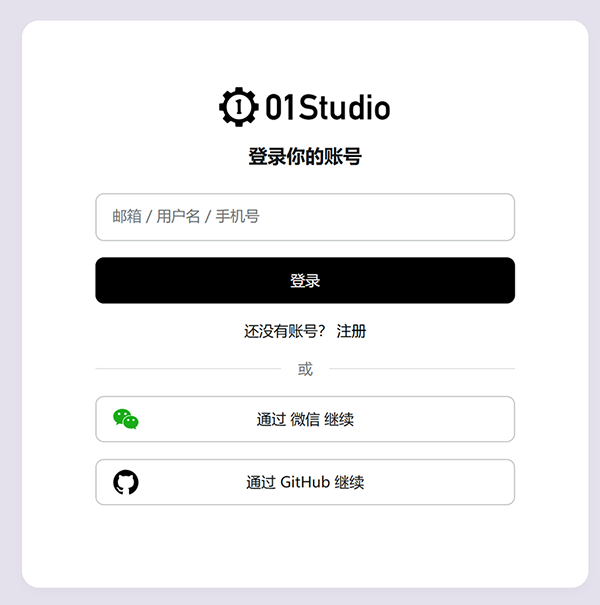
You can register manually or use WeChat or Github account association for one-click login (currently, associated login still requires email or phone number verification).
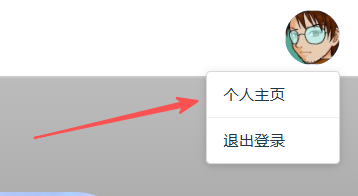
After logging in, click [Avatar--Personal Homepage] in the top right corner to view or modify your personal information.
Training a Classification Model
Visual classification is about identifying and classifying images, outputting what item the image most likely contains (without location bounding boxes).
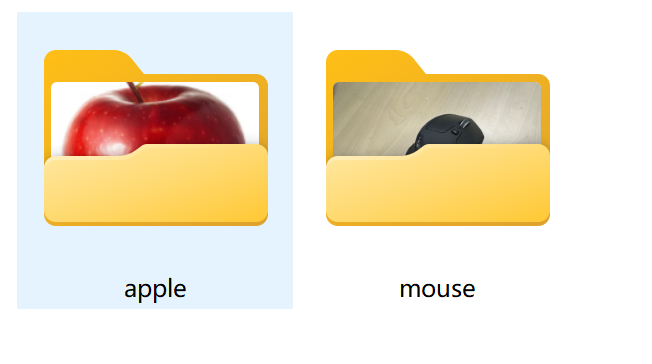
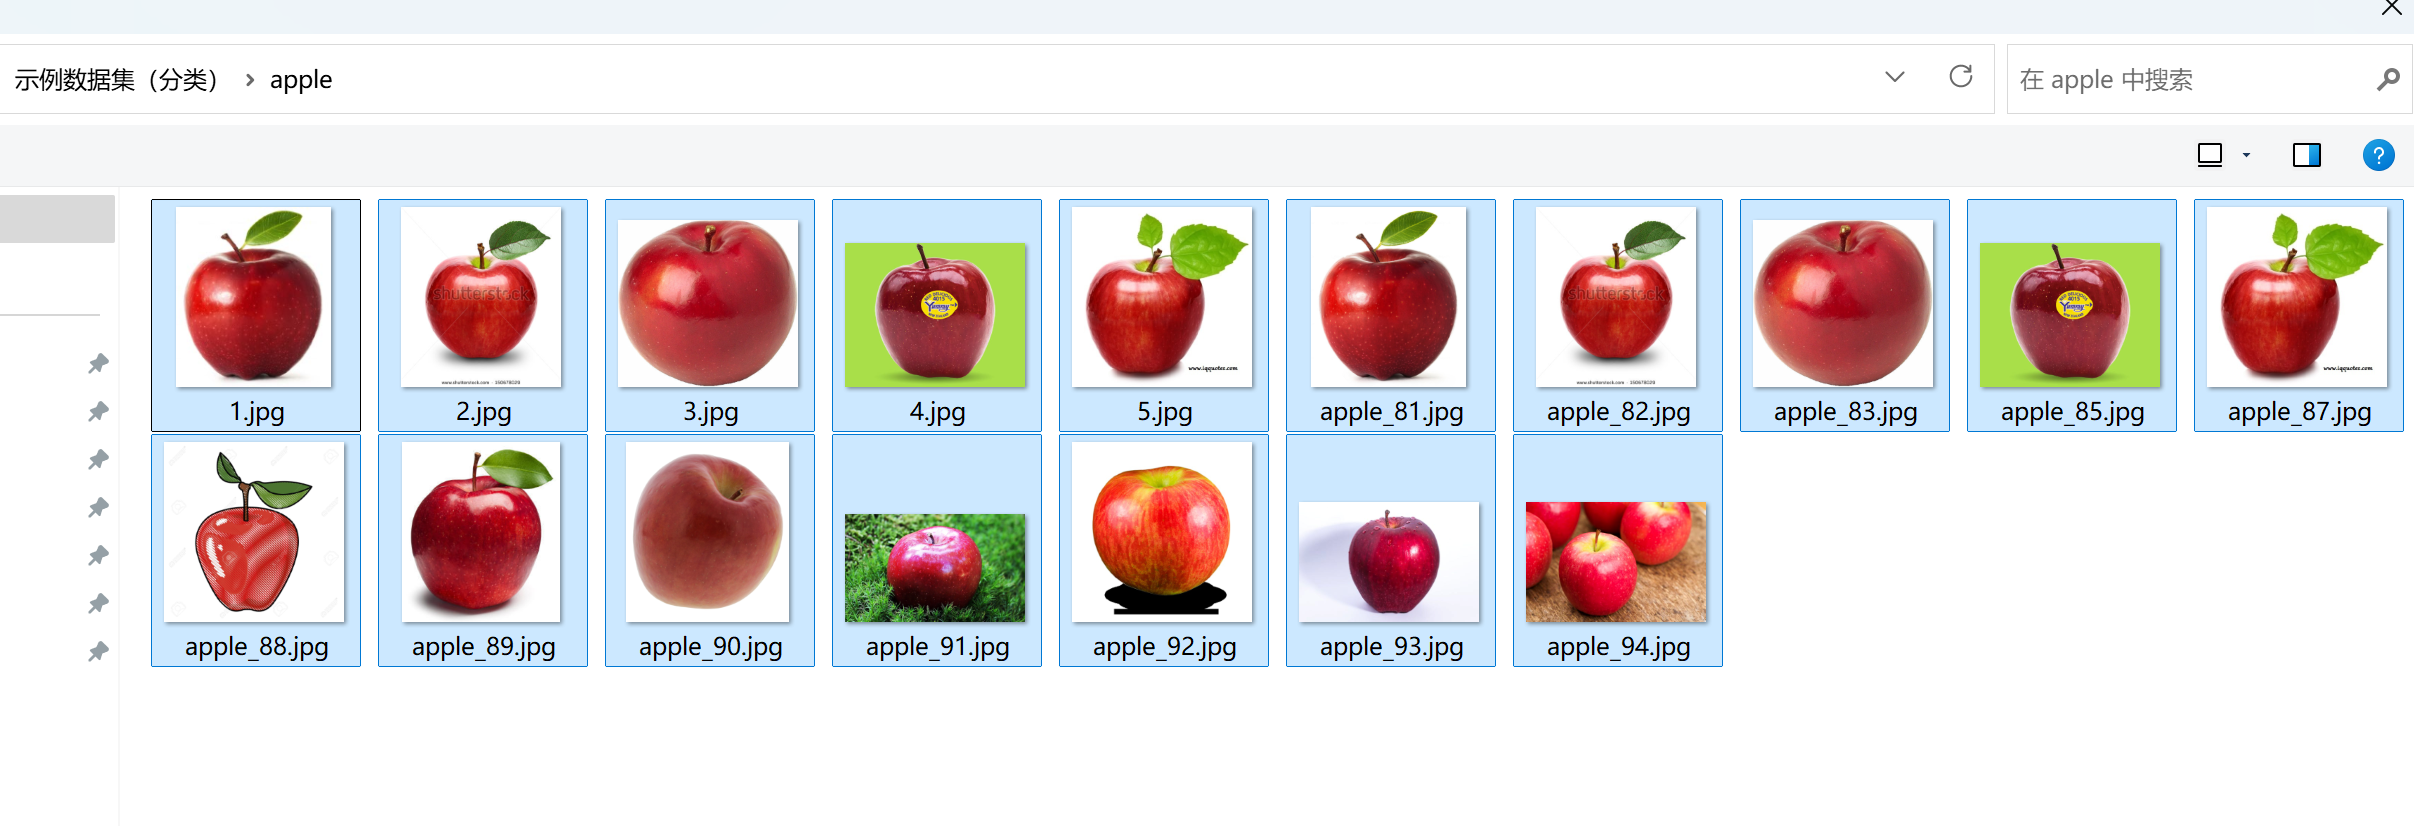
Here is a simple dataset prepared for testing. Click to download: Sample Dataset (Classification). It contains dozens of images of apples and mice.
Creating a Dataset
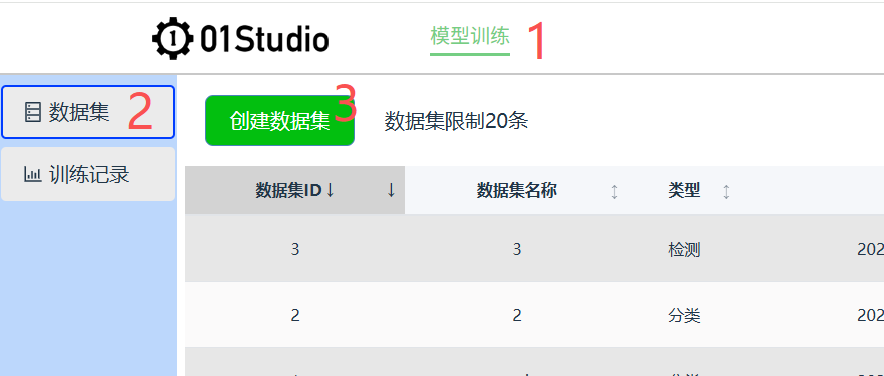
Click Model Training--Dataset--Create Dataset:
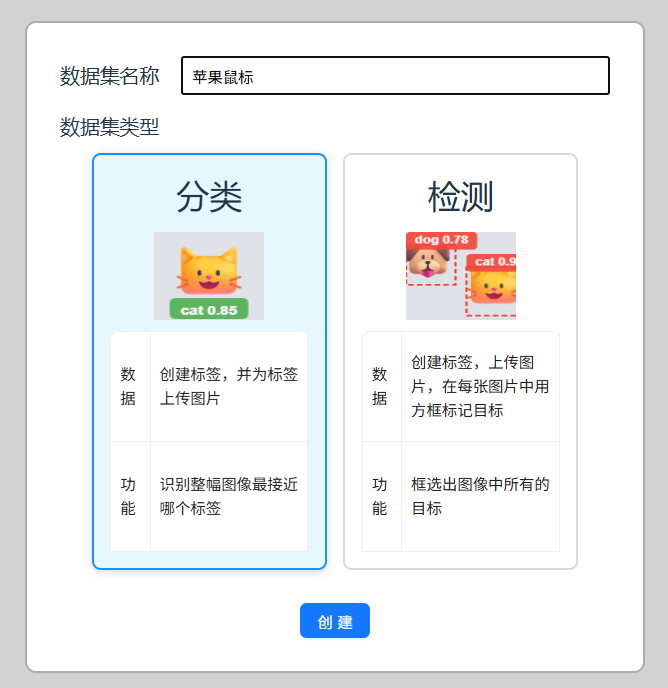
Enter the dataset name (custom), select classification, and click create.
You can see a new dataset has been created.

Dataset ID: Unique number for all datasets;Dataset Name: The user-defined dataset name;Type: Visual recognition type, here it is classification;Created Time: The creation time of the dataset;Last Updated: The last editing time of the dataset;Actions: Includes edit and delete buttons (deletion is currently irreversible).
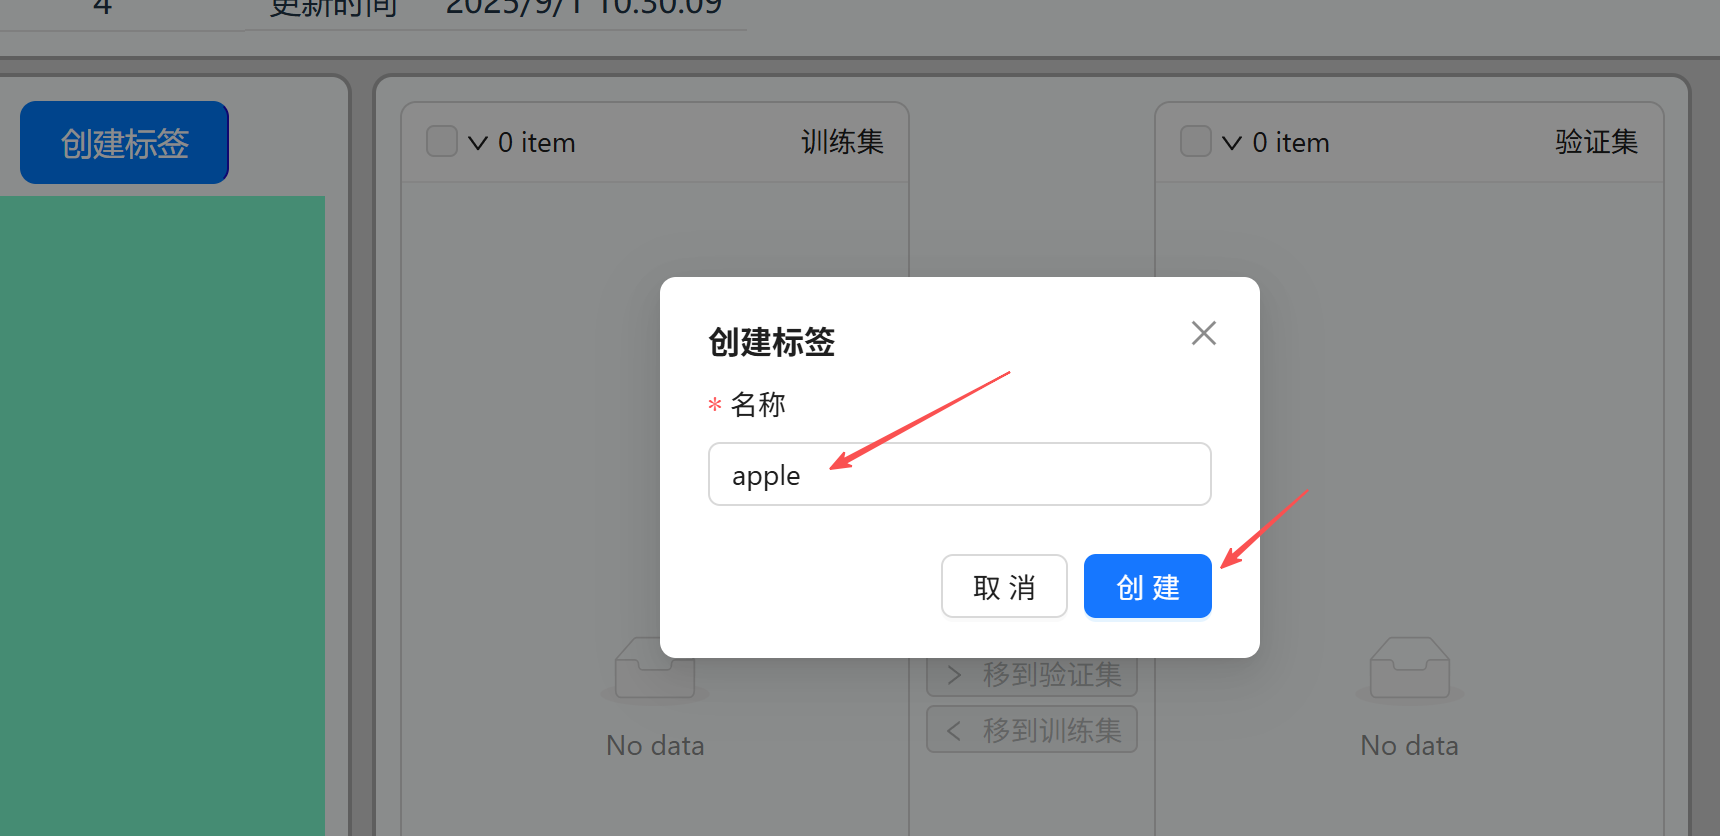
Click the Edit button in the right-side actions. On first entry, you will be prompted to create a new label. Here, we are training apple and mouse classification recognition. First, create the apple label apple (Use English labels as much as possible to avoid issues on some development boards without Chinese library support).
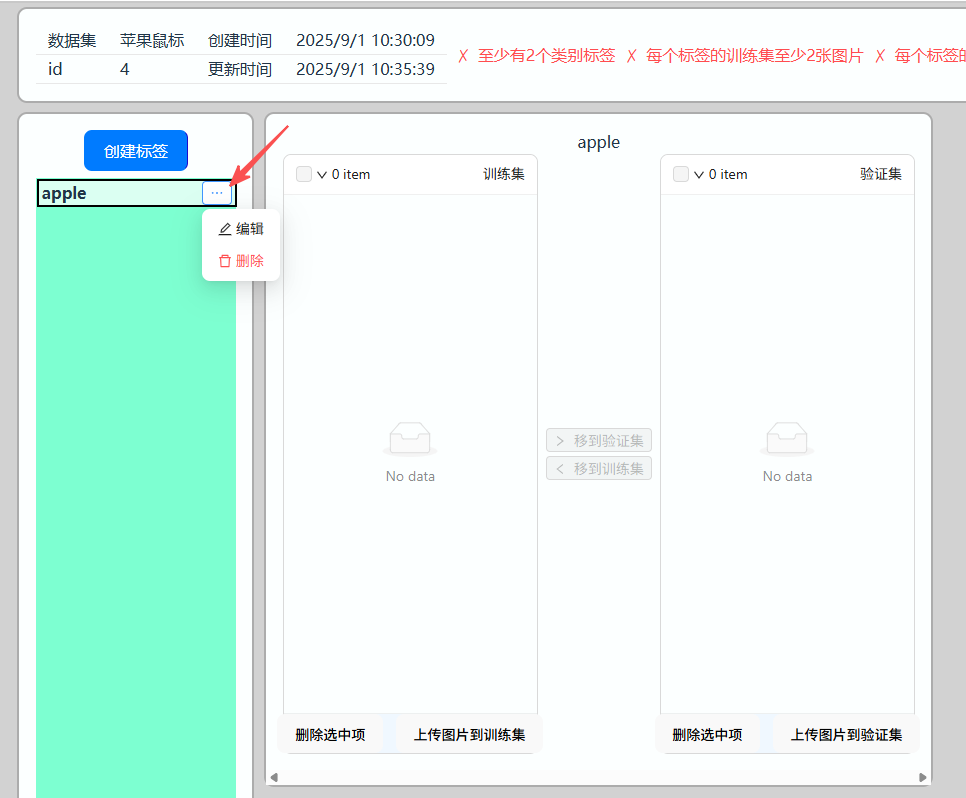
After creation, the apple label appears in the left sidebar. Click the right button to edit or modify.
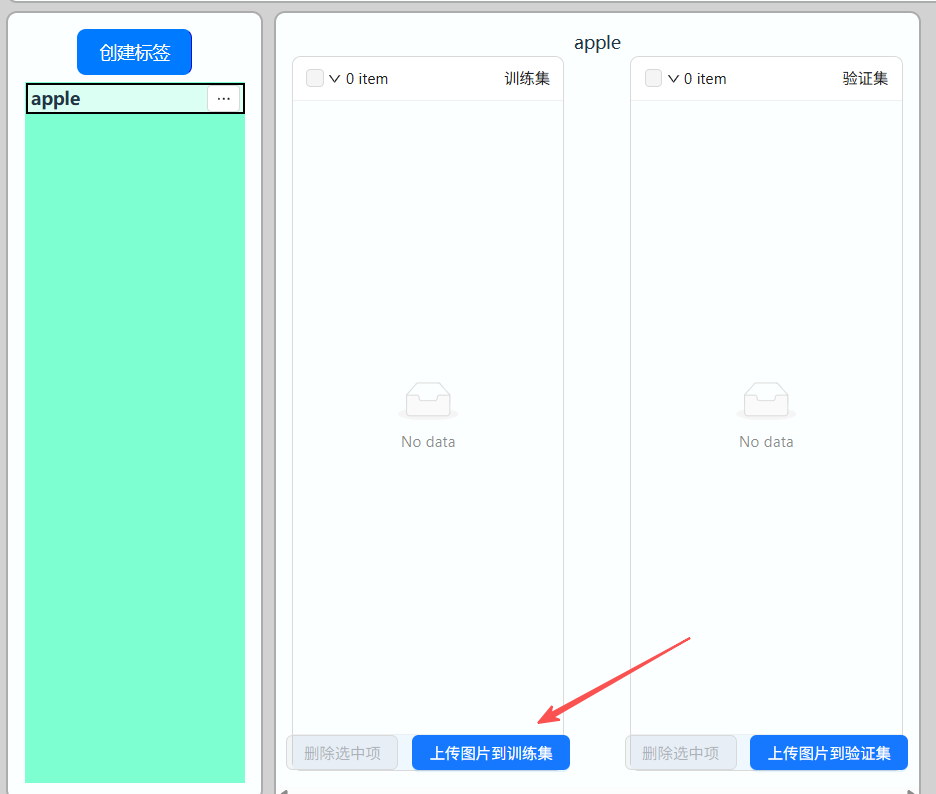
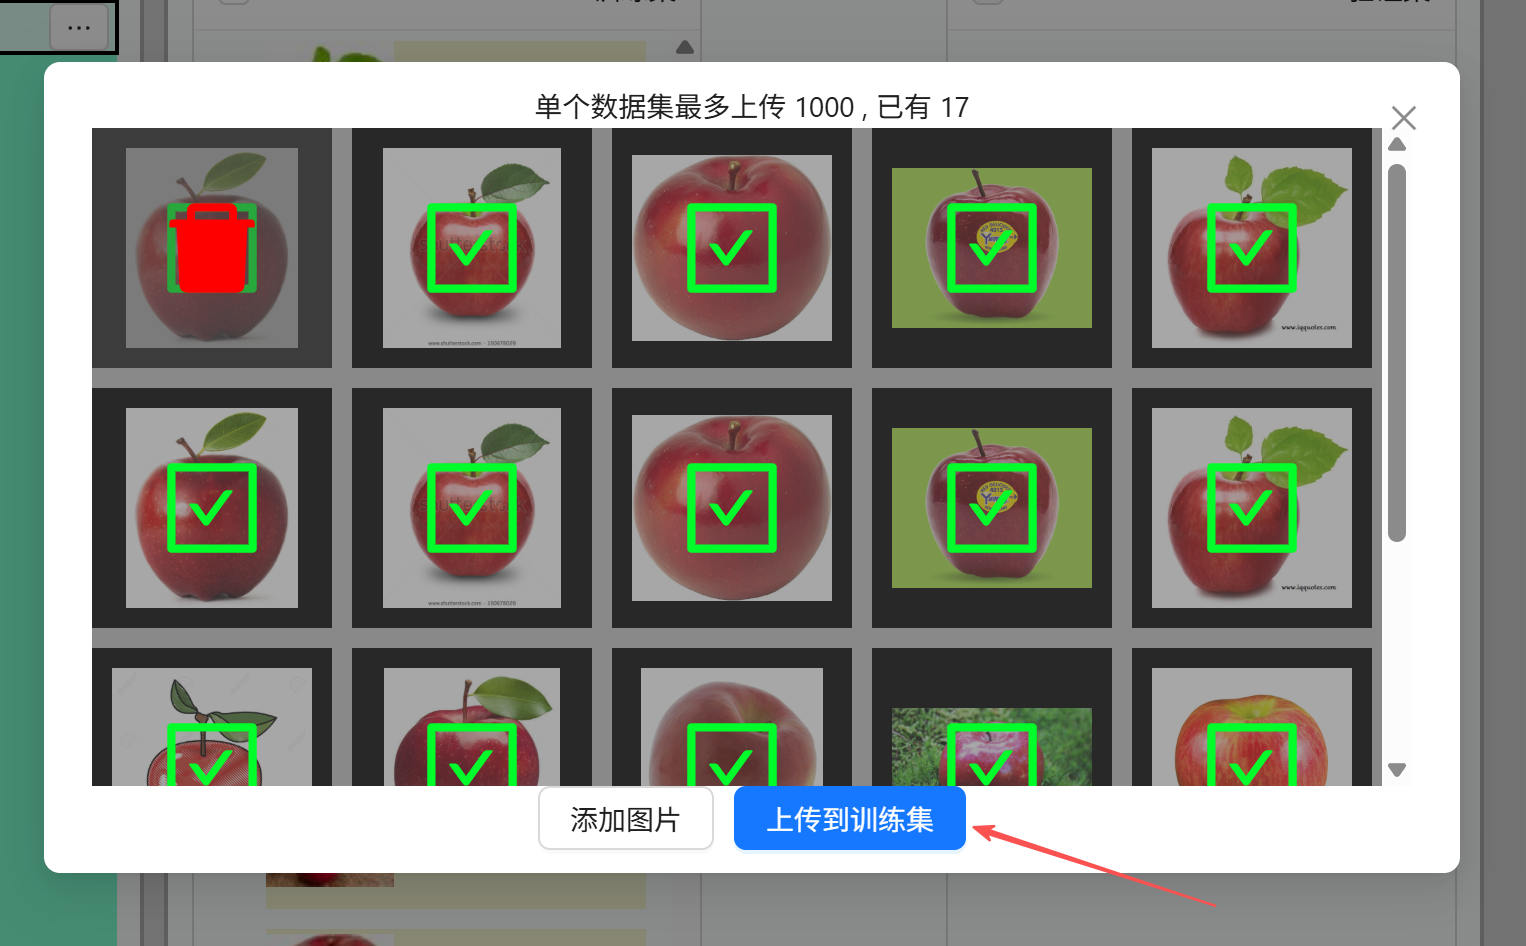
Click [Upload Images to Training Set]
Click [Add Images]
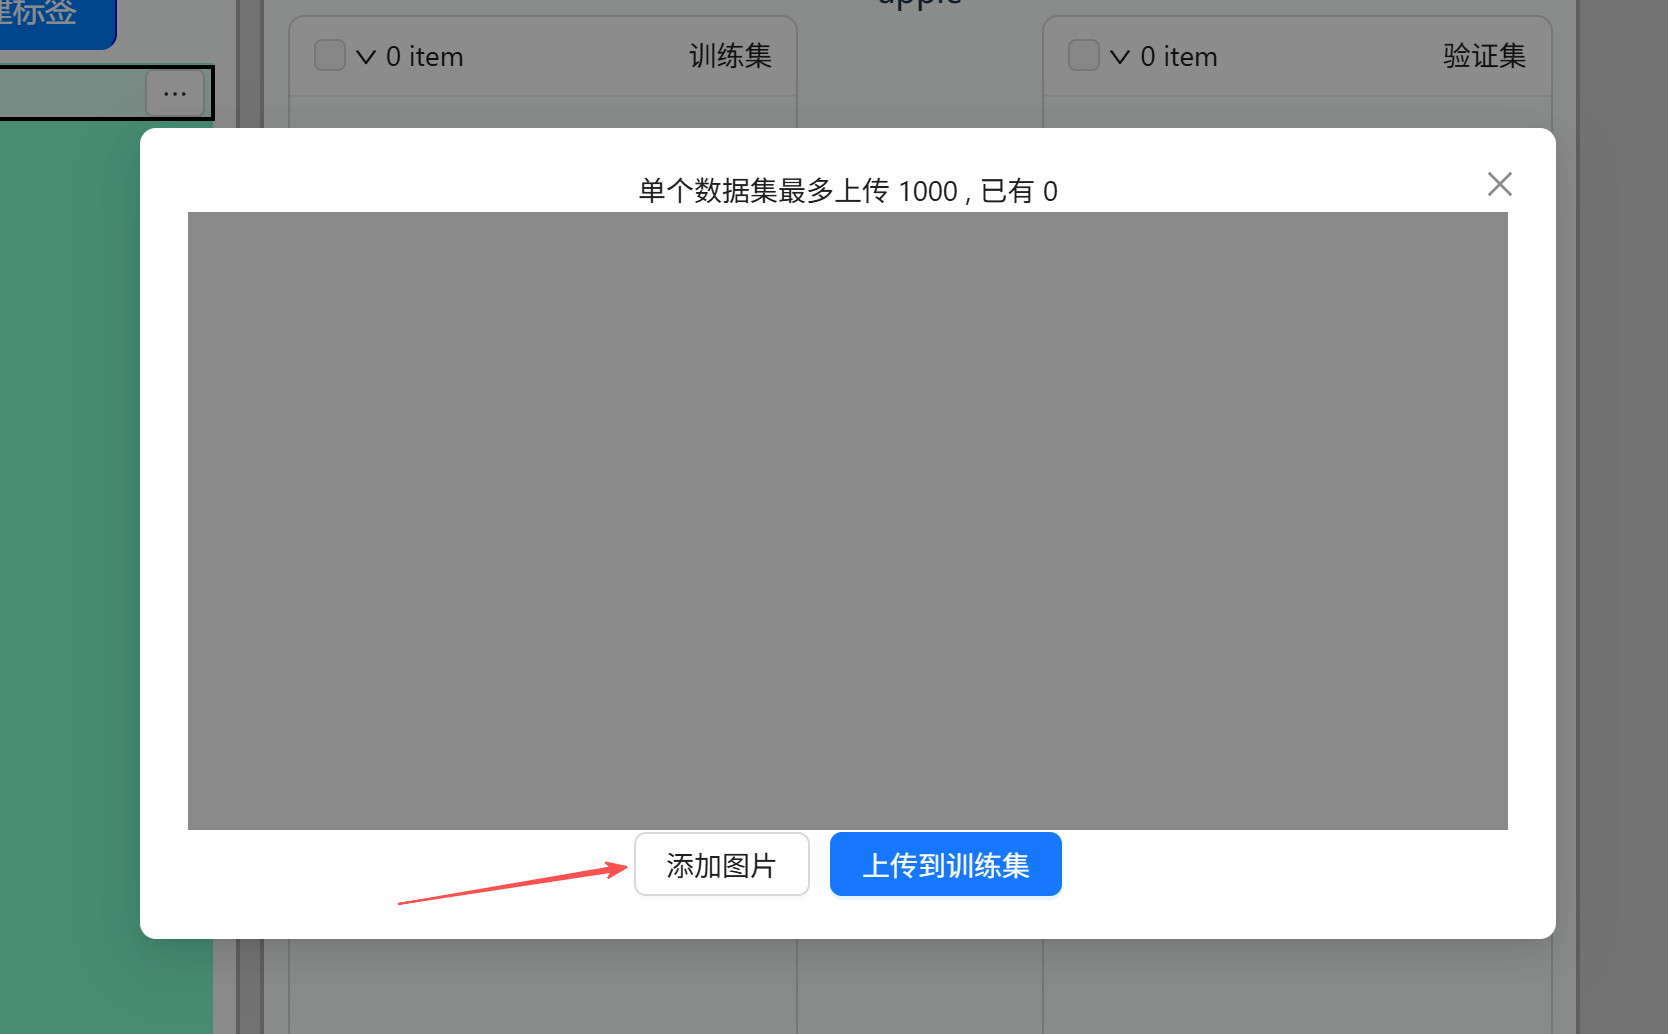
Select the apple images from the sample dataset downloaded earlier:
Click [Upload to Training Set]
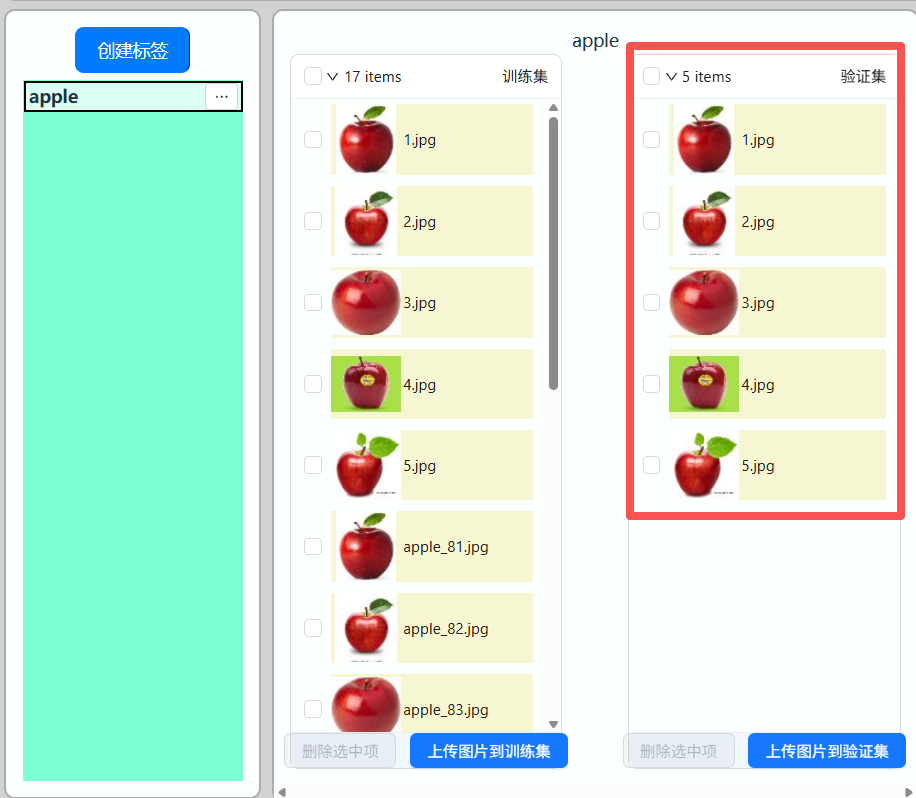
Use the same method to upload a few images to the validation set. The training set is used for training, and the validation set is used for assessment after each training round. The number of validation set images should generally be about 10%~30% of the total dataset.
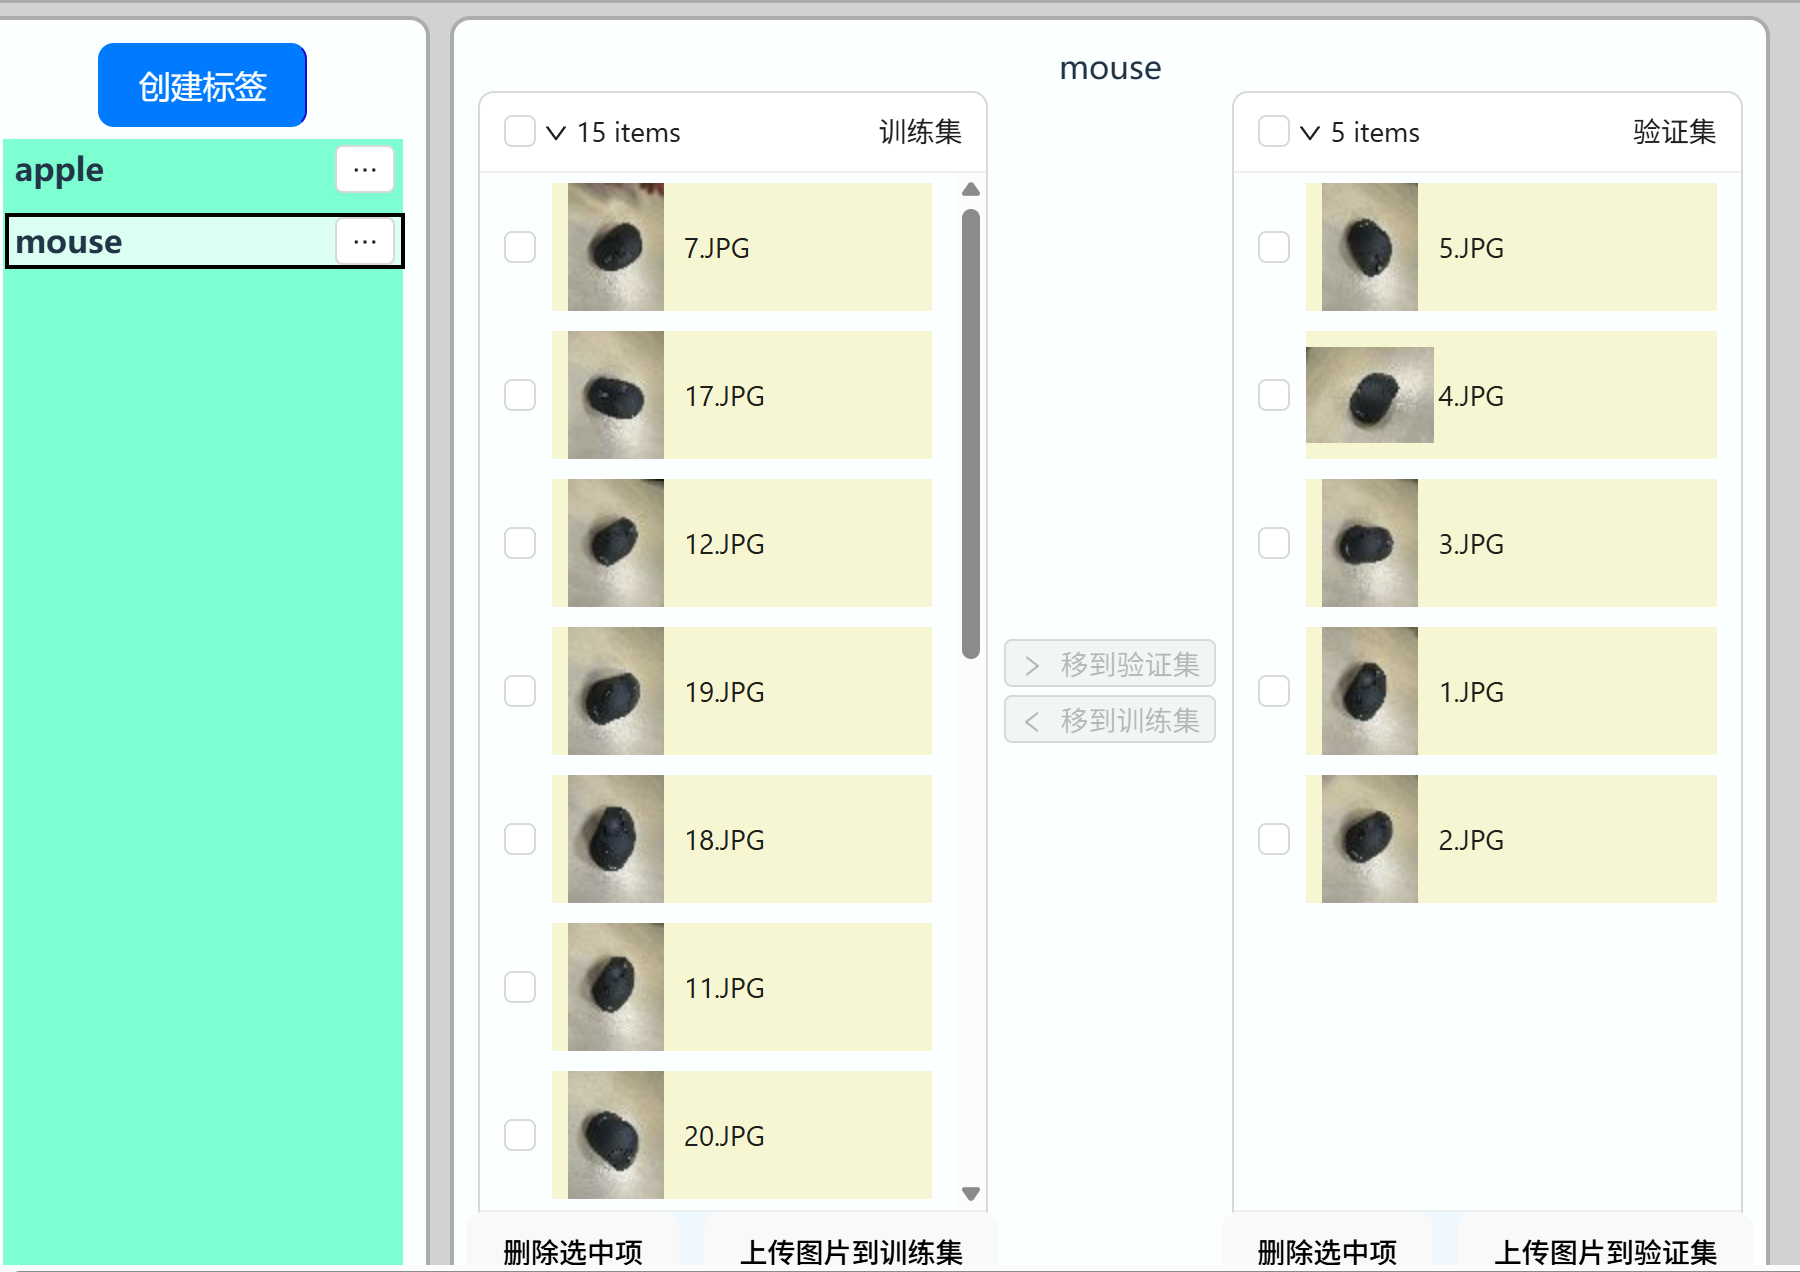
Click [Create Label], then create a mouse label.
Select the mouse label:
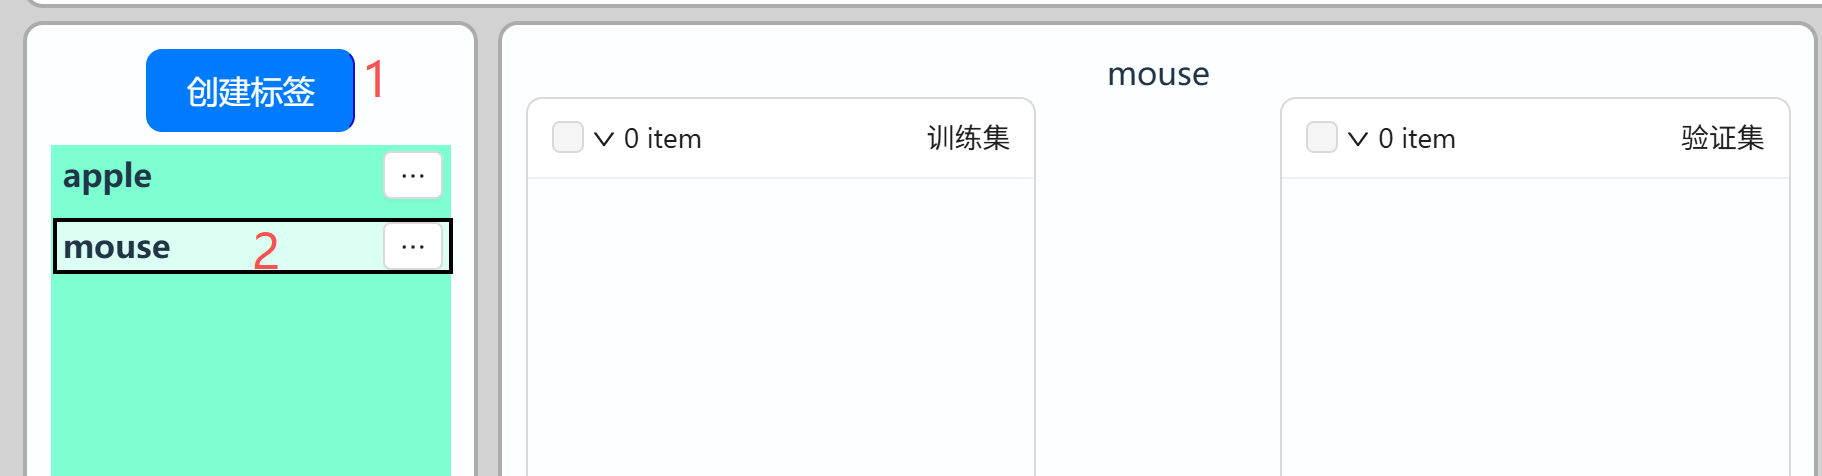
Use the same method as before to upload the mouse images from the sample dataset to the training set and validation set.
Start Training
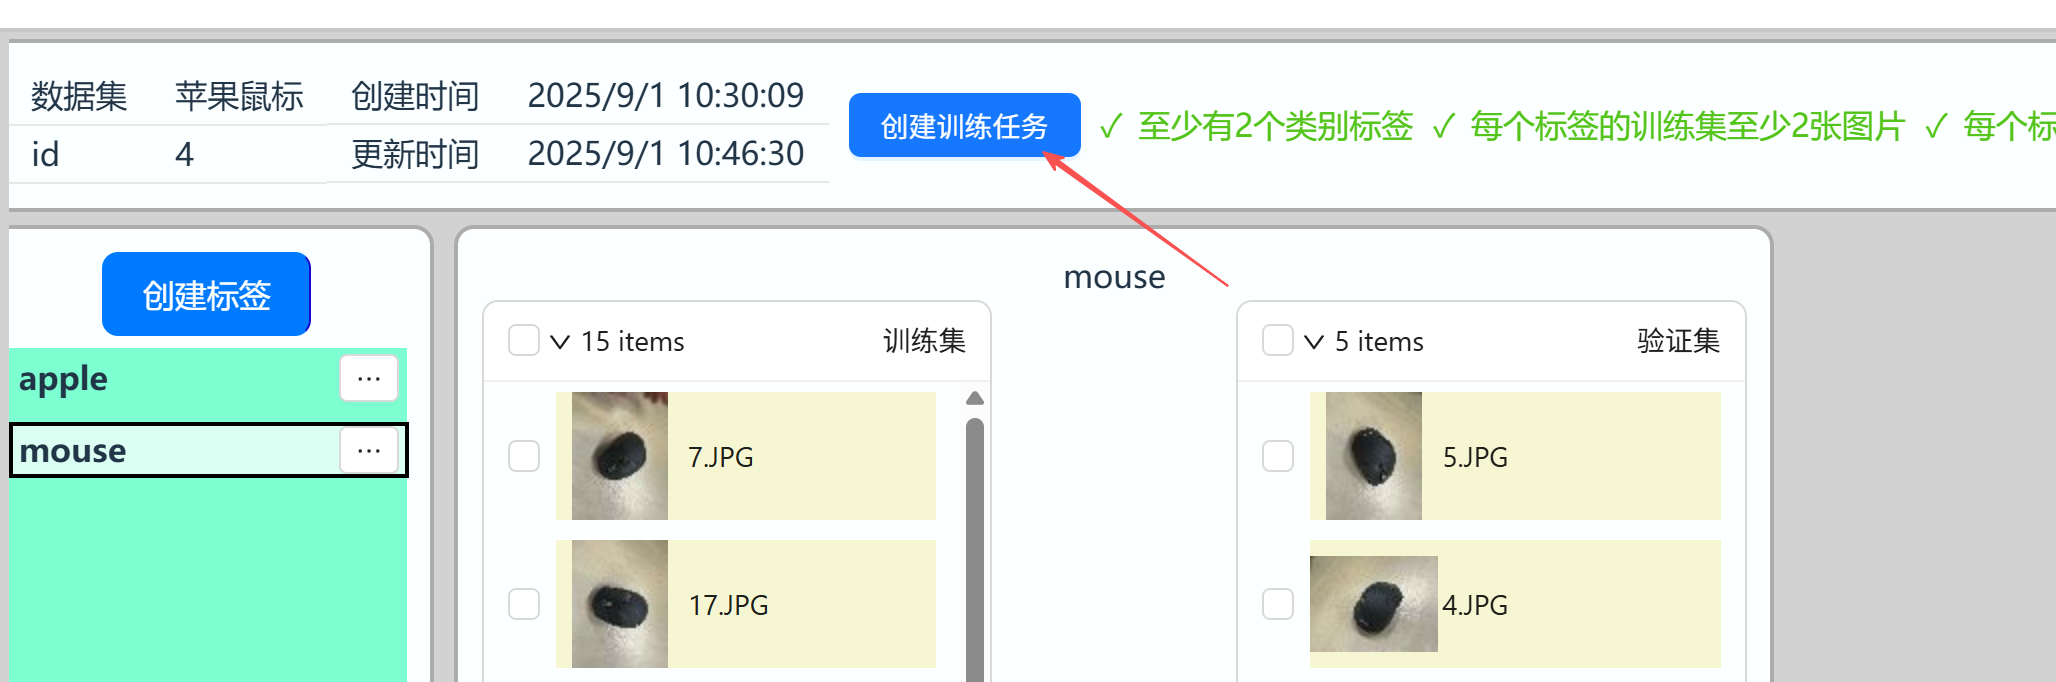
Click [Create Training Task] above the dataset:
Configure training parameters: Generally, the default configuration is fine.
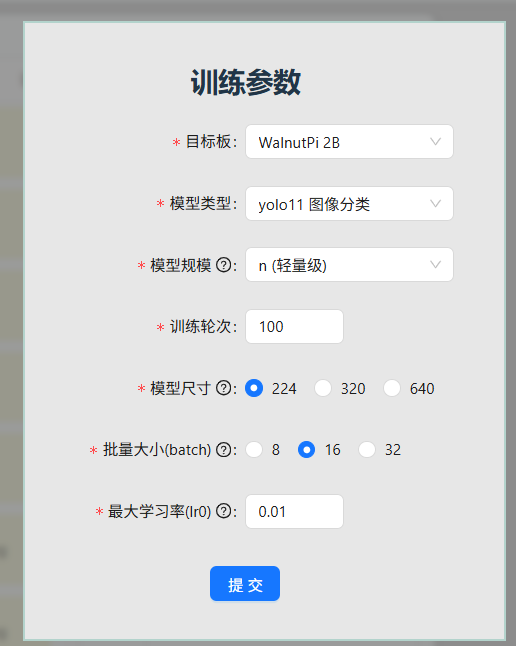
Target Board: Select WalnutPi 2B here;Model Type: Automatically selected based on the dataset;Model Scale: For development boards, generally choose n or s, as others may not run.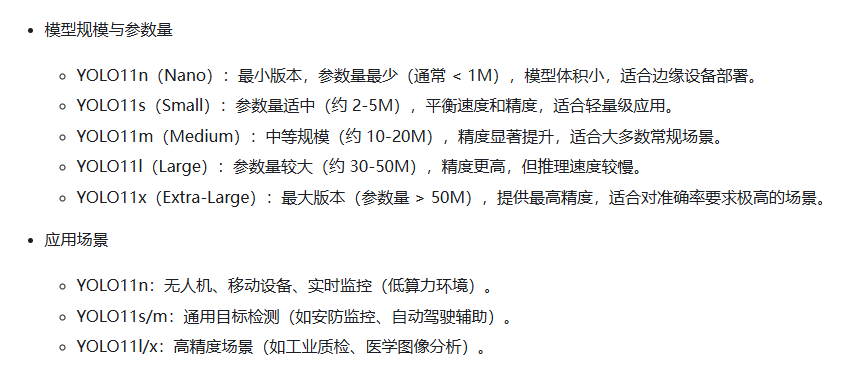
Training Epochs: The platform allows a maximum of 500 epochs;Model Size: Larger values improve accuracy but increase runtime. Generally recommended 224 or 320.Batch Size: Default is 16. If there are many images (around a thousand), you can select 32 to improve training speed;Max Learning Rate (lr0): Default is 0.01, usually no need to adjust;
After clicking [Submit], you will automatically be redirected to the training interface:
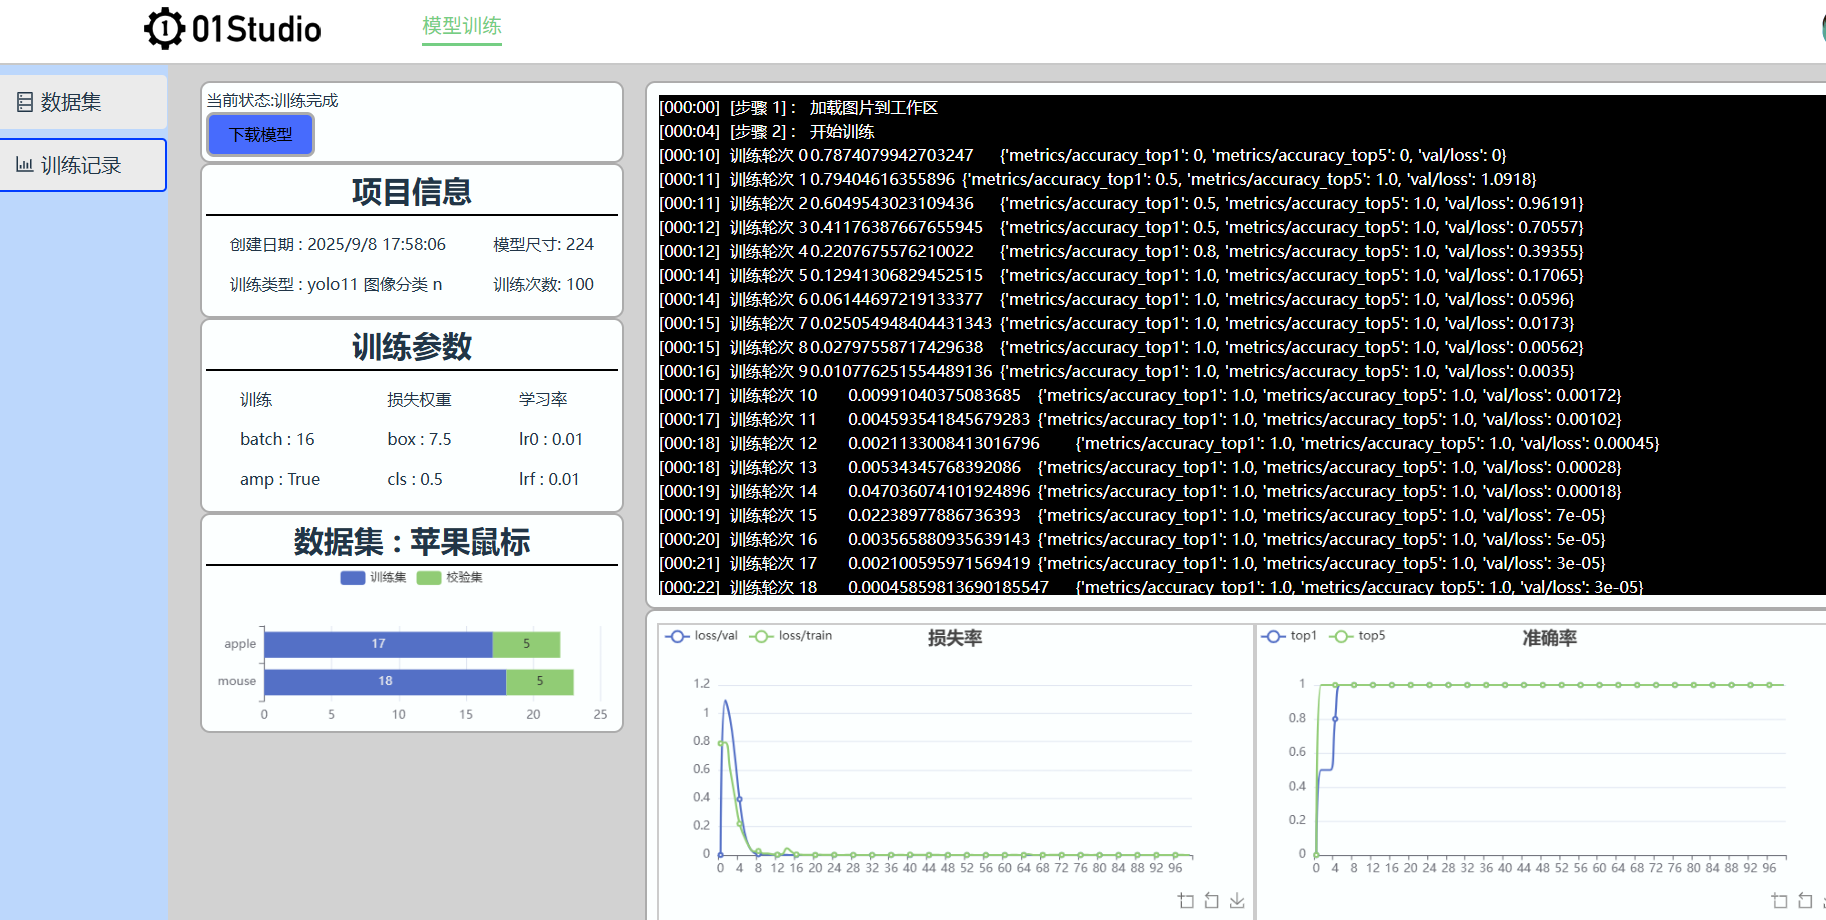
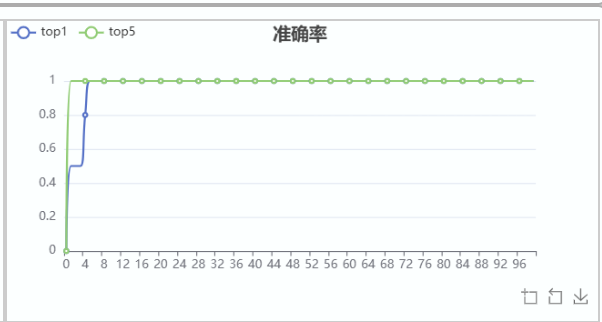
The left side shows project information, the top right shows training logs, and the bottom right shows training result charts. Taking the example below, the model achieved 100% recognition accuracy after the 5th iteration, with excellent results.
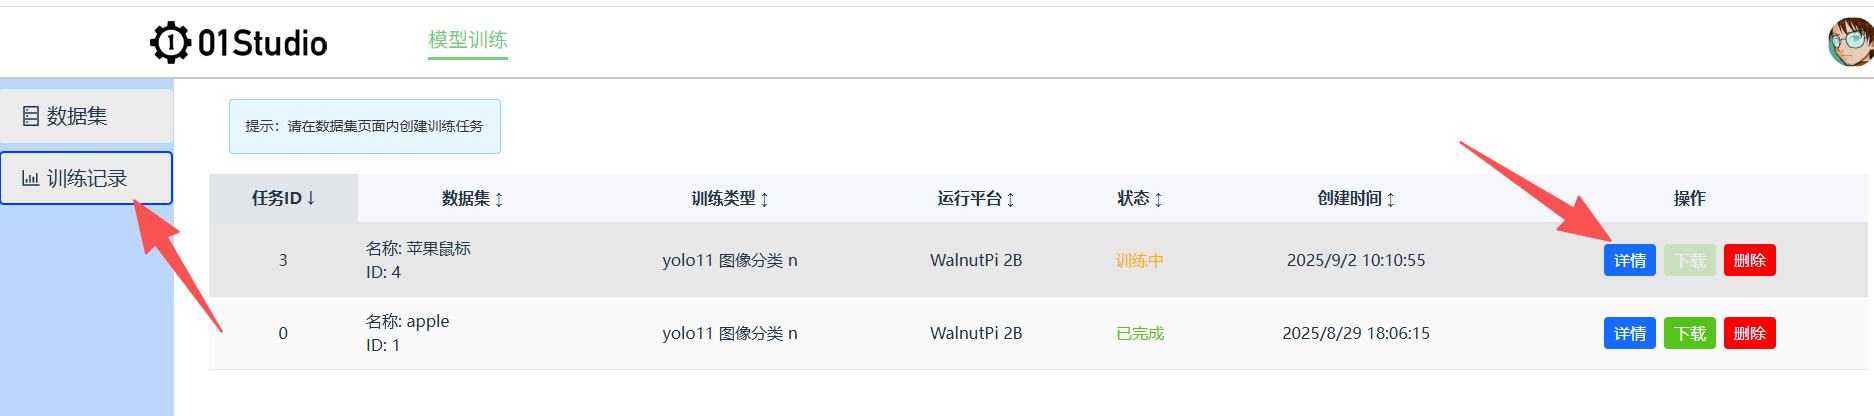
Click the left navigation bar--Training Records to see all training project information. Click the [Details] button on the right to enter:
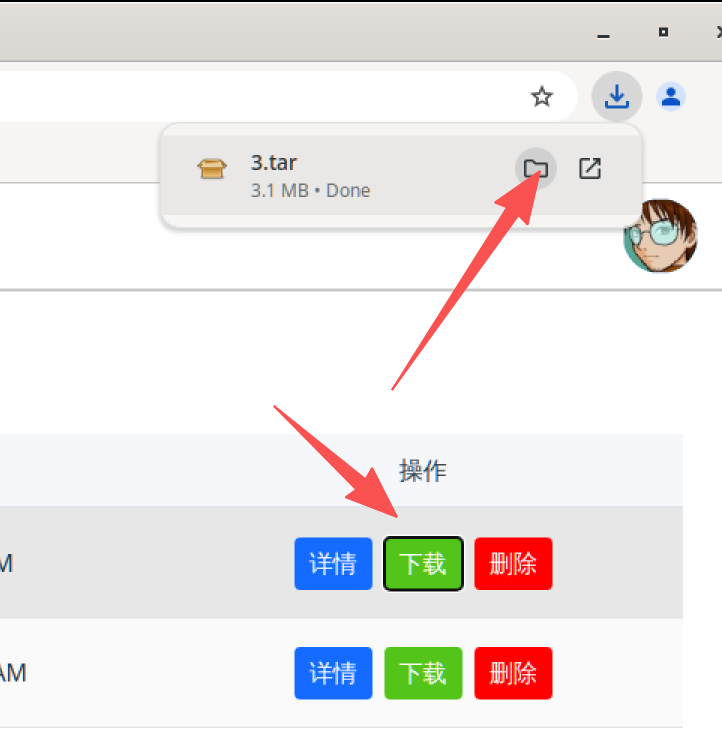
After training is complete, you can click the [Download] button to download the model and code files.

Deployment and Running
After downloading, copy the model file to WalnutPi 2B via USB drive or other methods. The desktop version system is recommended to conveniently observe camera or image recognition results.
You can also open https://ai.01studio.cc in the desktop version WalnutPi system browser, log in with the same account, and download the training result files from the training records.
Use the following command to decompress.
tar -xvf 3.tar
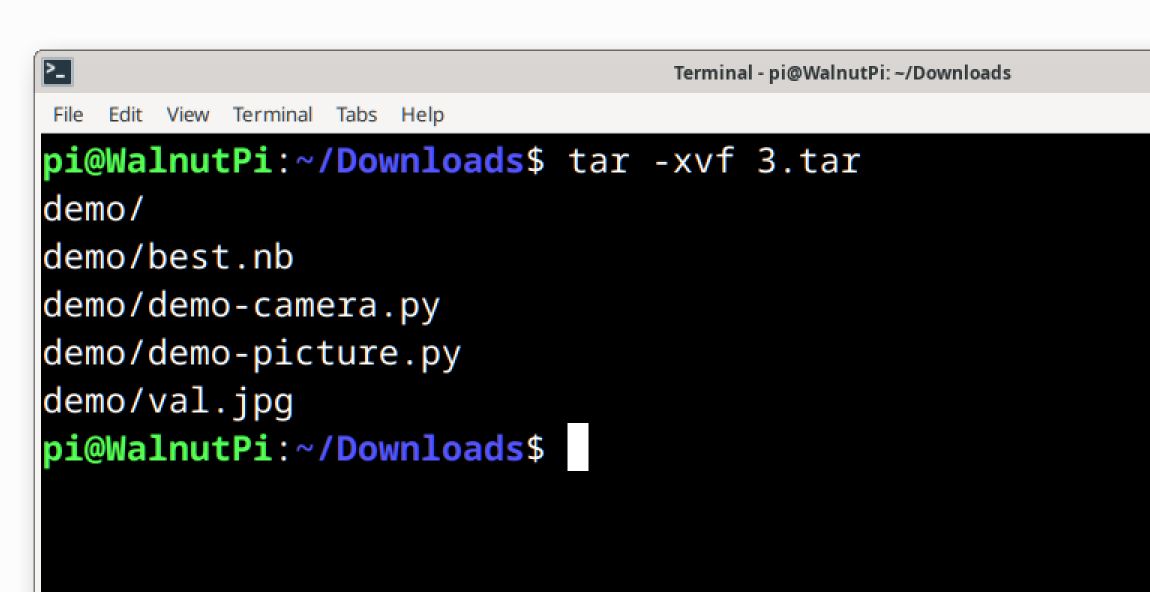
You can see there are 4 files:
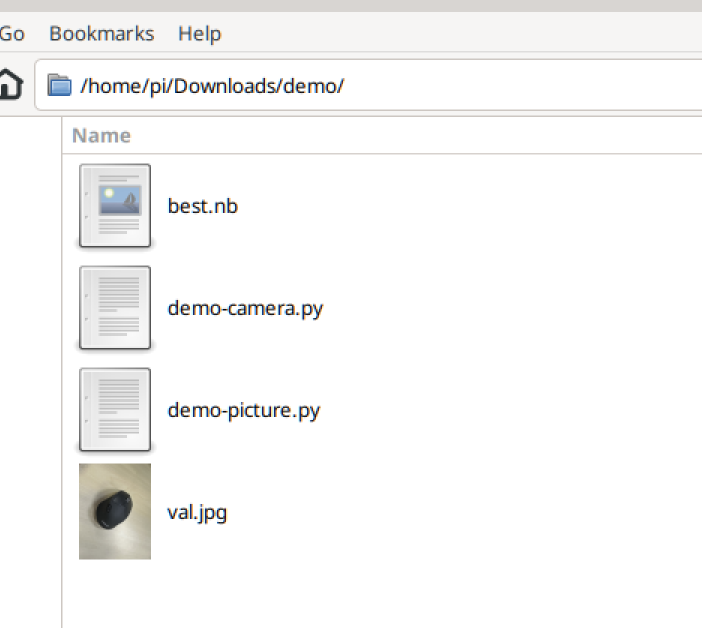
They are:
best.nb: Model file suitable for WalnutPi 2B (Allwinner T527)val.jpg: Image used for testing the picture demodemo-picture.py: Picture recognition demo, uses val.jpgdemo-camera.py: USB camera recognition
Image-Based
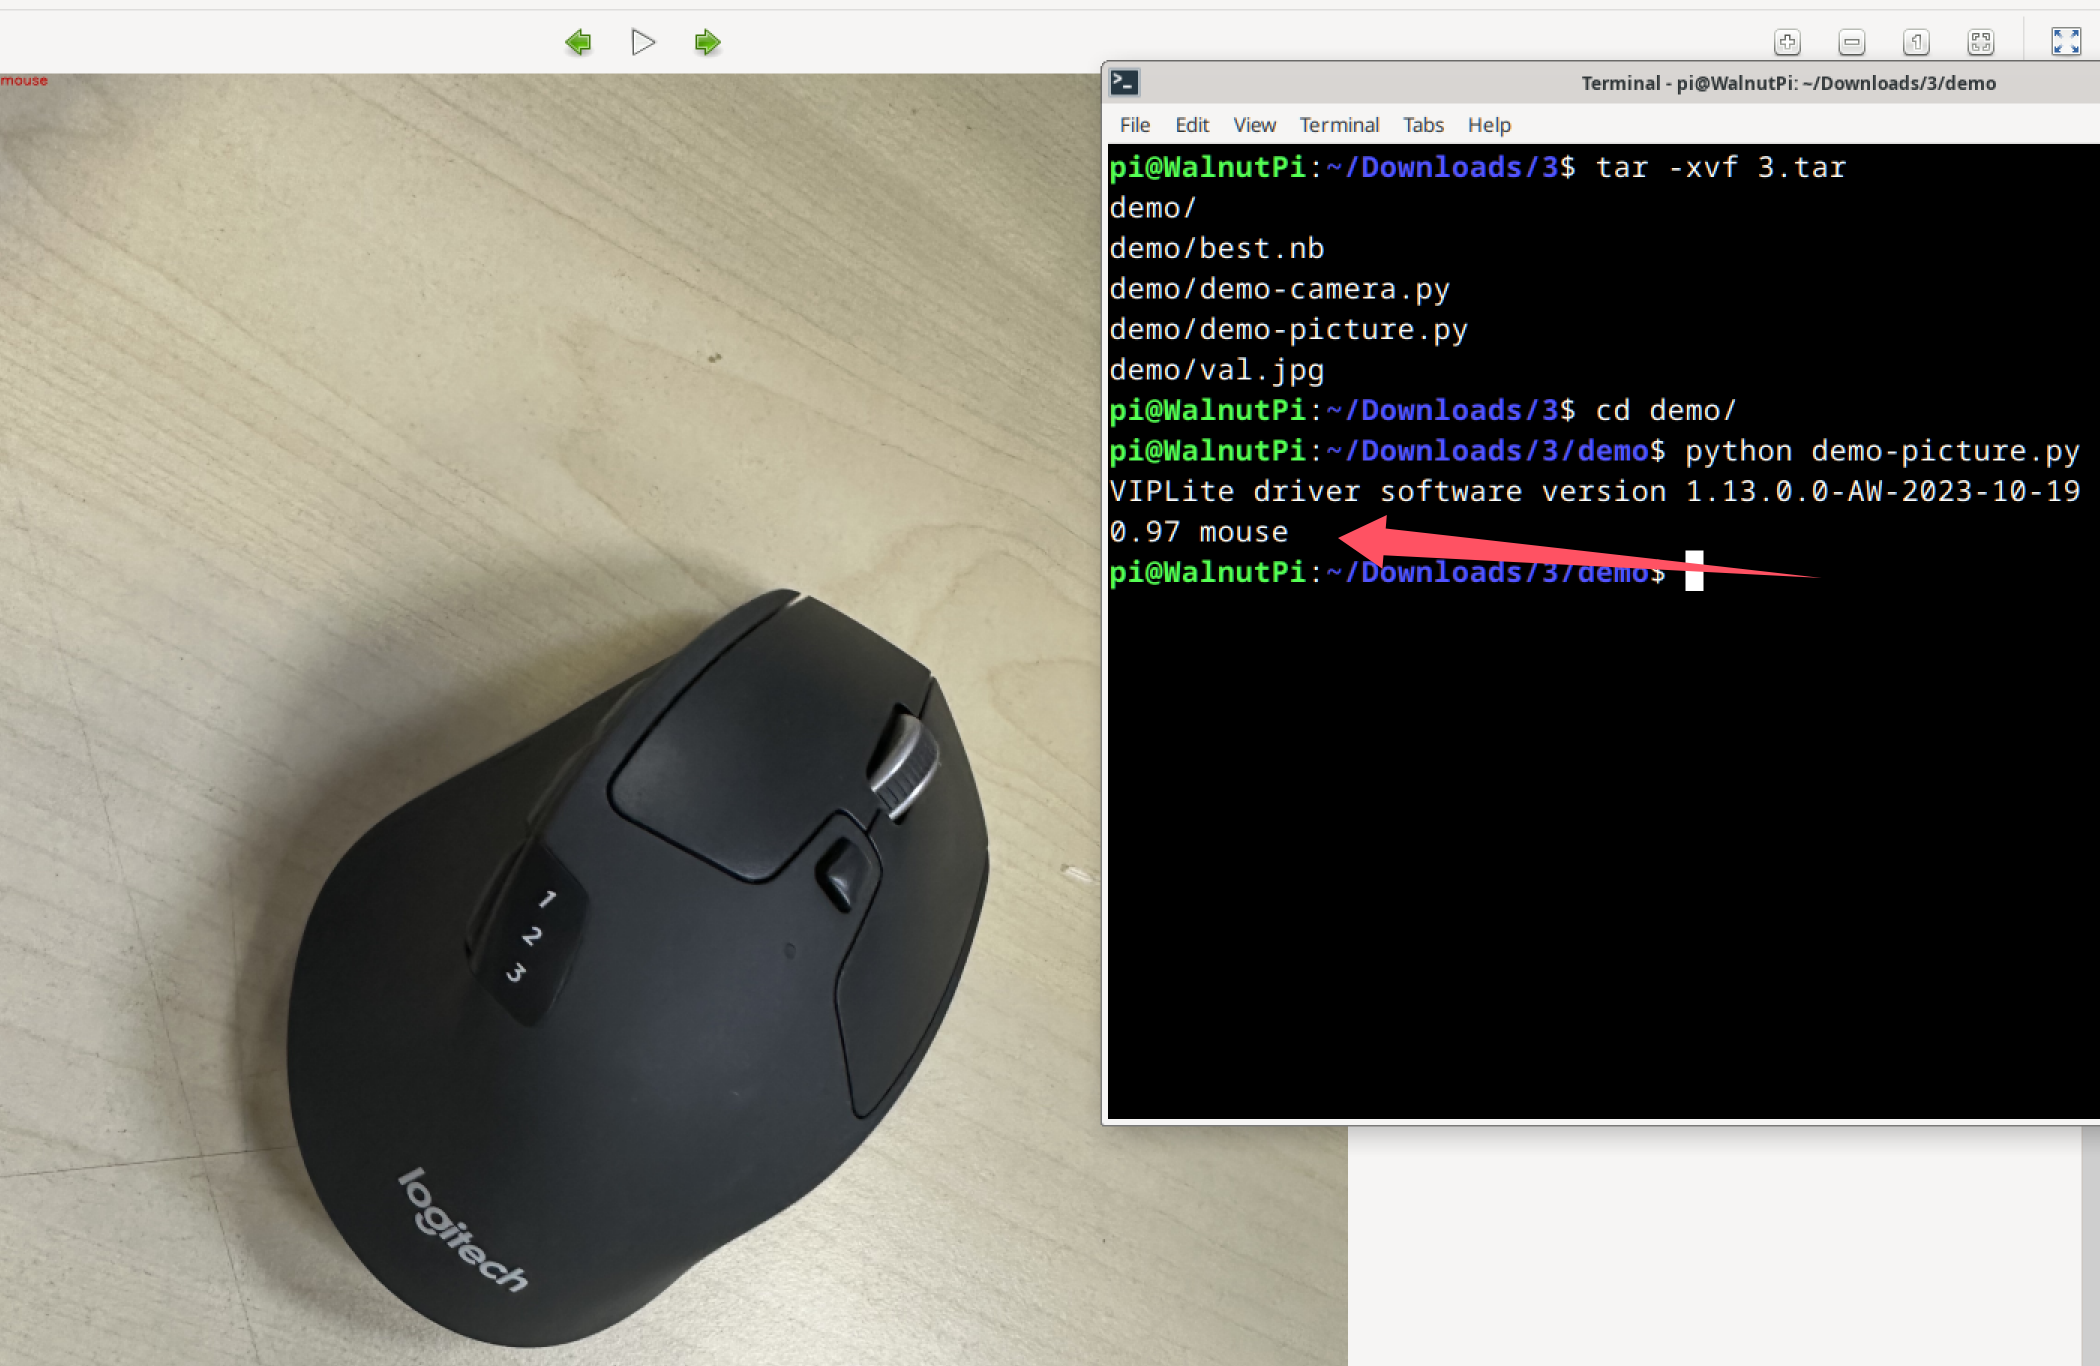
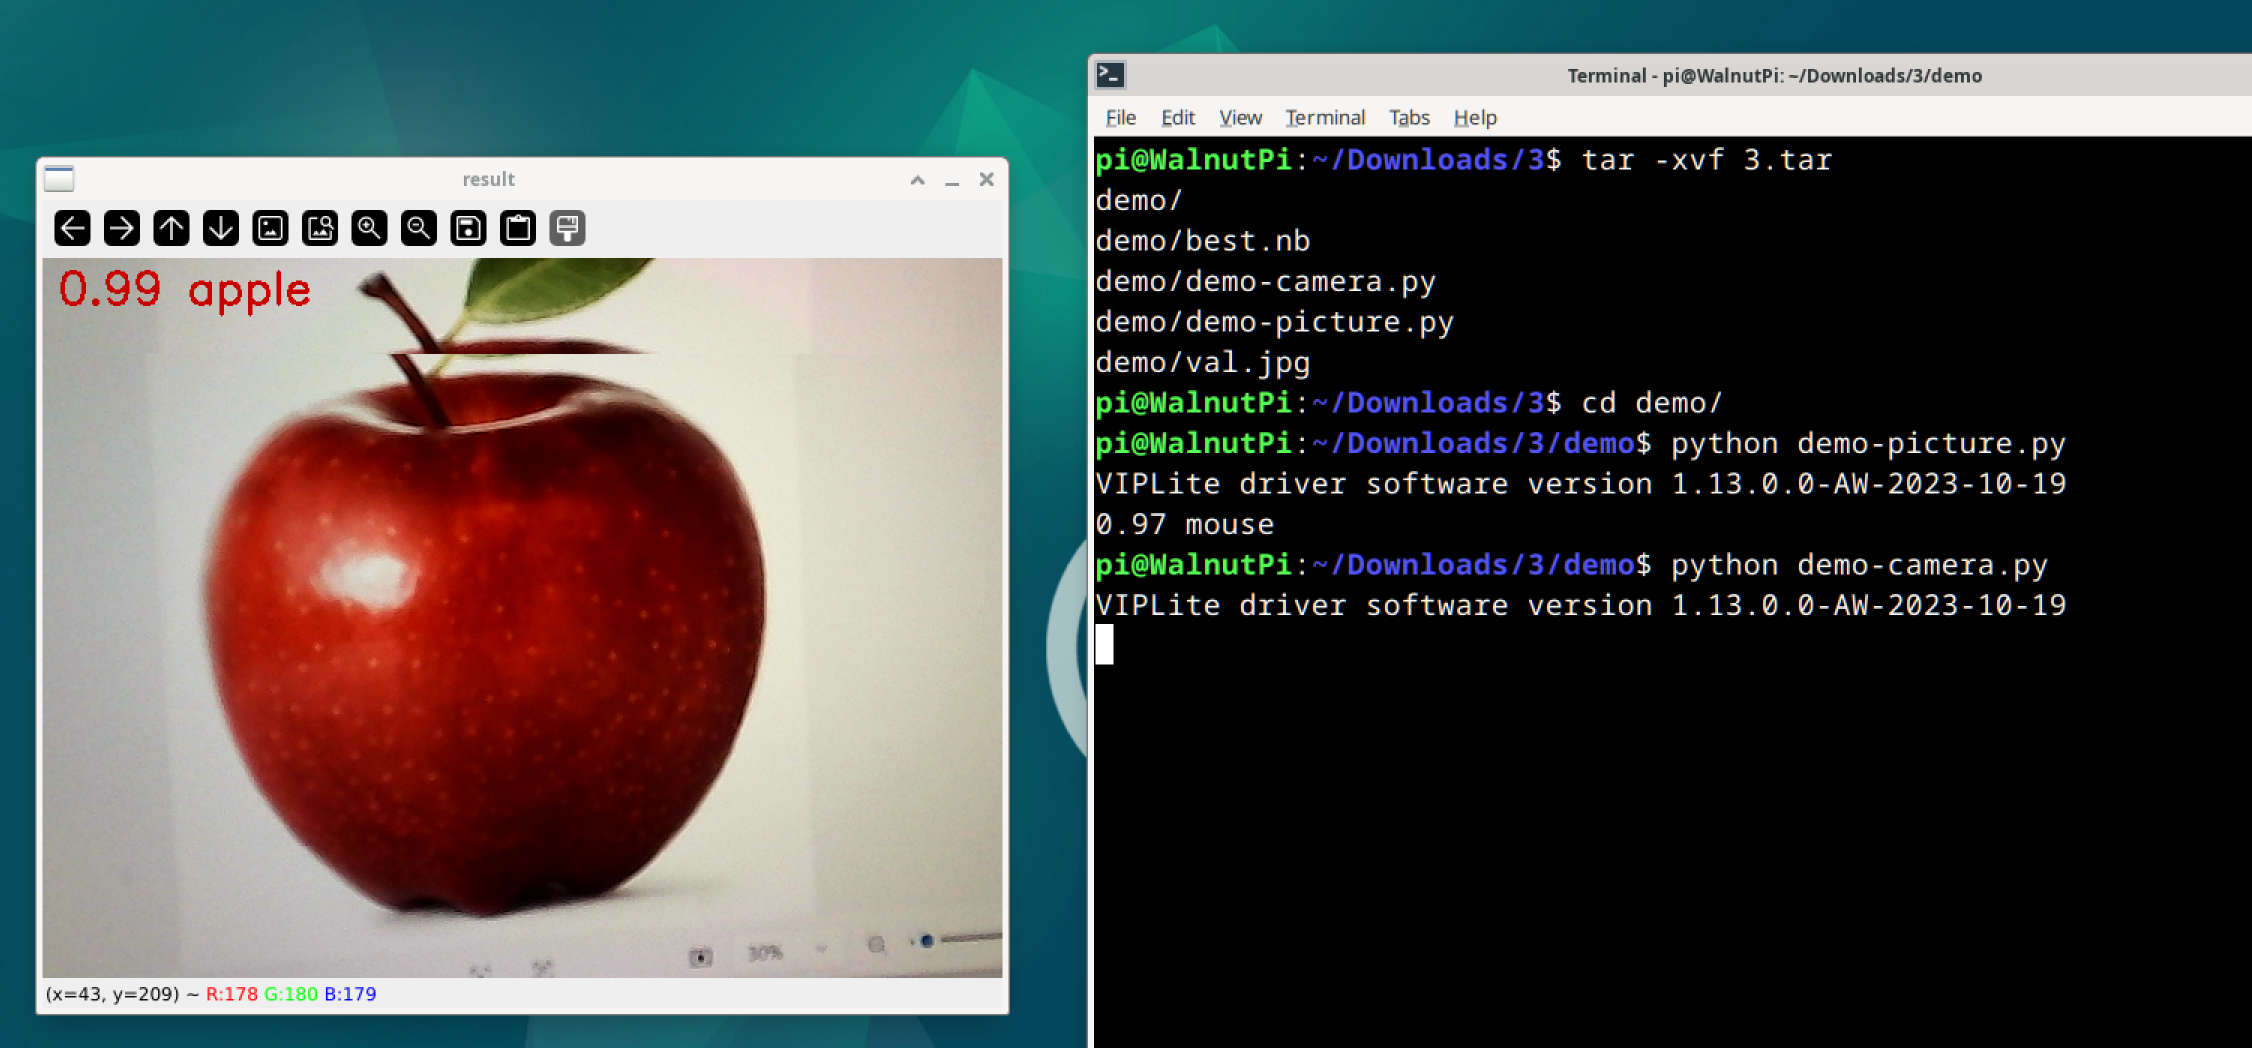
Use the python demo-picture.py command in the terminal, or open and run it with Thonny. You can see the recognition result is mouse, with a confidence of 0.97 (max 1). At the same time, result.jpg is returned in the current path, with recognition info in the top left corner of the image.
Camera-Based
Connect a USB camera to WalnutPi 2B:
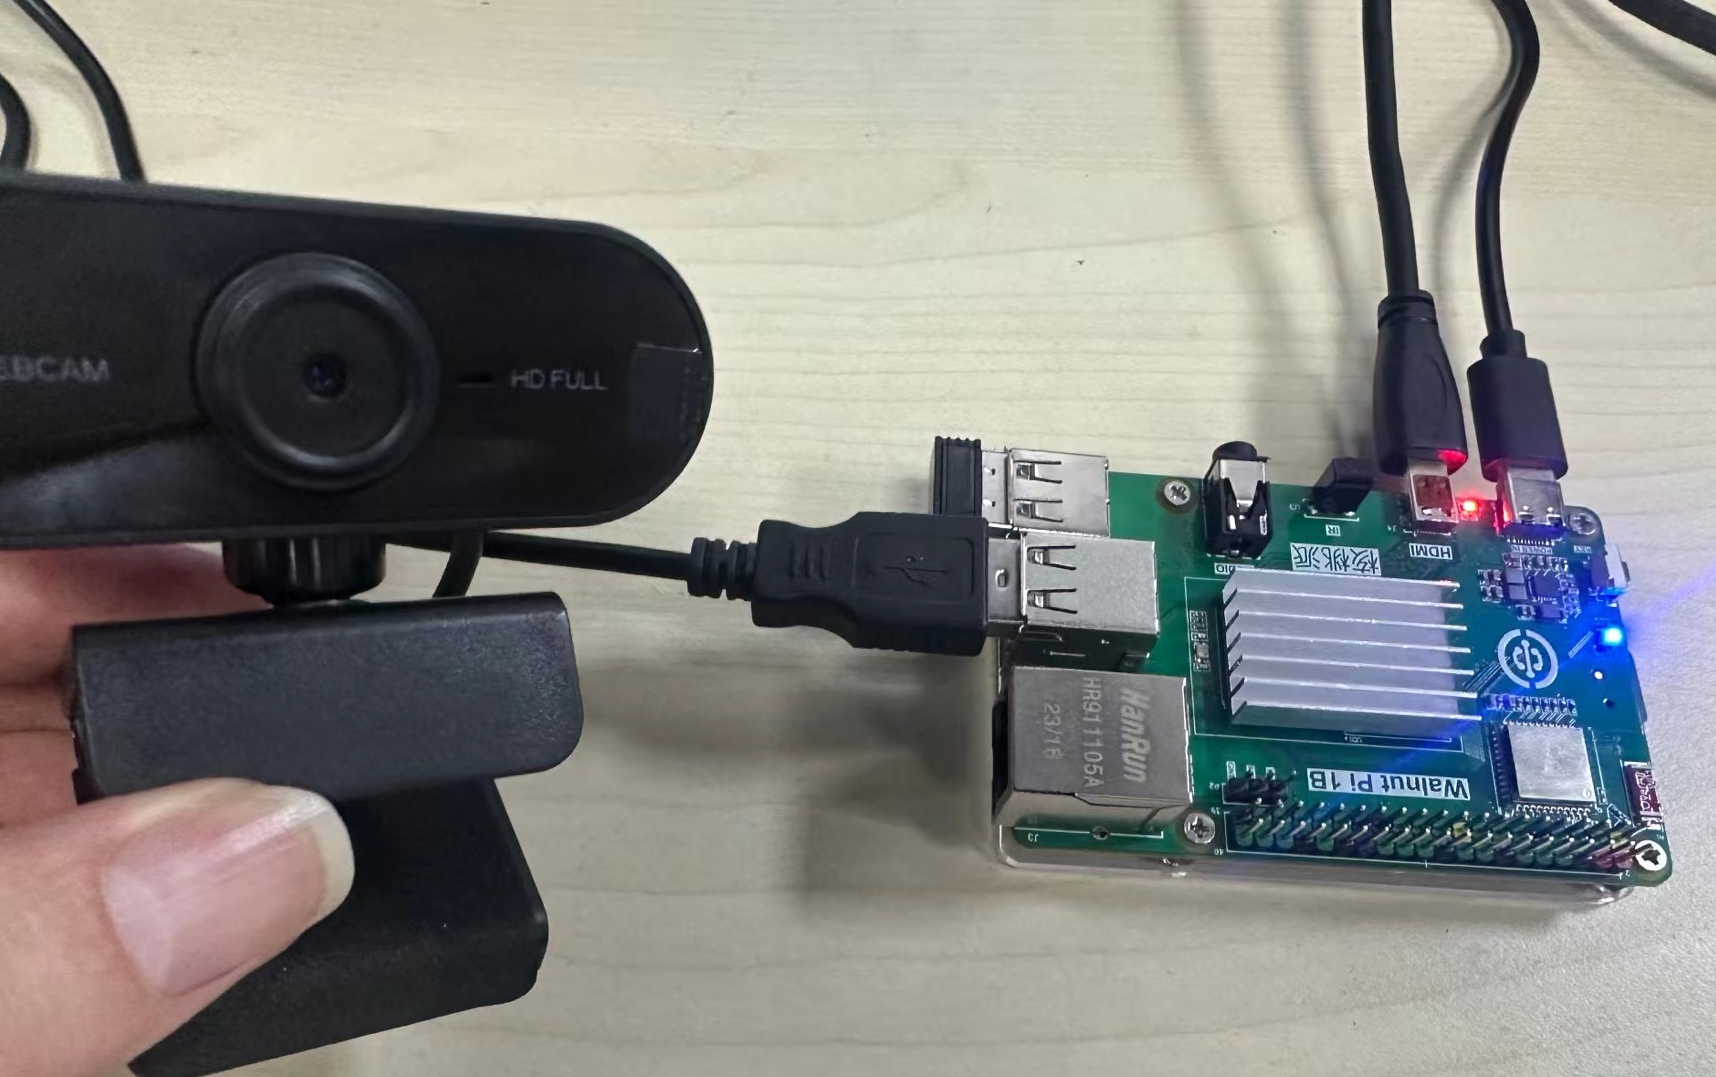
Run the command in the terminal: python demo-camera.py. A camera image display window will appear, allowing real-time classification recognition of objects.
Training a Detection Model
Image detection identifies the types of objects trained in the images and annotates them with bounding boxes.
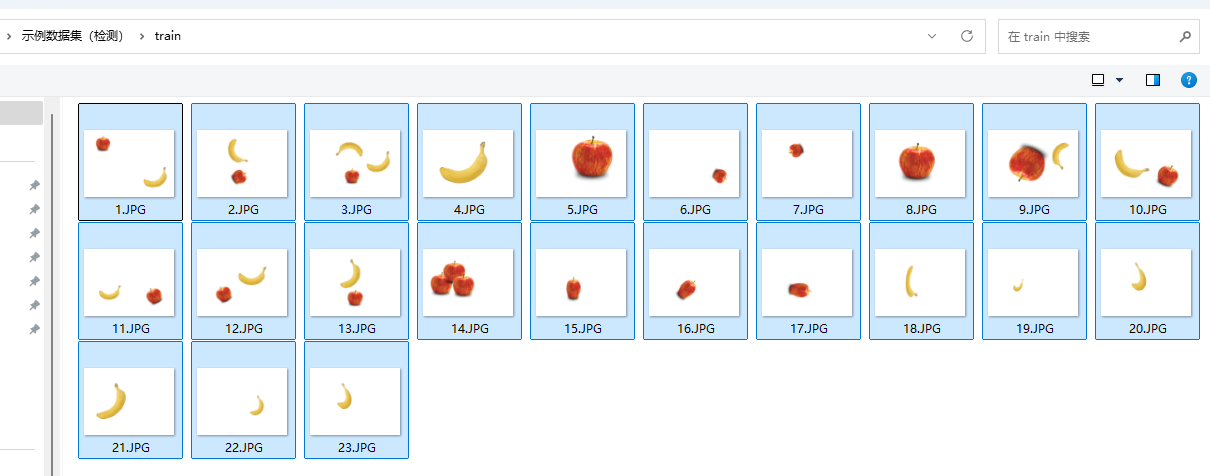
Here is a simple dataset prepared for testing. Click to download: Sample Dataset (Detection). It contains dozens of images of apples and bananas, each with an already annotated label.txt file.
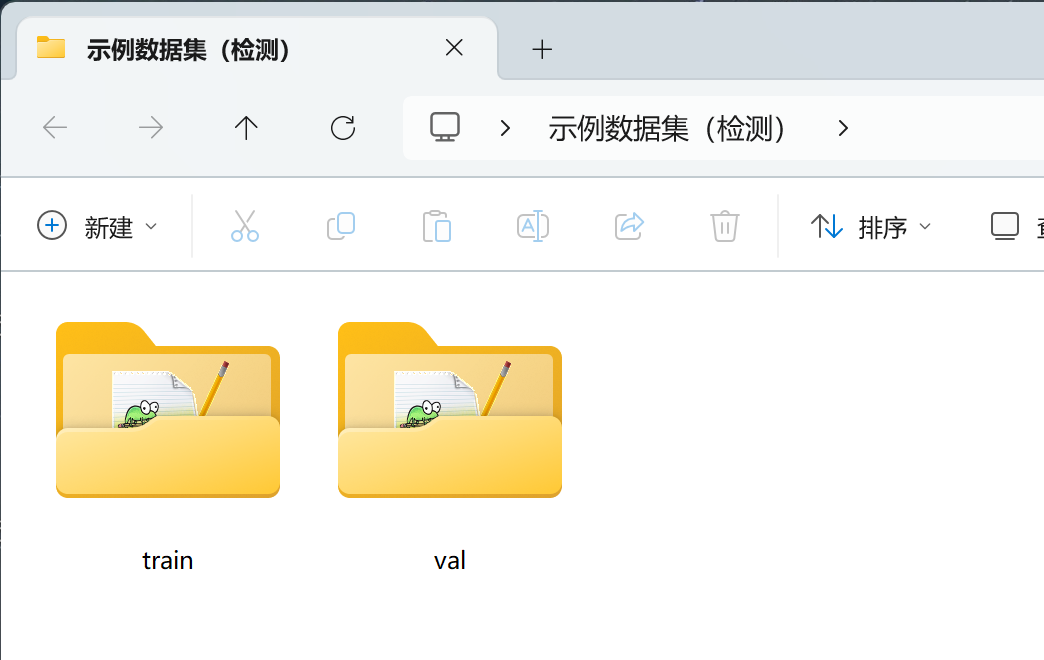
The "train" folder contains the training set, and the "val" folder contains the validation set.
Creating a Dataset
Click Model Training--Dataset--Create Dataset:
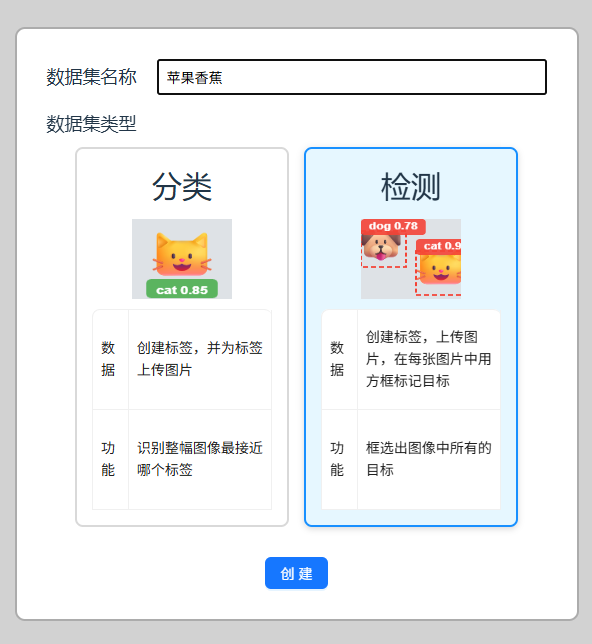
Enter the dataset name (custom), select detection, and click create.
You can see a new dataset has been created.

Dataset ID: Unique number for all datasets;Dataset Name: The user-defined dataset name;Type: Visual recognition type, here it is classification;Created Time: The creation time of the dataset;Last Updated: The last editing time of the dataset;Actions: Includes edit and delete buttons (deletion is currently irreversible).
Click the [Edit] button to enter the dataset editing page, then click upload images:
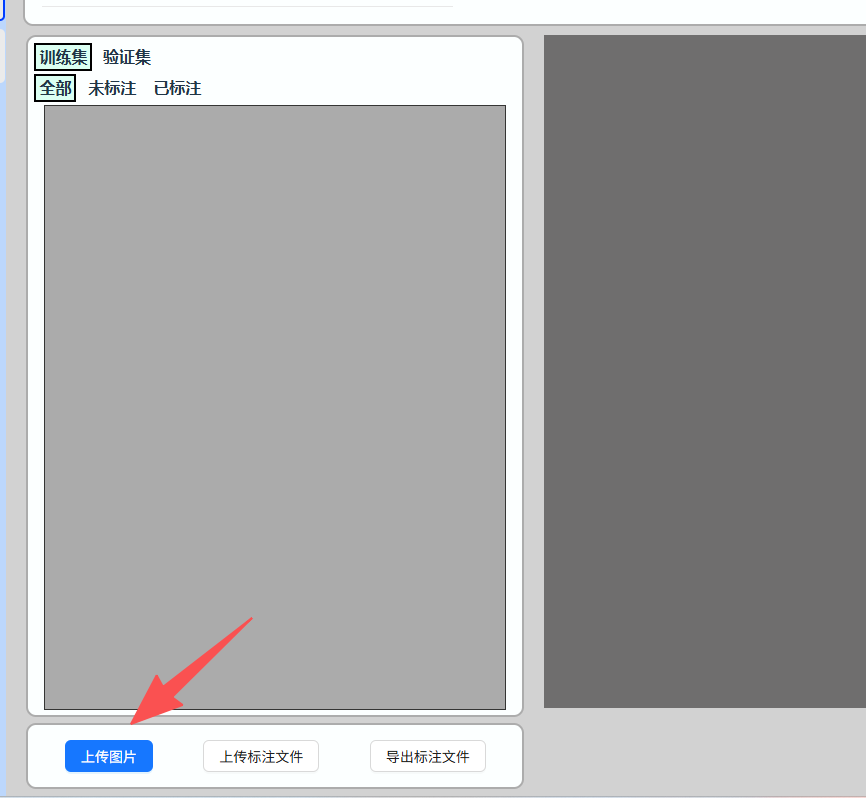
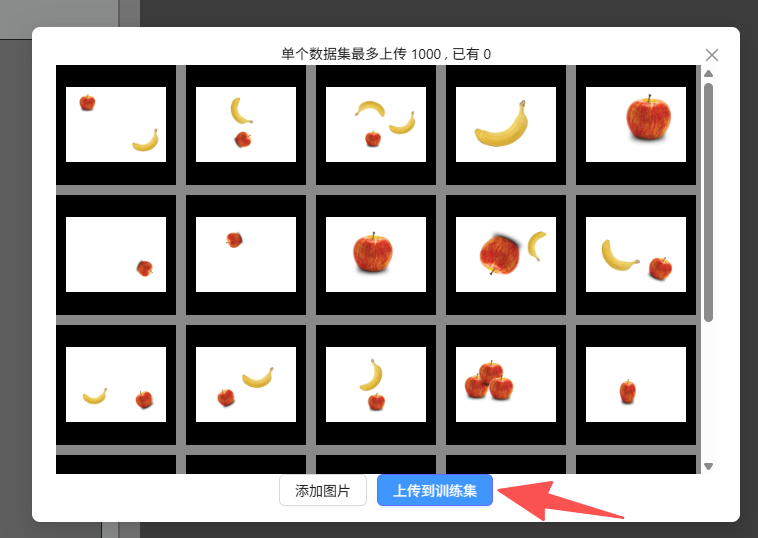
First upload to the training set:

Add and upload all images from the "train" folder of the sample dataset.
Create a label on the right with the name apple and a custom color.
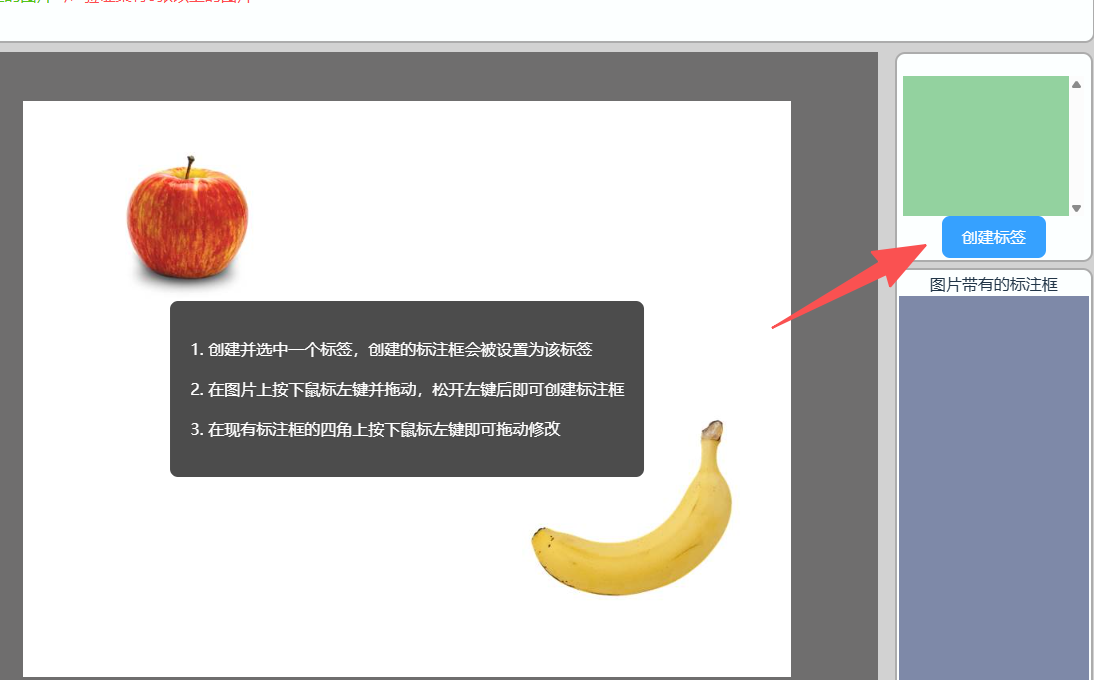
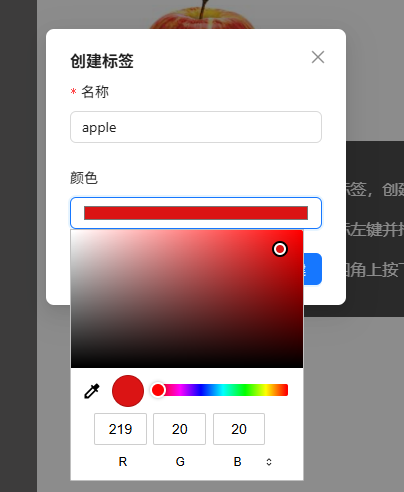
After creation, it looks like this:

Then create a banana label banana. (Tip: After creating, click the small button on the right to re-edit)
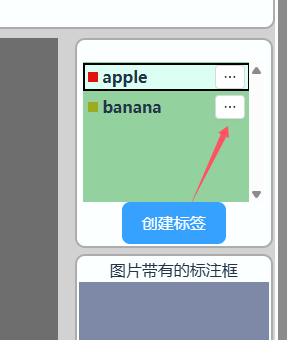
Image Annotation
Next, we can annotate the images. Start from the first image:
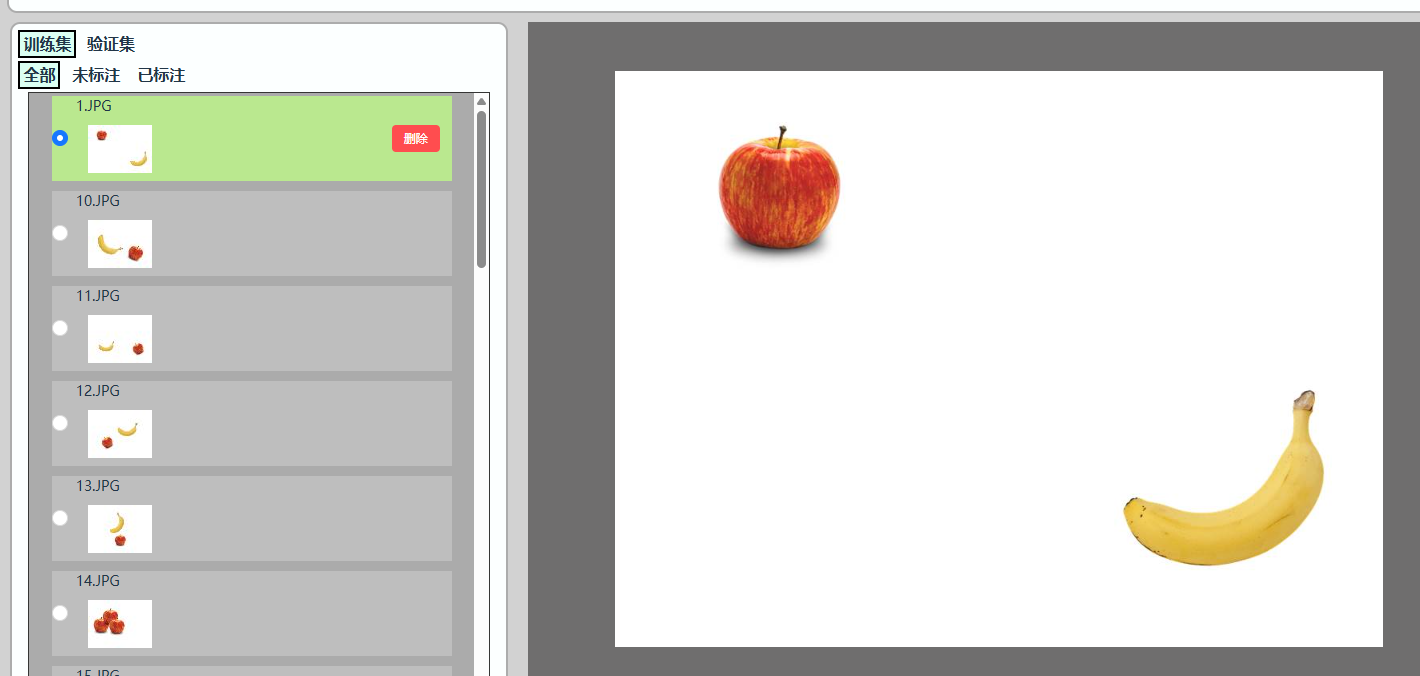
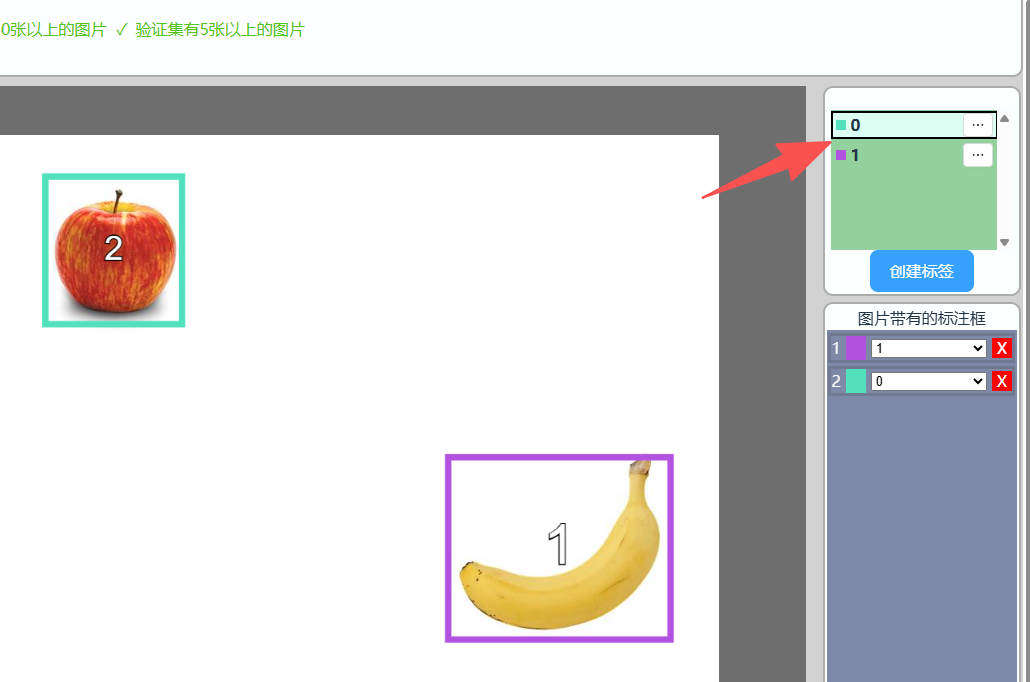
First select the apple label in the label bar, then use the mouse to draw a box around the apple. Once done, it looks like the image below: a box on the left with the number 1 inside, and annotation box info on the bottom right.
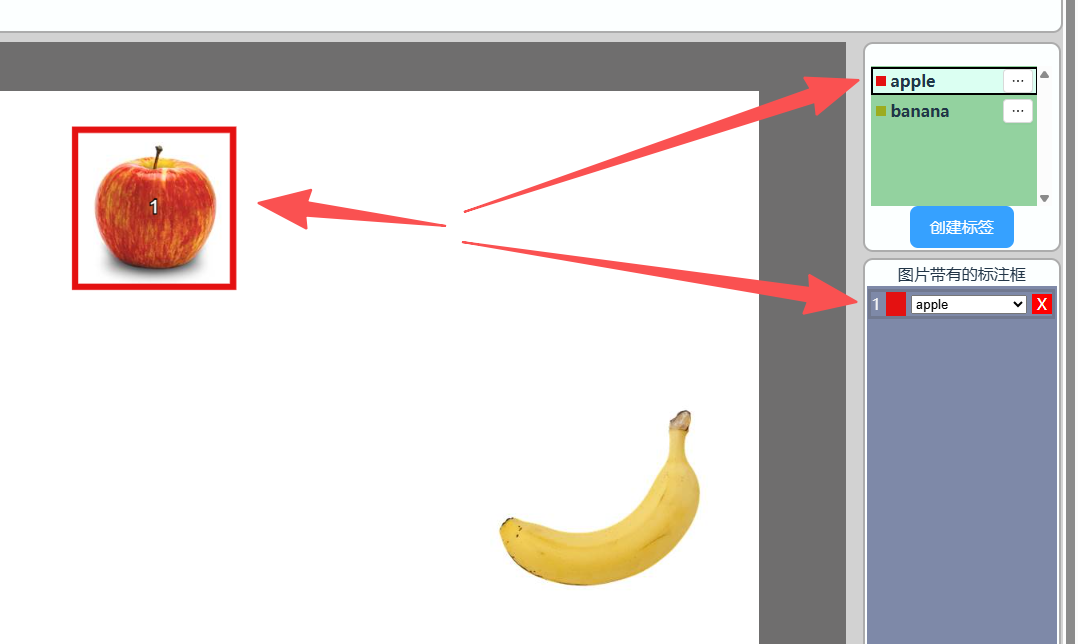
Use the same method to annotate the banana as well.
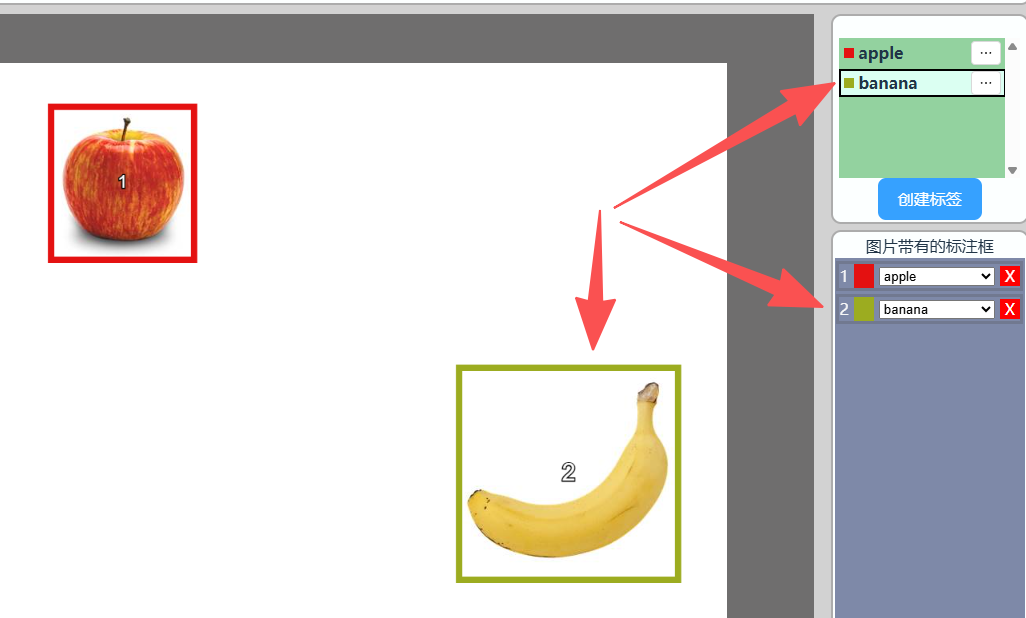
Finally, use the same method to annotate the apples and bananas in all images.
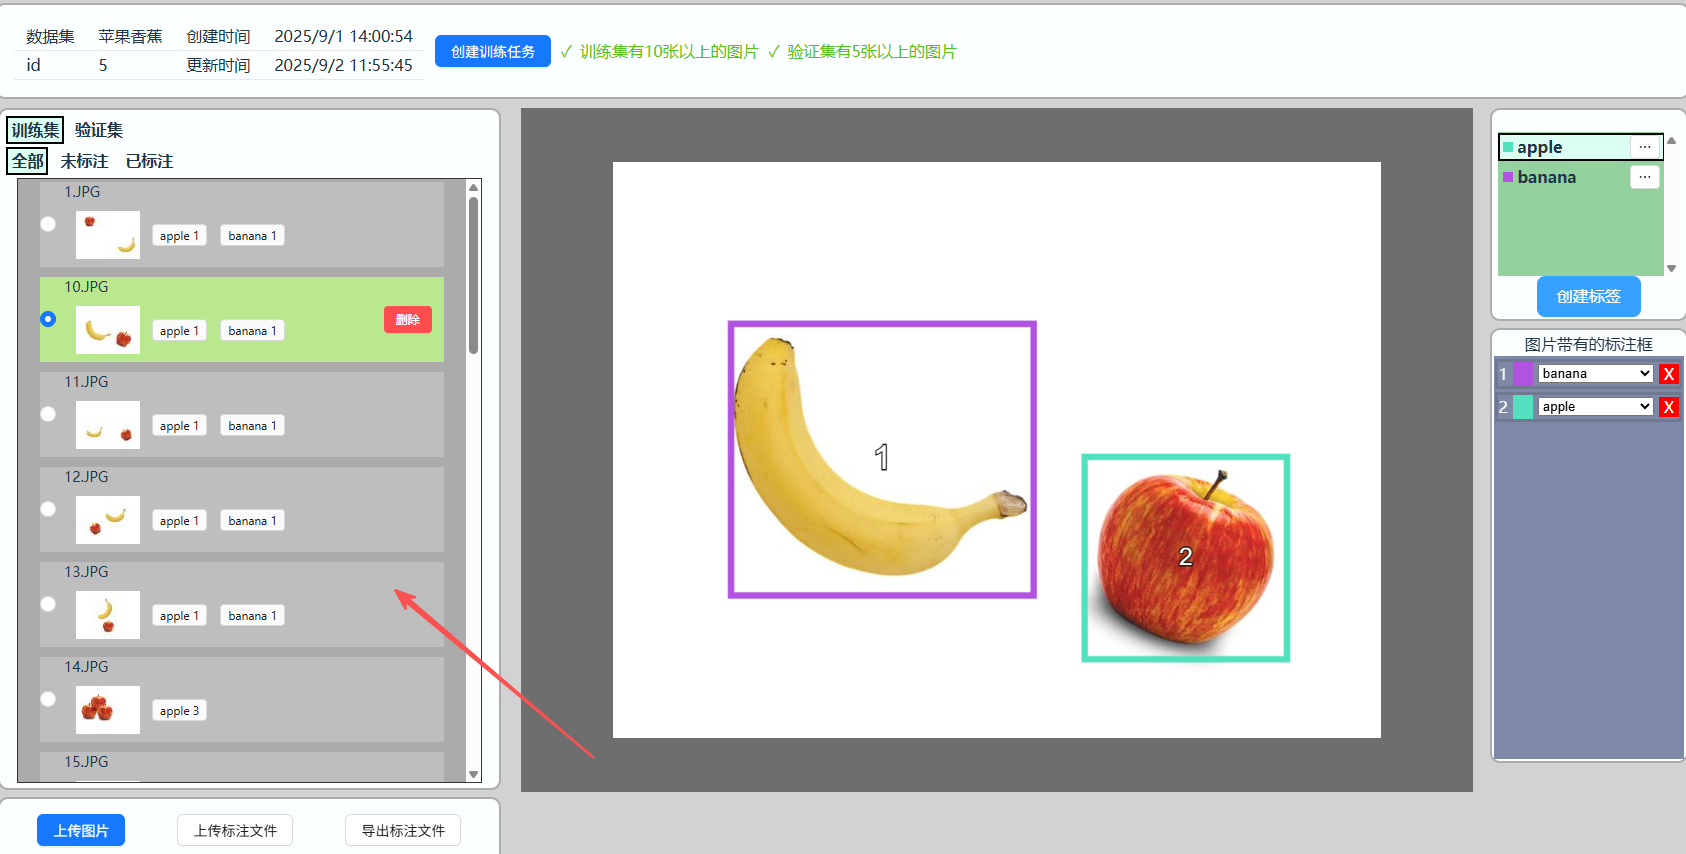
After the training set annotation is complete, upload the val folder images to the validation set. The training set is used for training, and the validation set is used for assessment after each training round. The number of validation set images should generally be about 10%~30% of the total dataset.
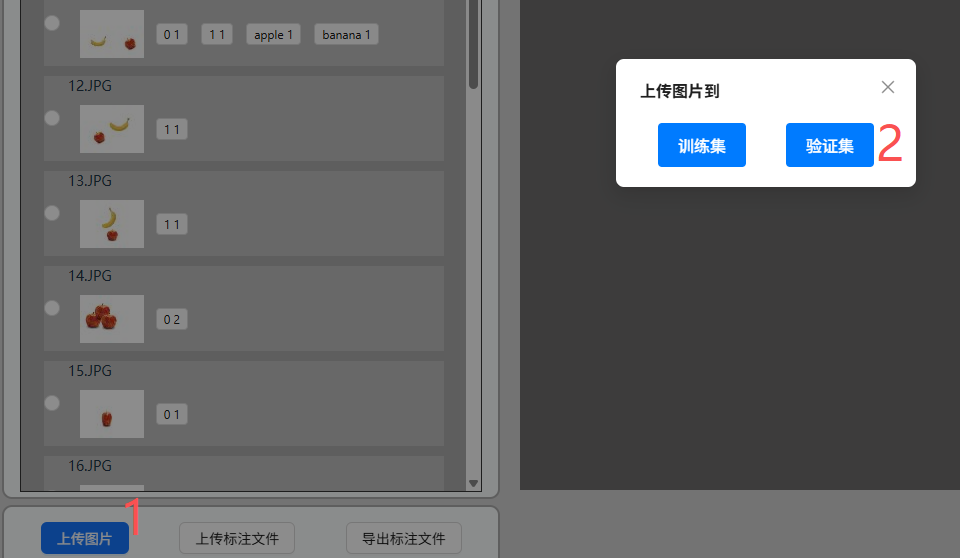
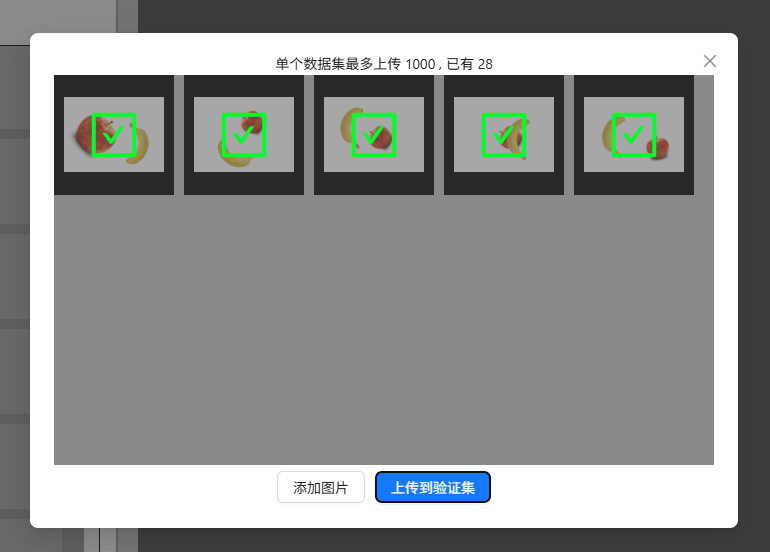
Then use the same method as the training set to annotate.
The following position allows you to filter the training set, validation set, and whether images have been annotated.

The detection dataset annotation is now complete.
The platform currently supports uploading and exporting annotation files, only supporting YOLO TXT format. Each TXT file corresponds to all annotation targets of one image, with each line representing one target in the format:
<class_index> <center_x> <center_y> <width> <height>
The sample detection dataset contains annotation info files with the same name as the images (txt files). They can be directly uploaded and imported.

Click upload annotation file:
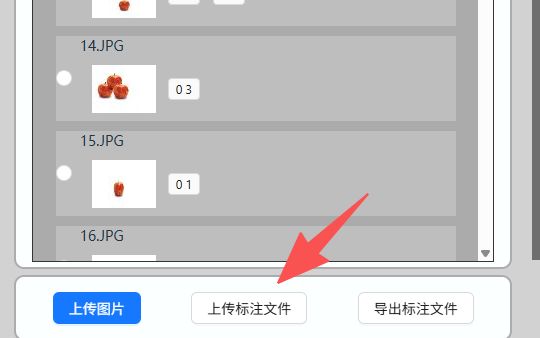
After import, if the label names are inconsistent, manually modify them.
Start Training
After completing annotation, click [Create Training Task] above the dataset:
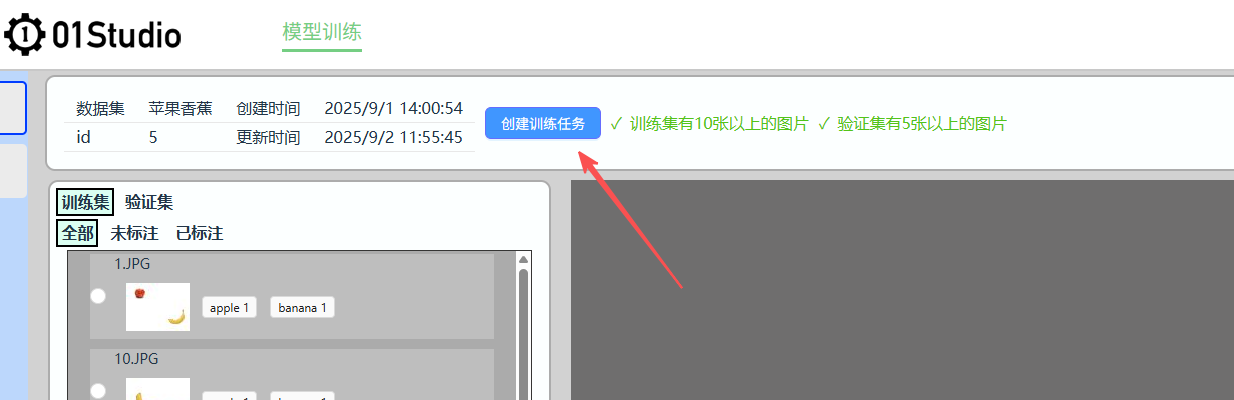
Configure training parameters: Generally, the default configuration is fine.
Target Board: Select WalnutPi 2B here;Model Type: Automatically selected based on the dataset;Model Scale: For development boards, generally choose n or s, as others may not run.Training Epochs: The platform allows a maximum of 500 epochs;Model Size: Larger values improve accuracy but increase runtime. Generally recommended 224 or 320.Batch Size: Default is 16. If there are many images (around a thousand), you can select 32 to improve training speed;Max Learning Rate (lr0): Default is 0.01, usually no need to adjust;
After clicking [Submit], you will automatically be redirected to the training interface:
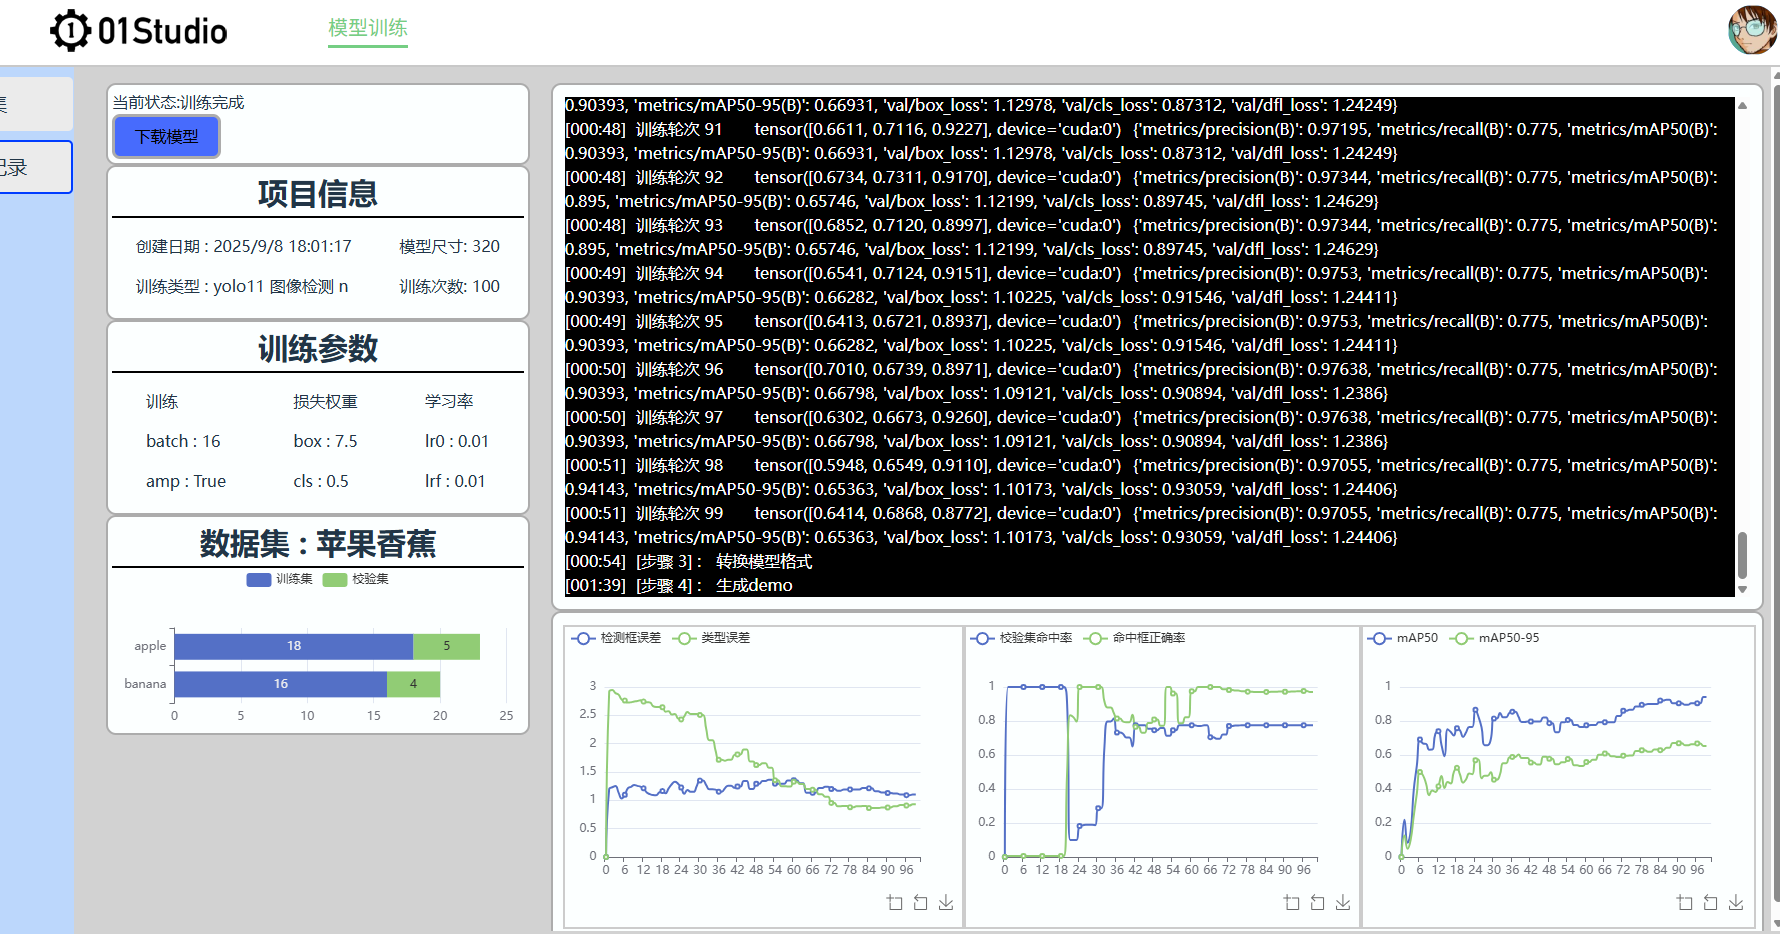
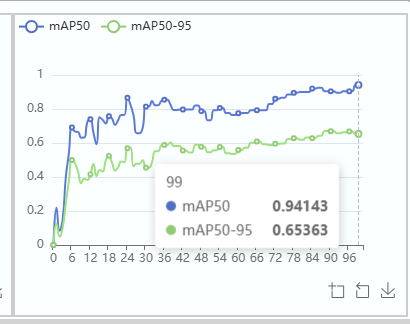
The left side shows project information, the top right shows training logs, and the bottom right shows training result charts. Taking the example below, after 100 epochs of training, the final mAP50 value is 0.94 (>0.8), and the mAP50-95 value is 0.65 (>0.5), with excellent results.
Click the left navigation bar--Training Records to see all training project information. Click the [Details] button on the right to enter:
After training is complete, you can click the [Download] button to download the model and code files.
Deployment and Running
After downloading, copy to WalnutPi 2B via USB drive or other methods. The desktop version system is recommended to conveniently observe camera or image recognition results.
You can also open https://ai.01studio.cc in the desktop version WalnutPi system browser, log in with the same account, and download the training result files from the training records.
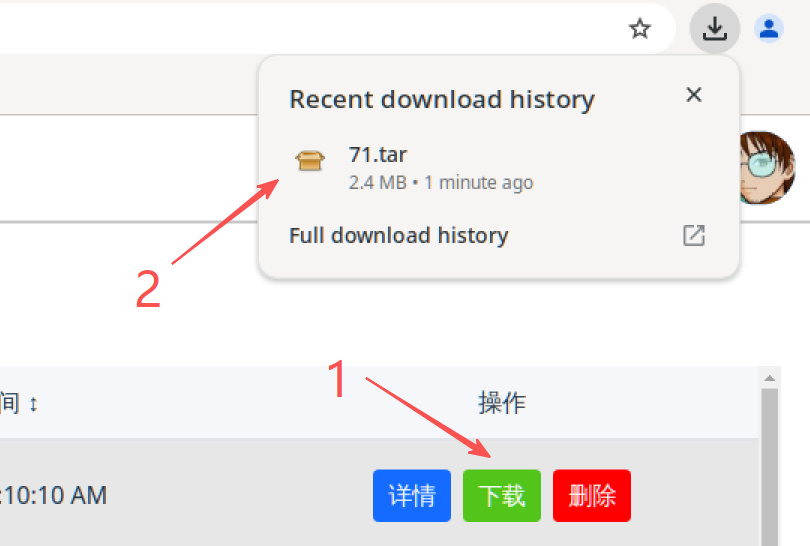
Use the command tar -xvf 71.rar to decompress (modify according to your own file name). You can see there are 4 files:
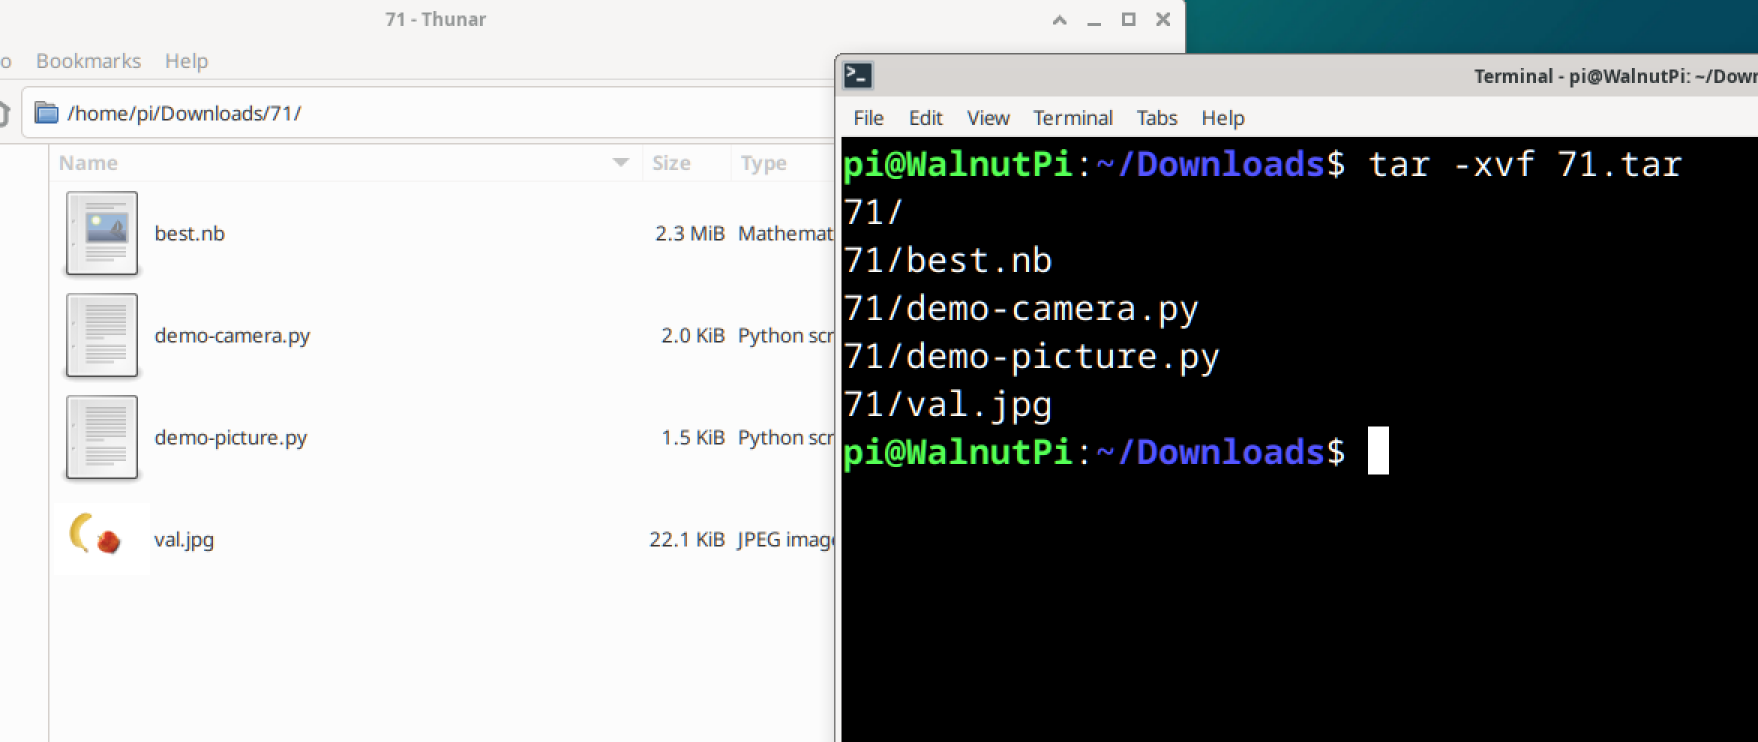
They are:
best.nb: Model file suitable for WalnutPi 2B (Allwinner T527)val.jpg: Image used for testing the picture demodemo-picture.py: Picture recognition demo, uses val.jpgdemo-camera.py: USB camera recognition
Image-Based
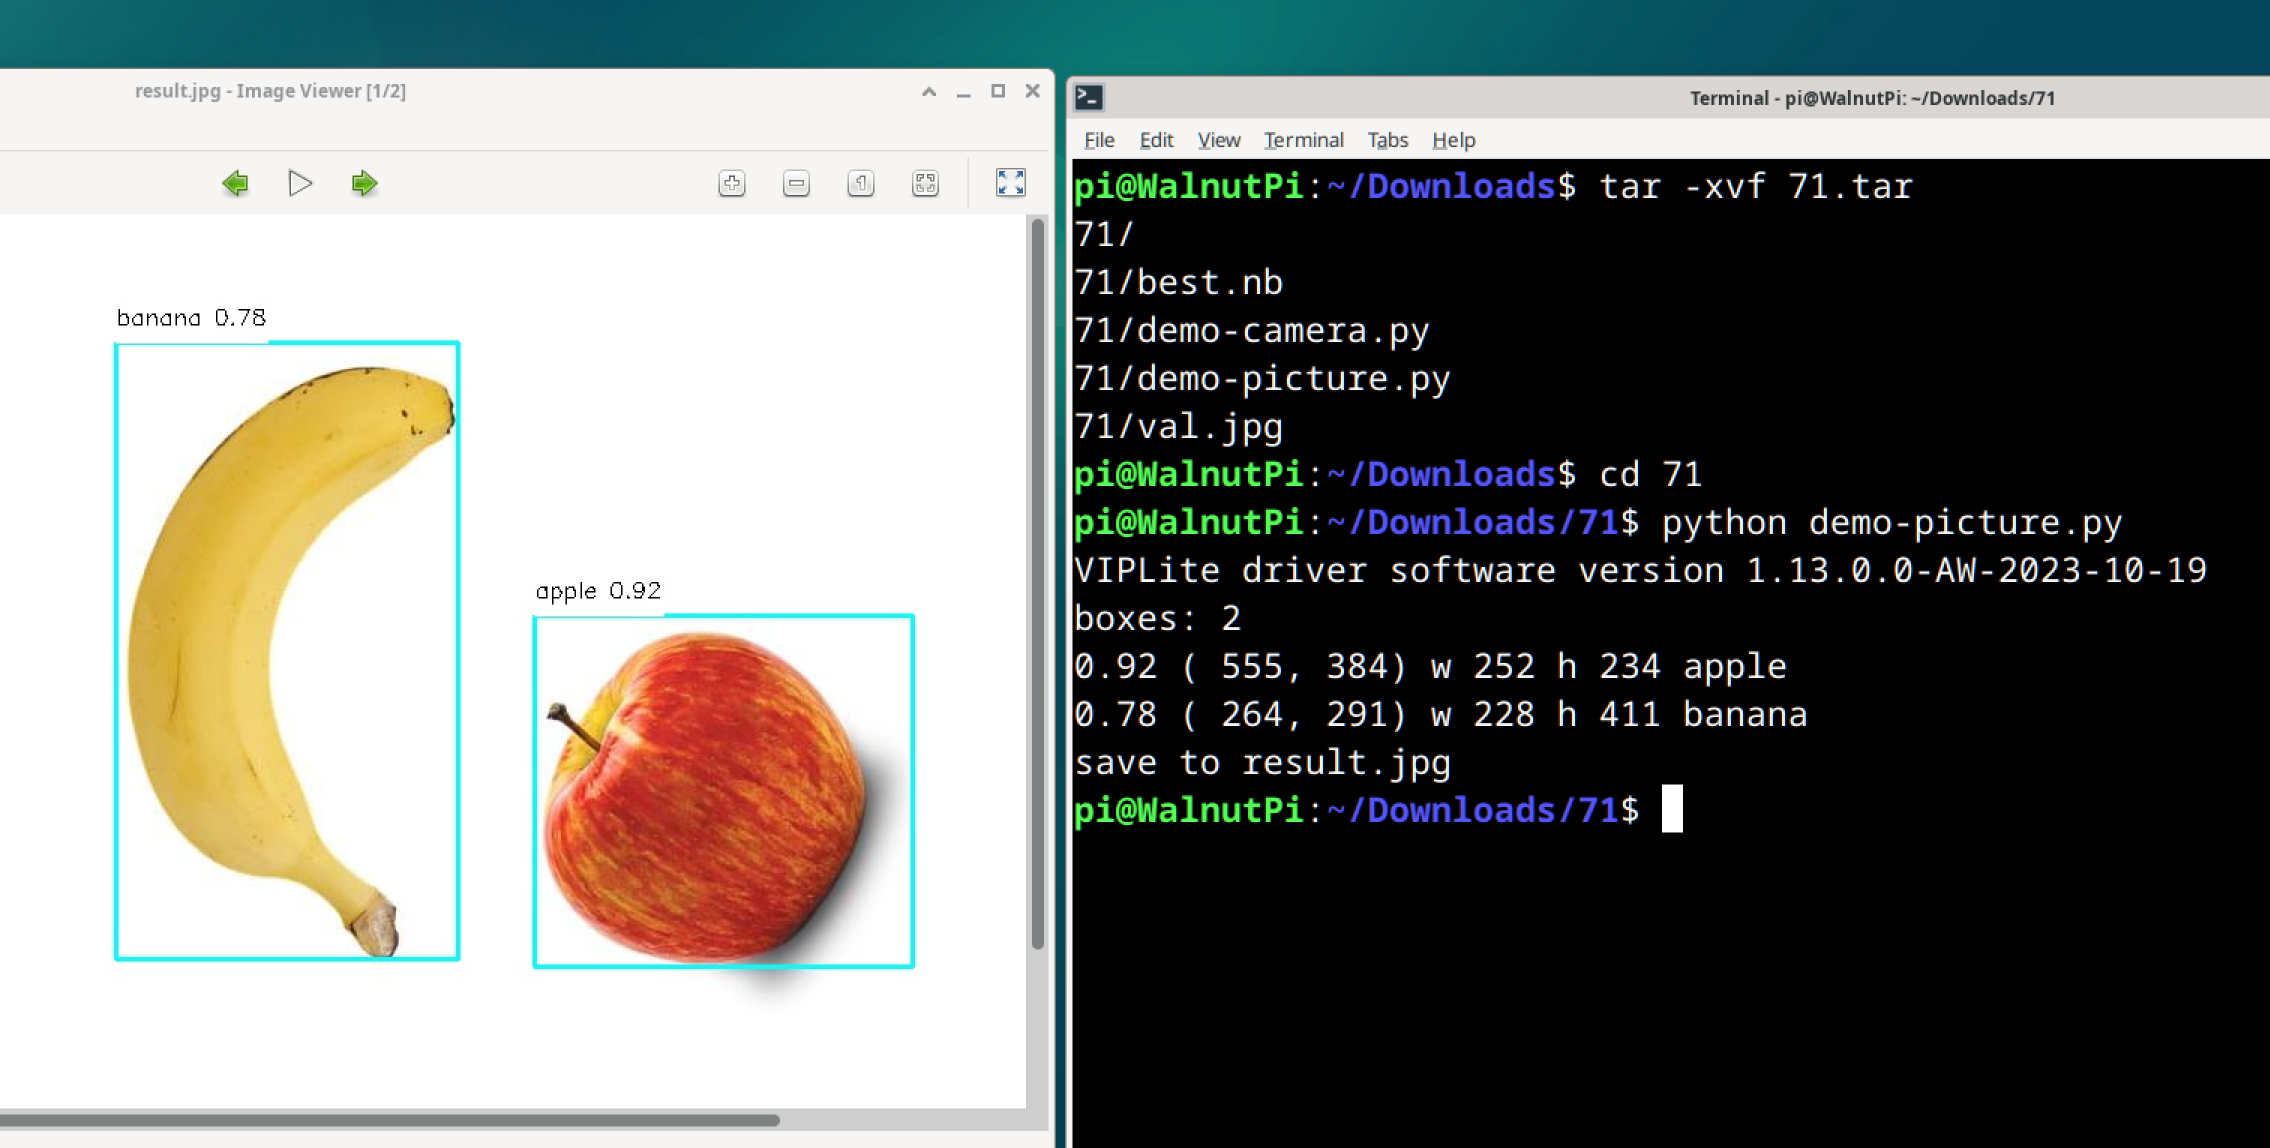
Use the python demo-picture.py command in the terminal, or open and run it with Thonny.
You can see the recognition results, with the identified fruits annotated, and the result image result.jpg returned in the current path.
Camera-Based
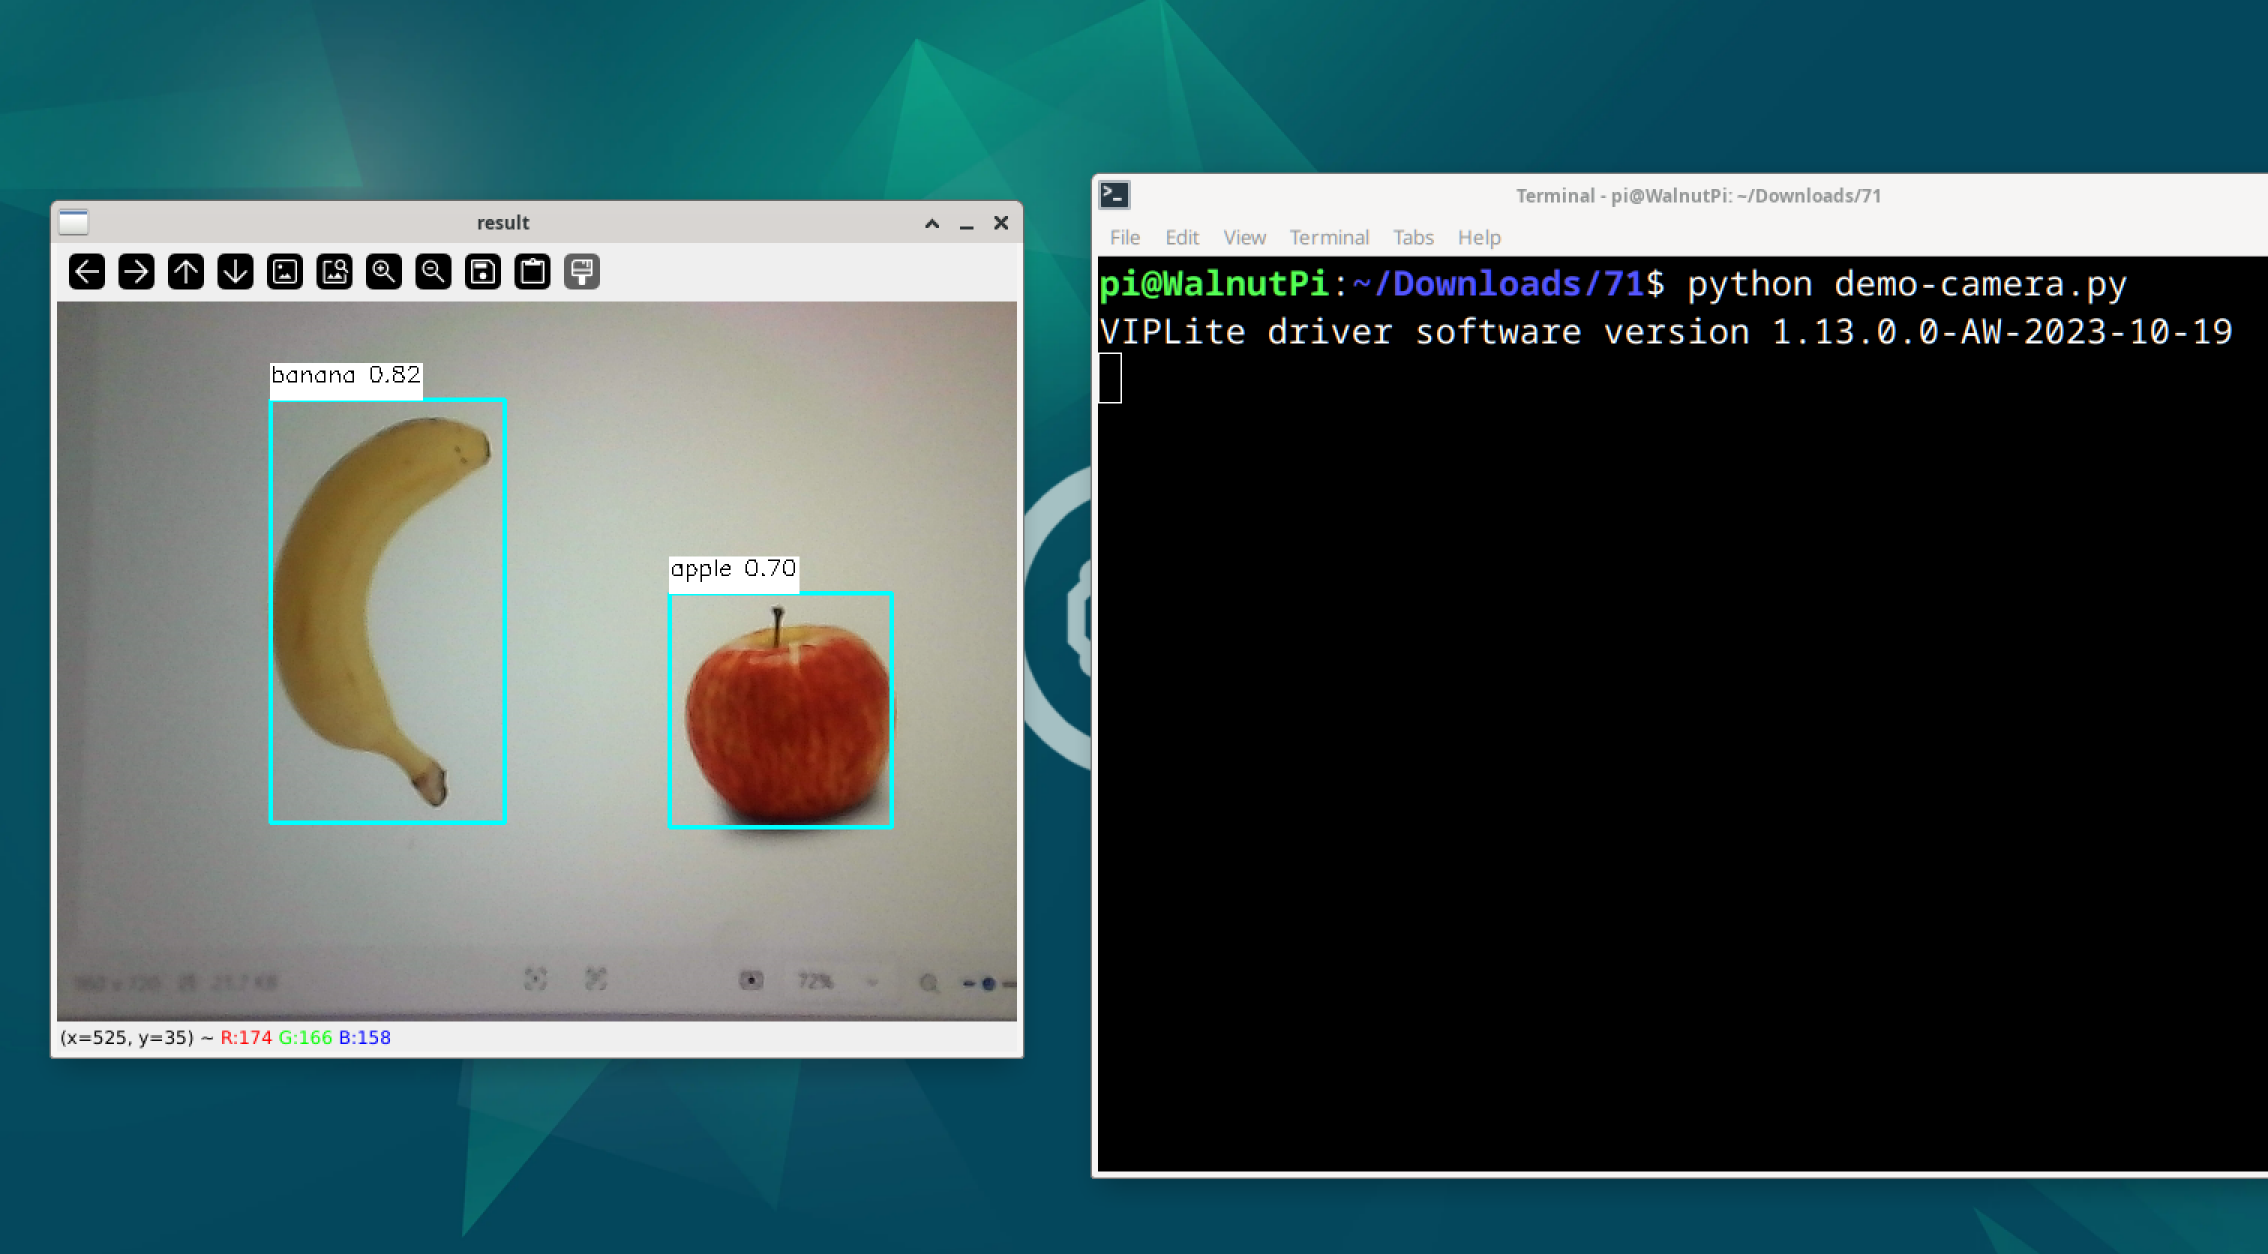
Connect a USB camera to WalnutPi 2B:
Run the command in the terminal: python demo-camera.py. A camera image display window will appear, allowing real-time detection of objects with bounding box annotation.
Model Sharing
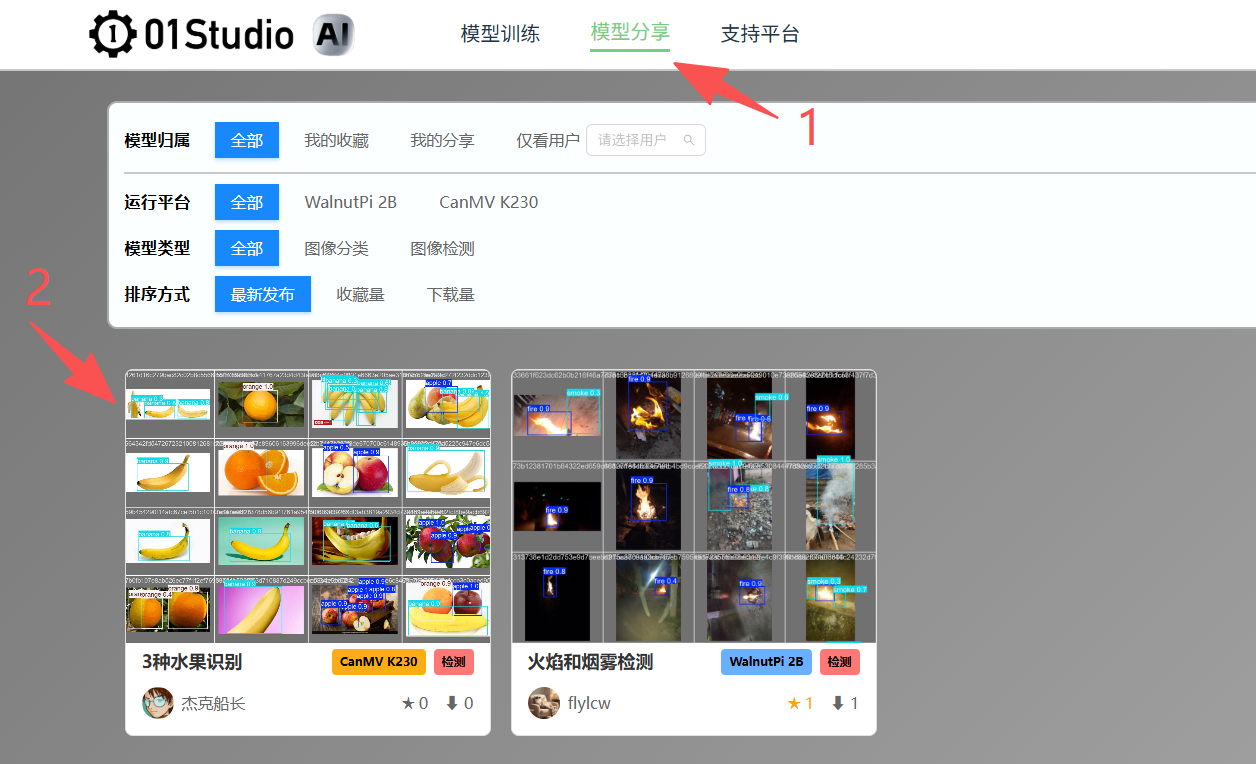
After training is complete, you can choose to share your model for other users to use, or browse the model sharing library to find a model that suits your needs.
Model Sharing Library
Link: https://ai.01studio.cc/market
Click the link to enter the model sharing library, where you can see all models shared by users. Use the filter bar at the top to filter models that suit your needs.
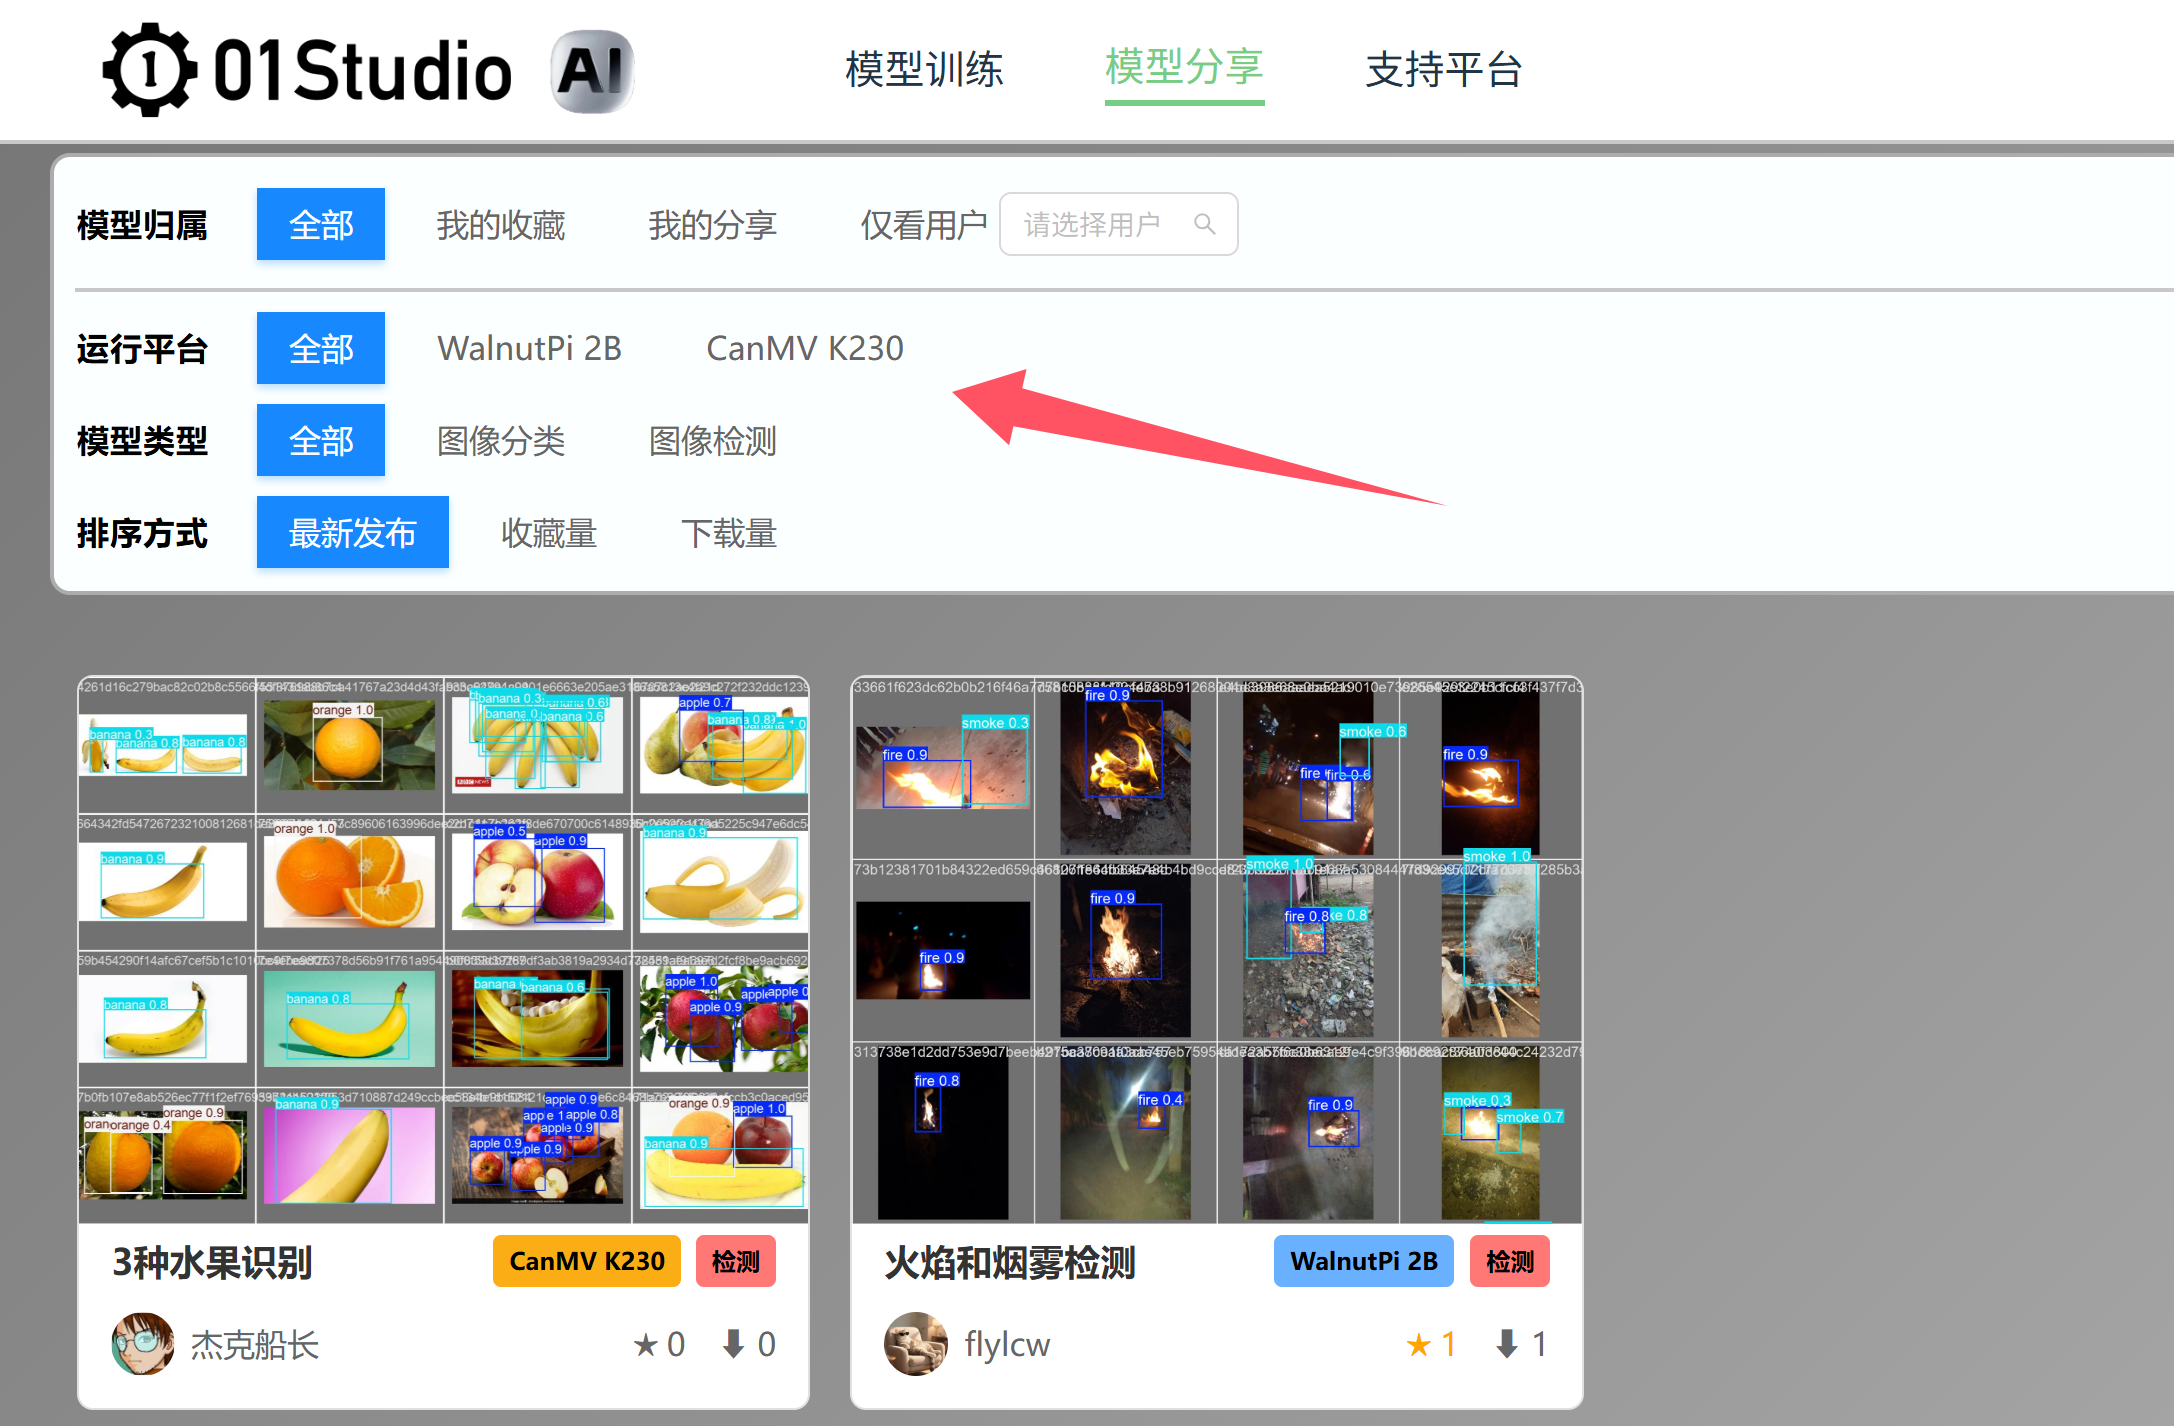
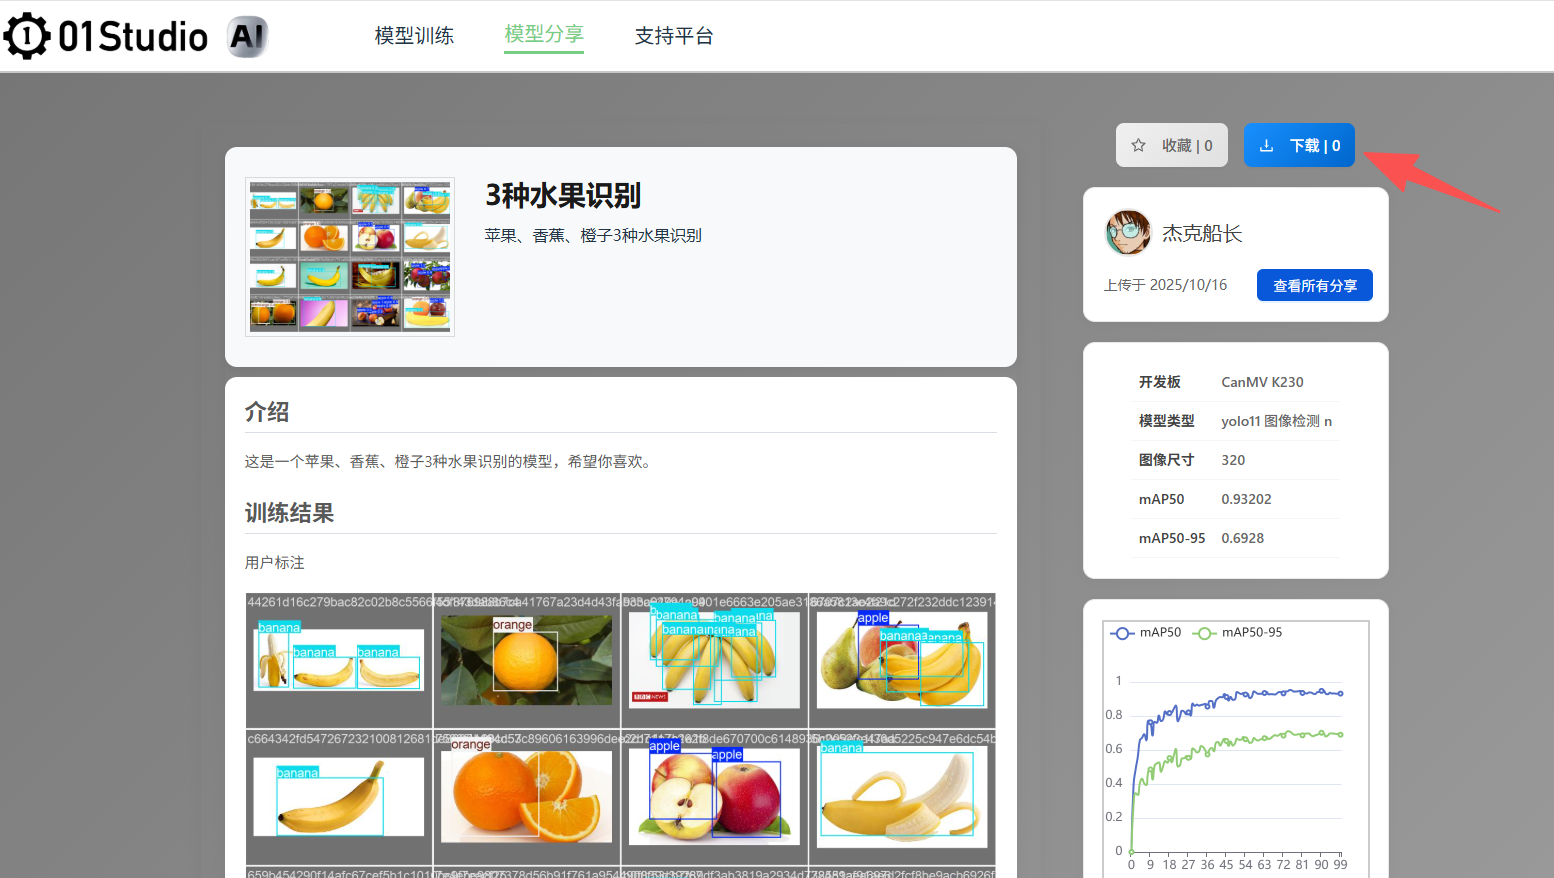
Click a model card to enter and see the detailed information of the current model. On the right, you can add to favorites and download the model for deployment on your own development board. Make sure the model development board model is consistent.
Sharing Your Own Model
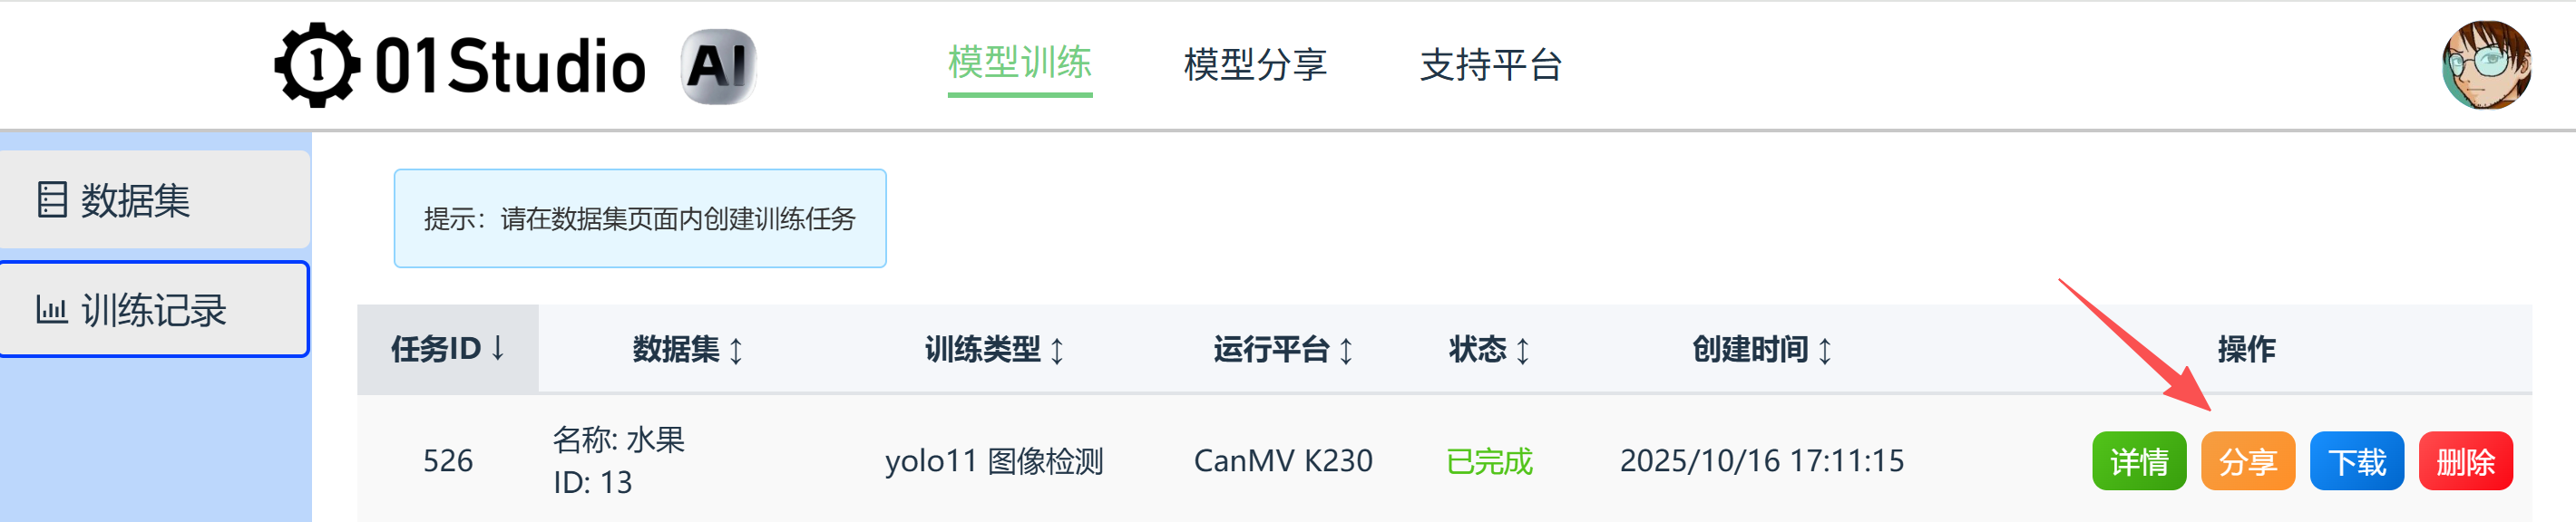
Find the successfully trained record in the training records and click the Share button:
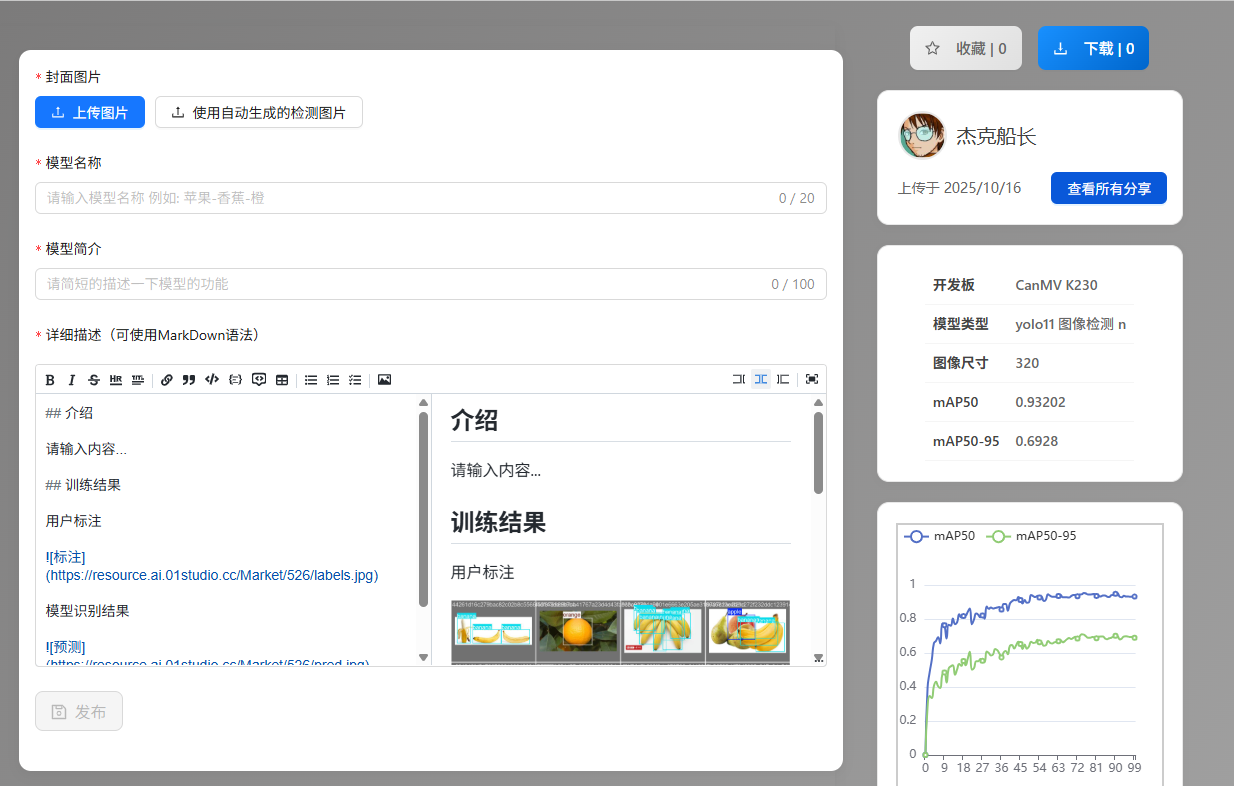
Enter the sharing editing interface. The platform will automatically generate some existing model information:
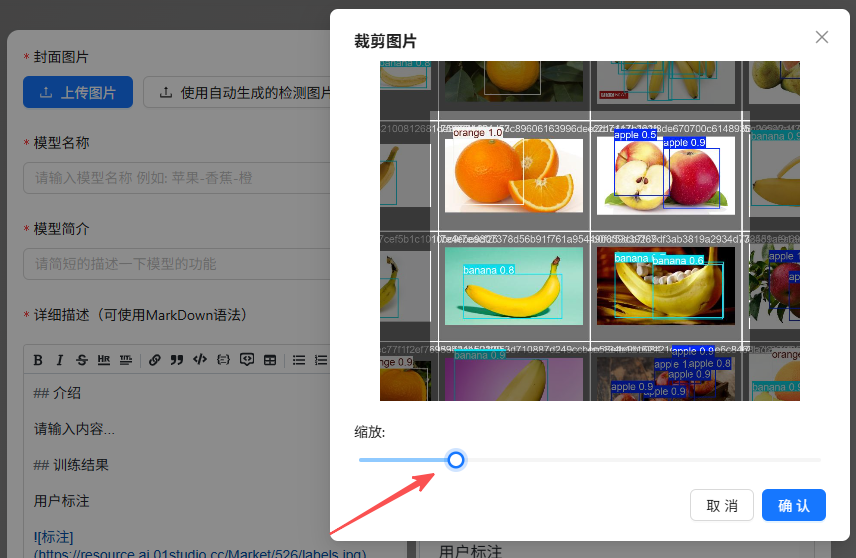
- Upload Cover
You can upload your own image or use the platform-generated image. The automatically generated detection image supports scaling.
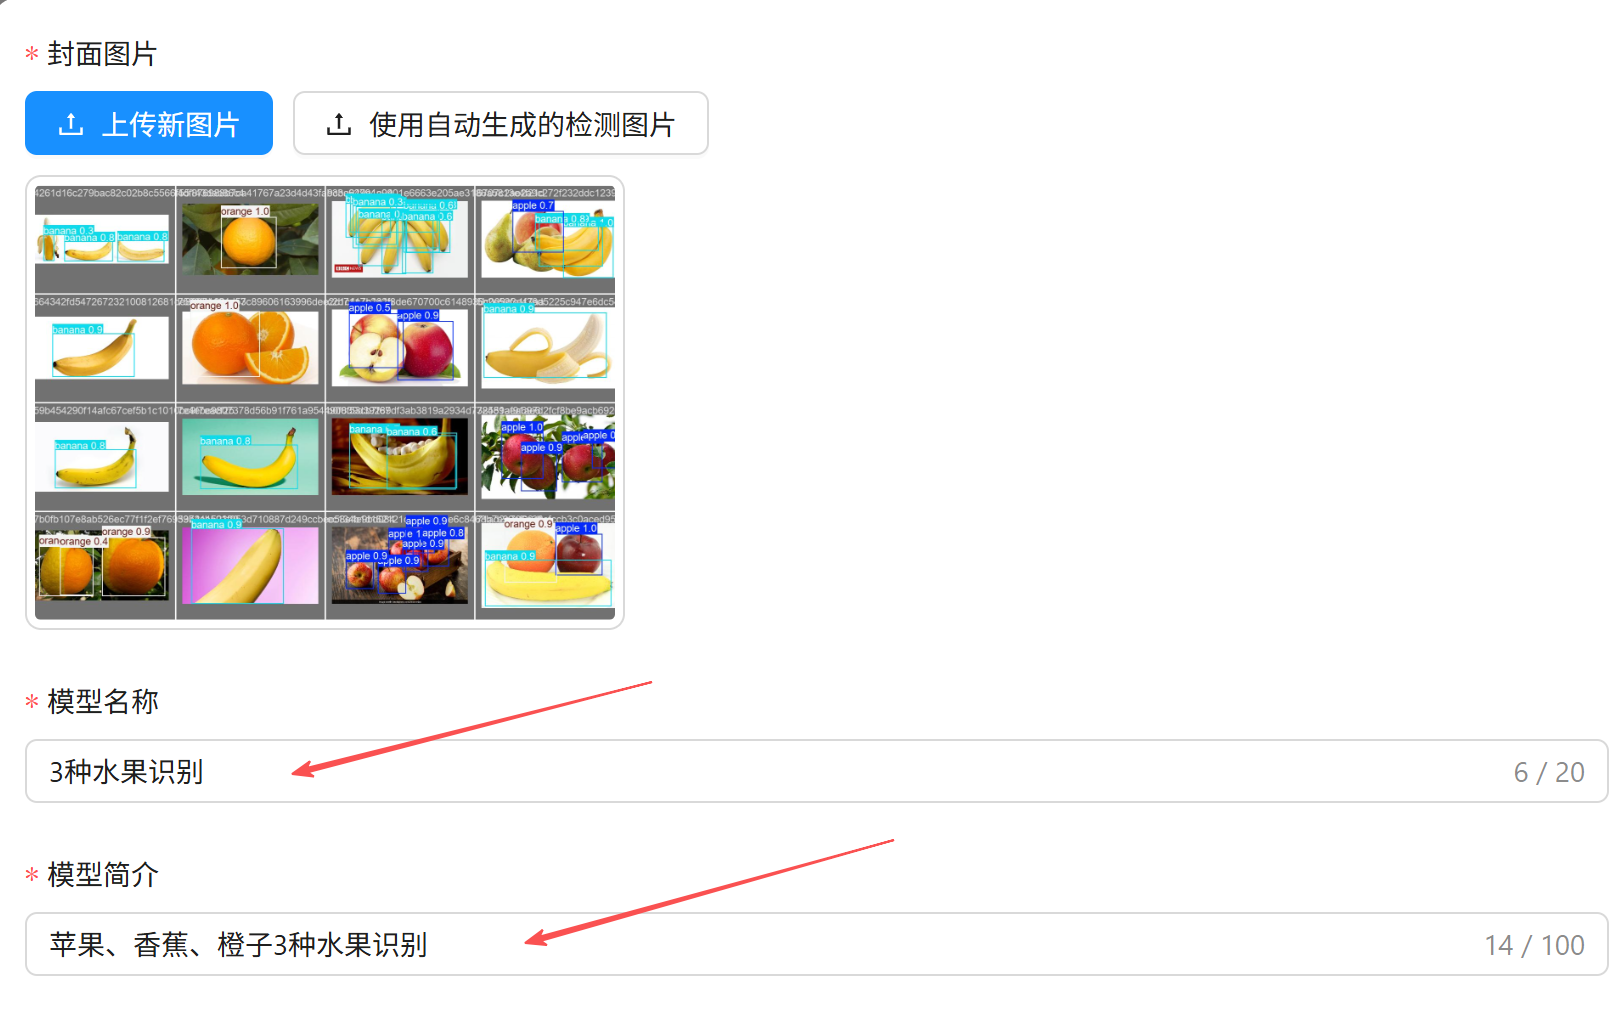
- Fill in Model Name and Model Introduction
The model name is like a title; keep it short. The introduction can briefly describe this model.
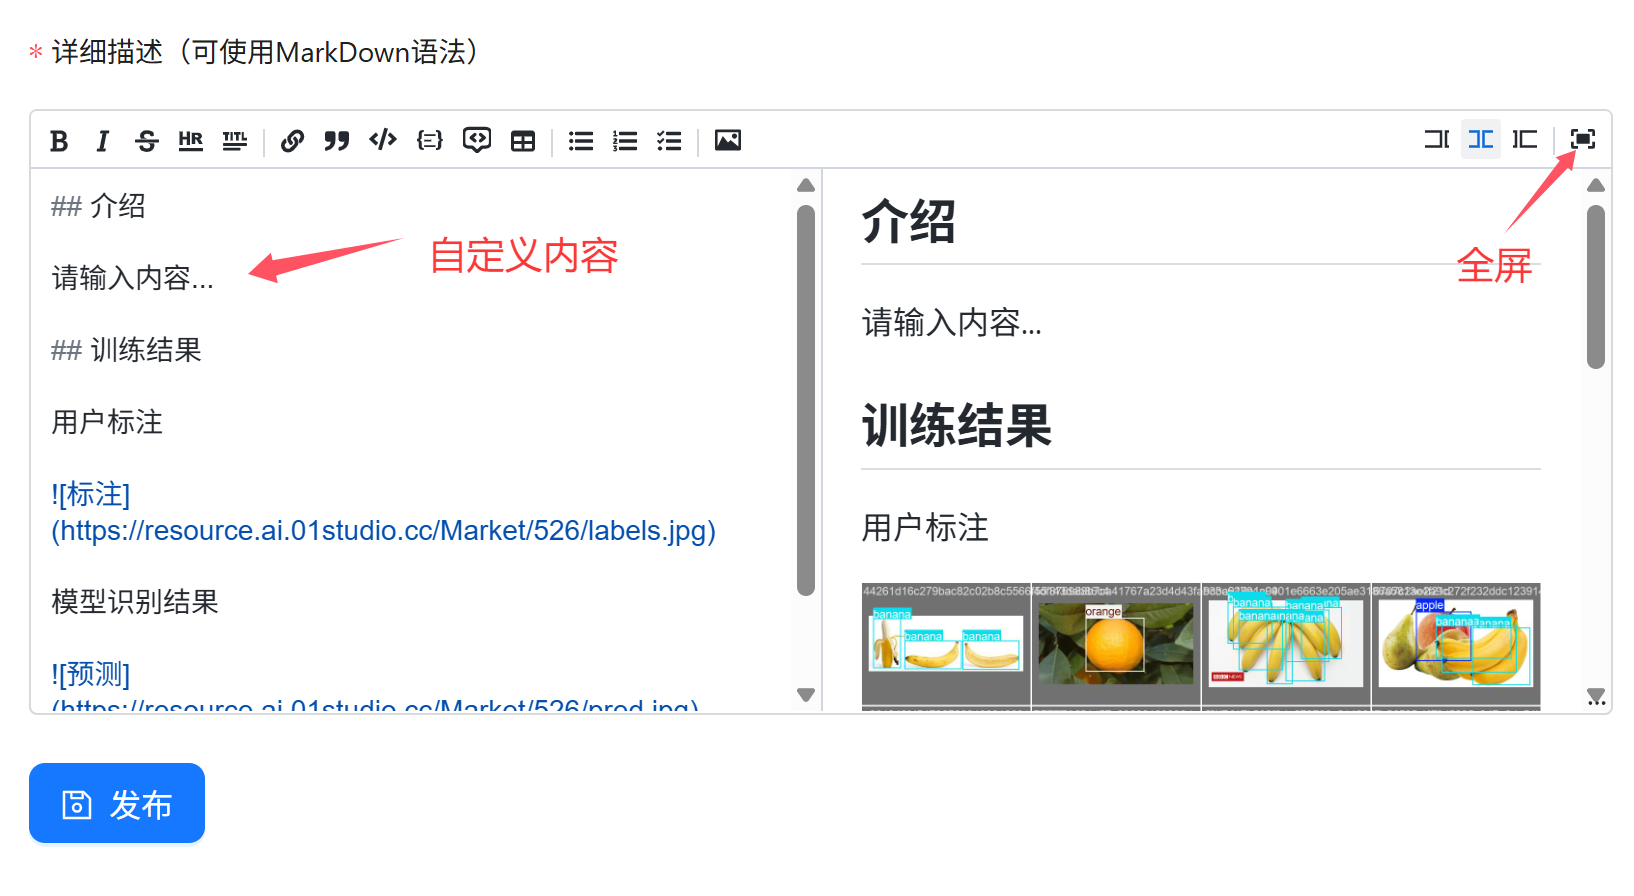
- Detailed Description
The details have been pre-generated with some content that users can modify themselves. The editing box has rich editing features such as image upload and full-screen mode. Supports MarkDown syntax, allowing you to insert Bilibili videos and other functions. After editing, click the Publish button.
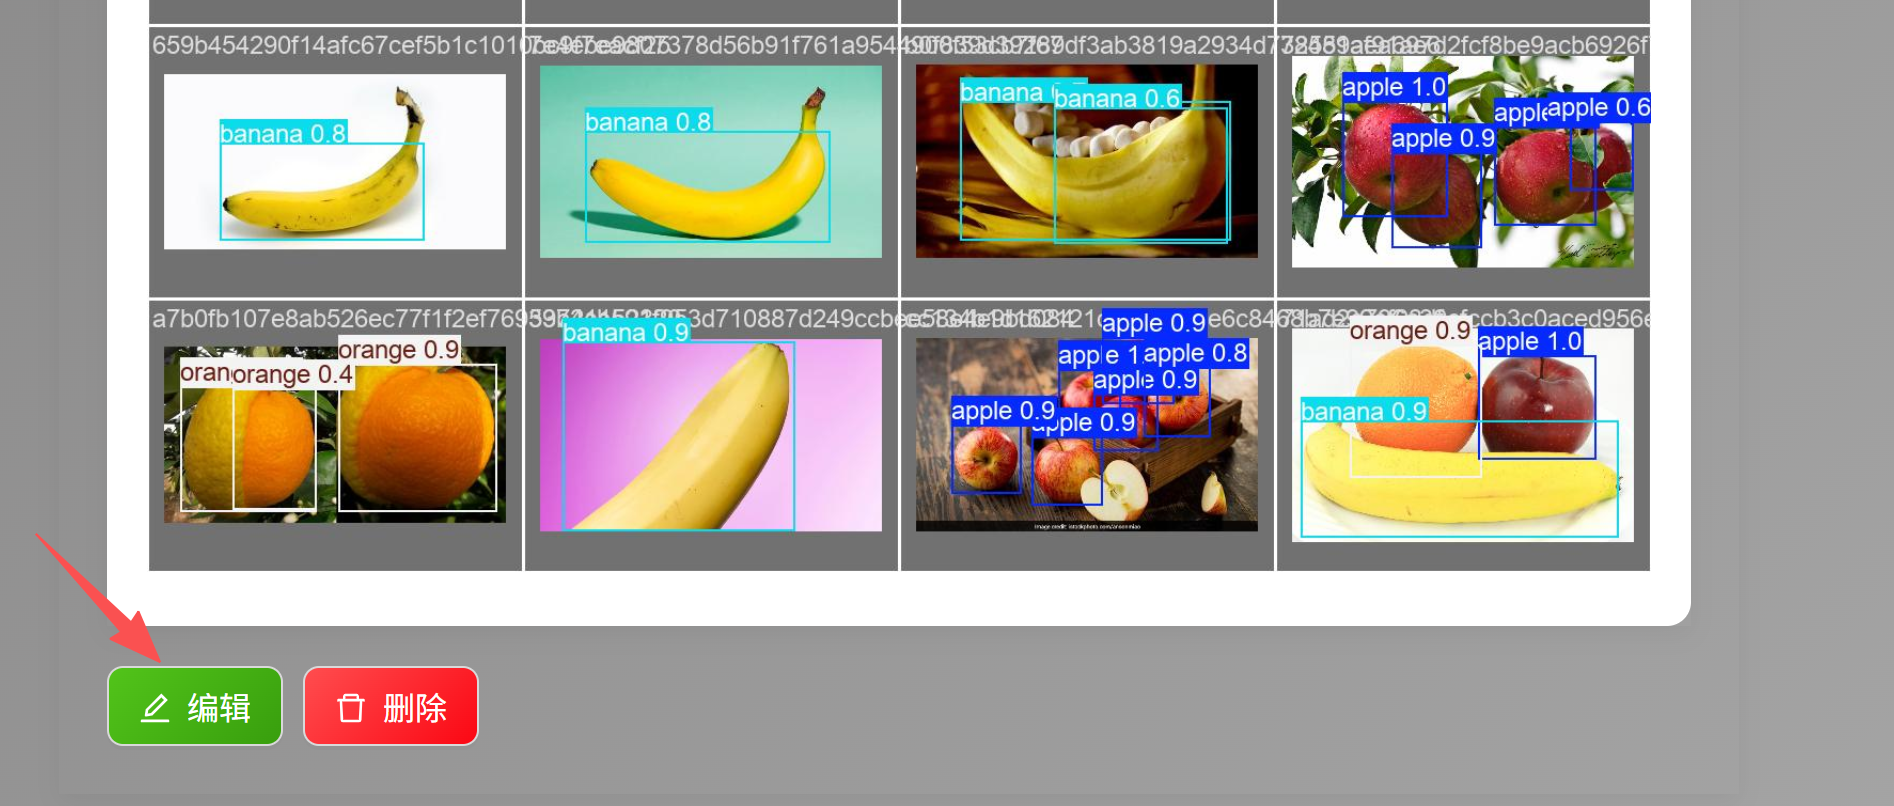
After publishing, you can click the Edit button below to edit again:
After publishing, you can see the relevant information in the model sharing library.