5.5-inch MIPI Display
The Walnut Pi official 5.5-inch MIPI display has a resolution of 1080P (1920x1080). Buy now >>
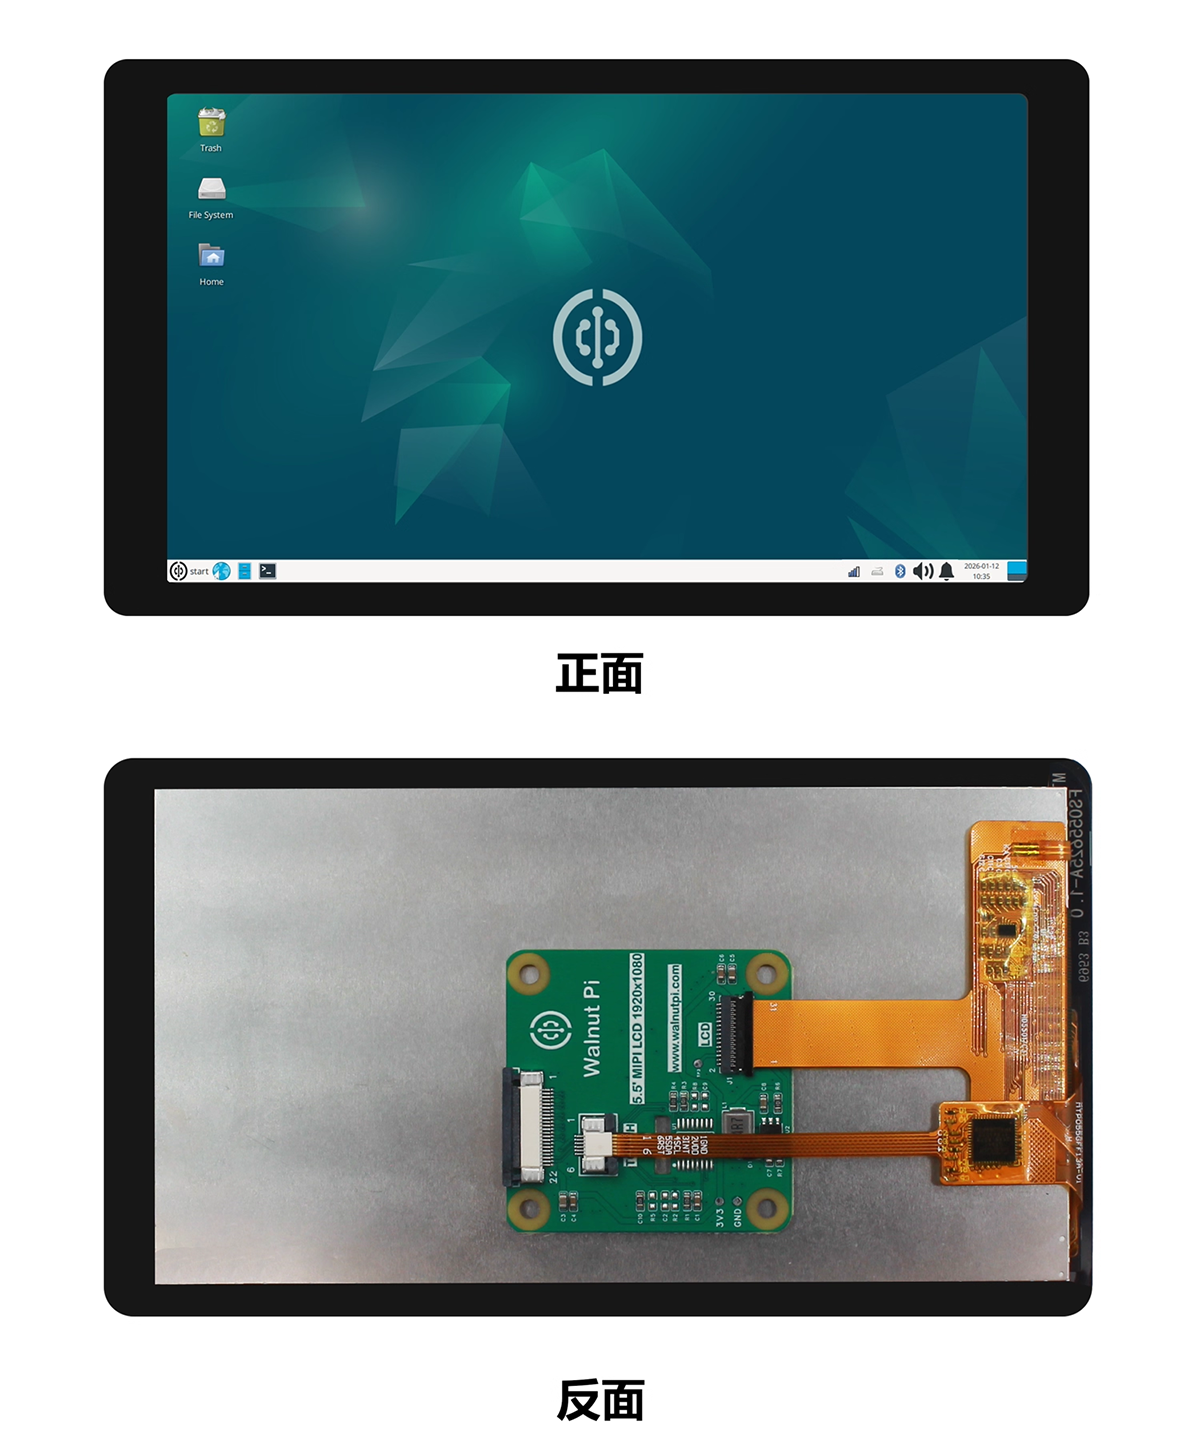
| Specifications | |
|---|---|
| Size | 5.5-inch |
| Resolution | 1920x1080 |
| Viewing Angle | IPS (Full Viewing Angle) |
| Interface | MIPI 4 lane |
| Capacitive Touch | GT911 |
| Operating Temperature | -20℃ ~ 60℃ |
| Storage Temperature | -30℃ ~ 70℃ |
| Dimensions | 140.8 x 80mm (with capacitive touch) |
| Weight | 60g (with capacitive touch) |
The Walnut Pi 2B has 1 MIPI DSI interface (1x4 lane DSI, 2 lane compatible), which can connect external MIPI displays, supporting up to 1080P@60fps. The interface definition is compatible with Raspberry Pi.
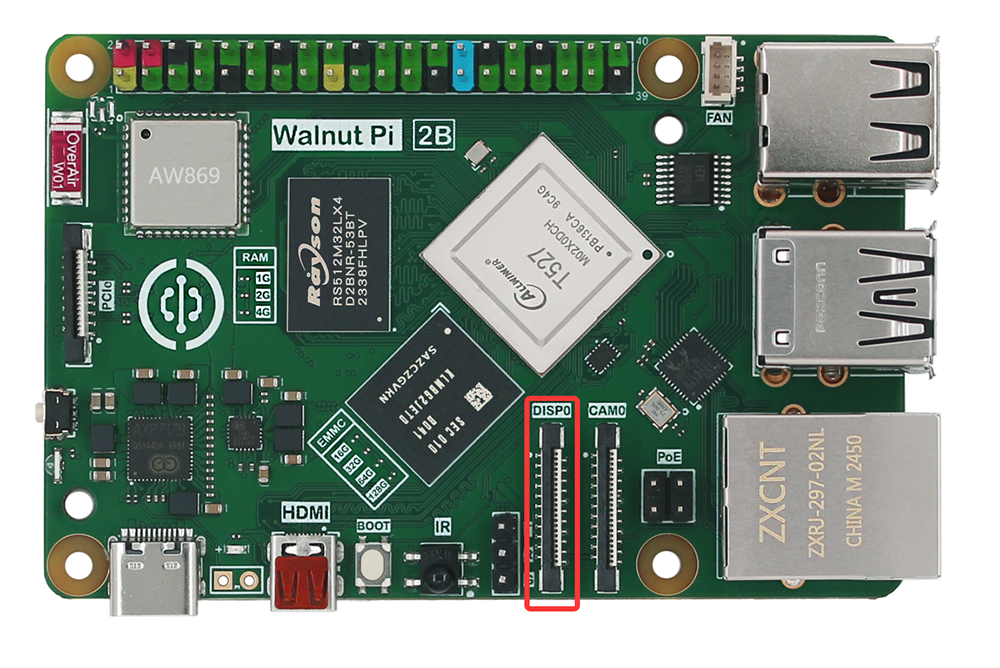
Assembly (Without Stand)
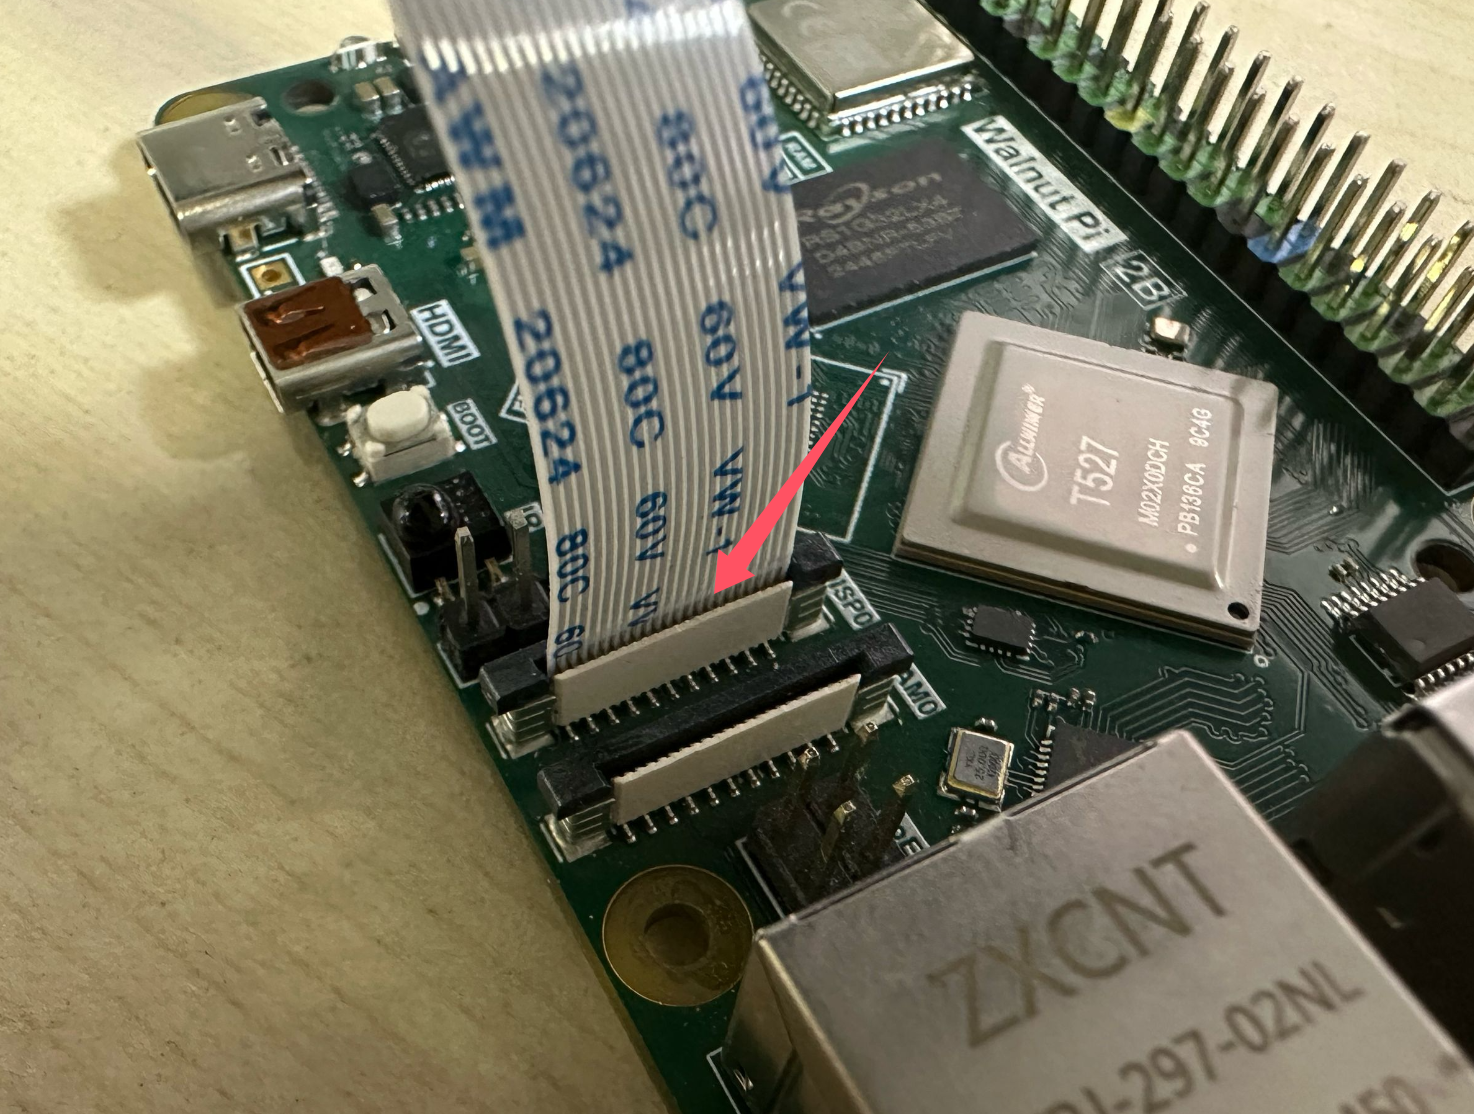
Make sure to assemble with power disconnected. First, lift the black 22P DSI latch on the Walnut Pi 2B, insert the ribbon cable with the gold fingers oriented as shown below, then push the latch down to secure it:
Connect the other end to the 5.5-inch MIPI display. After assembly, it should look like this:
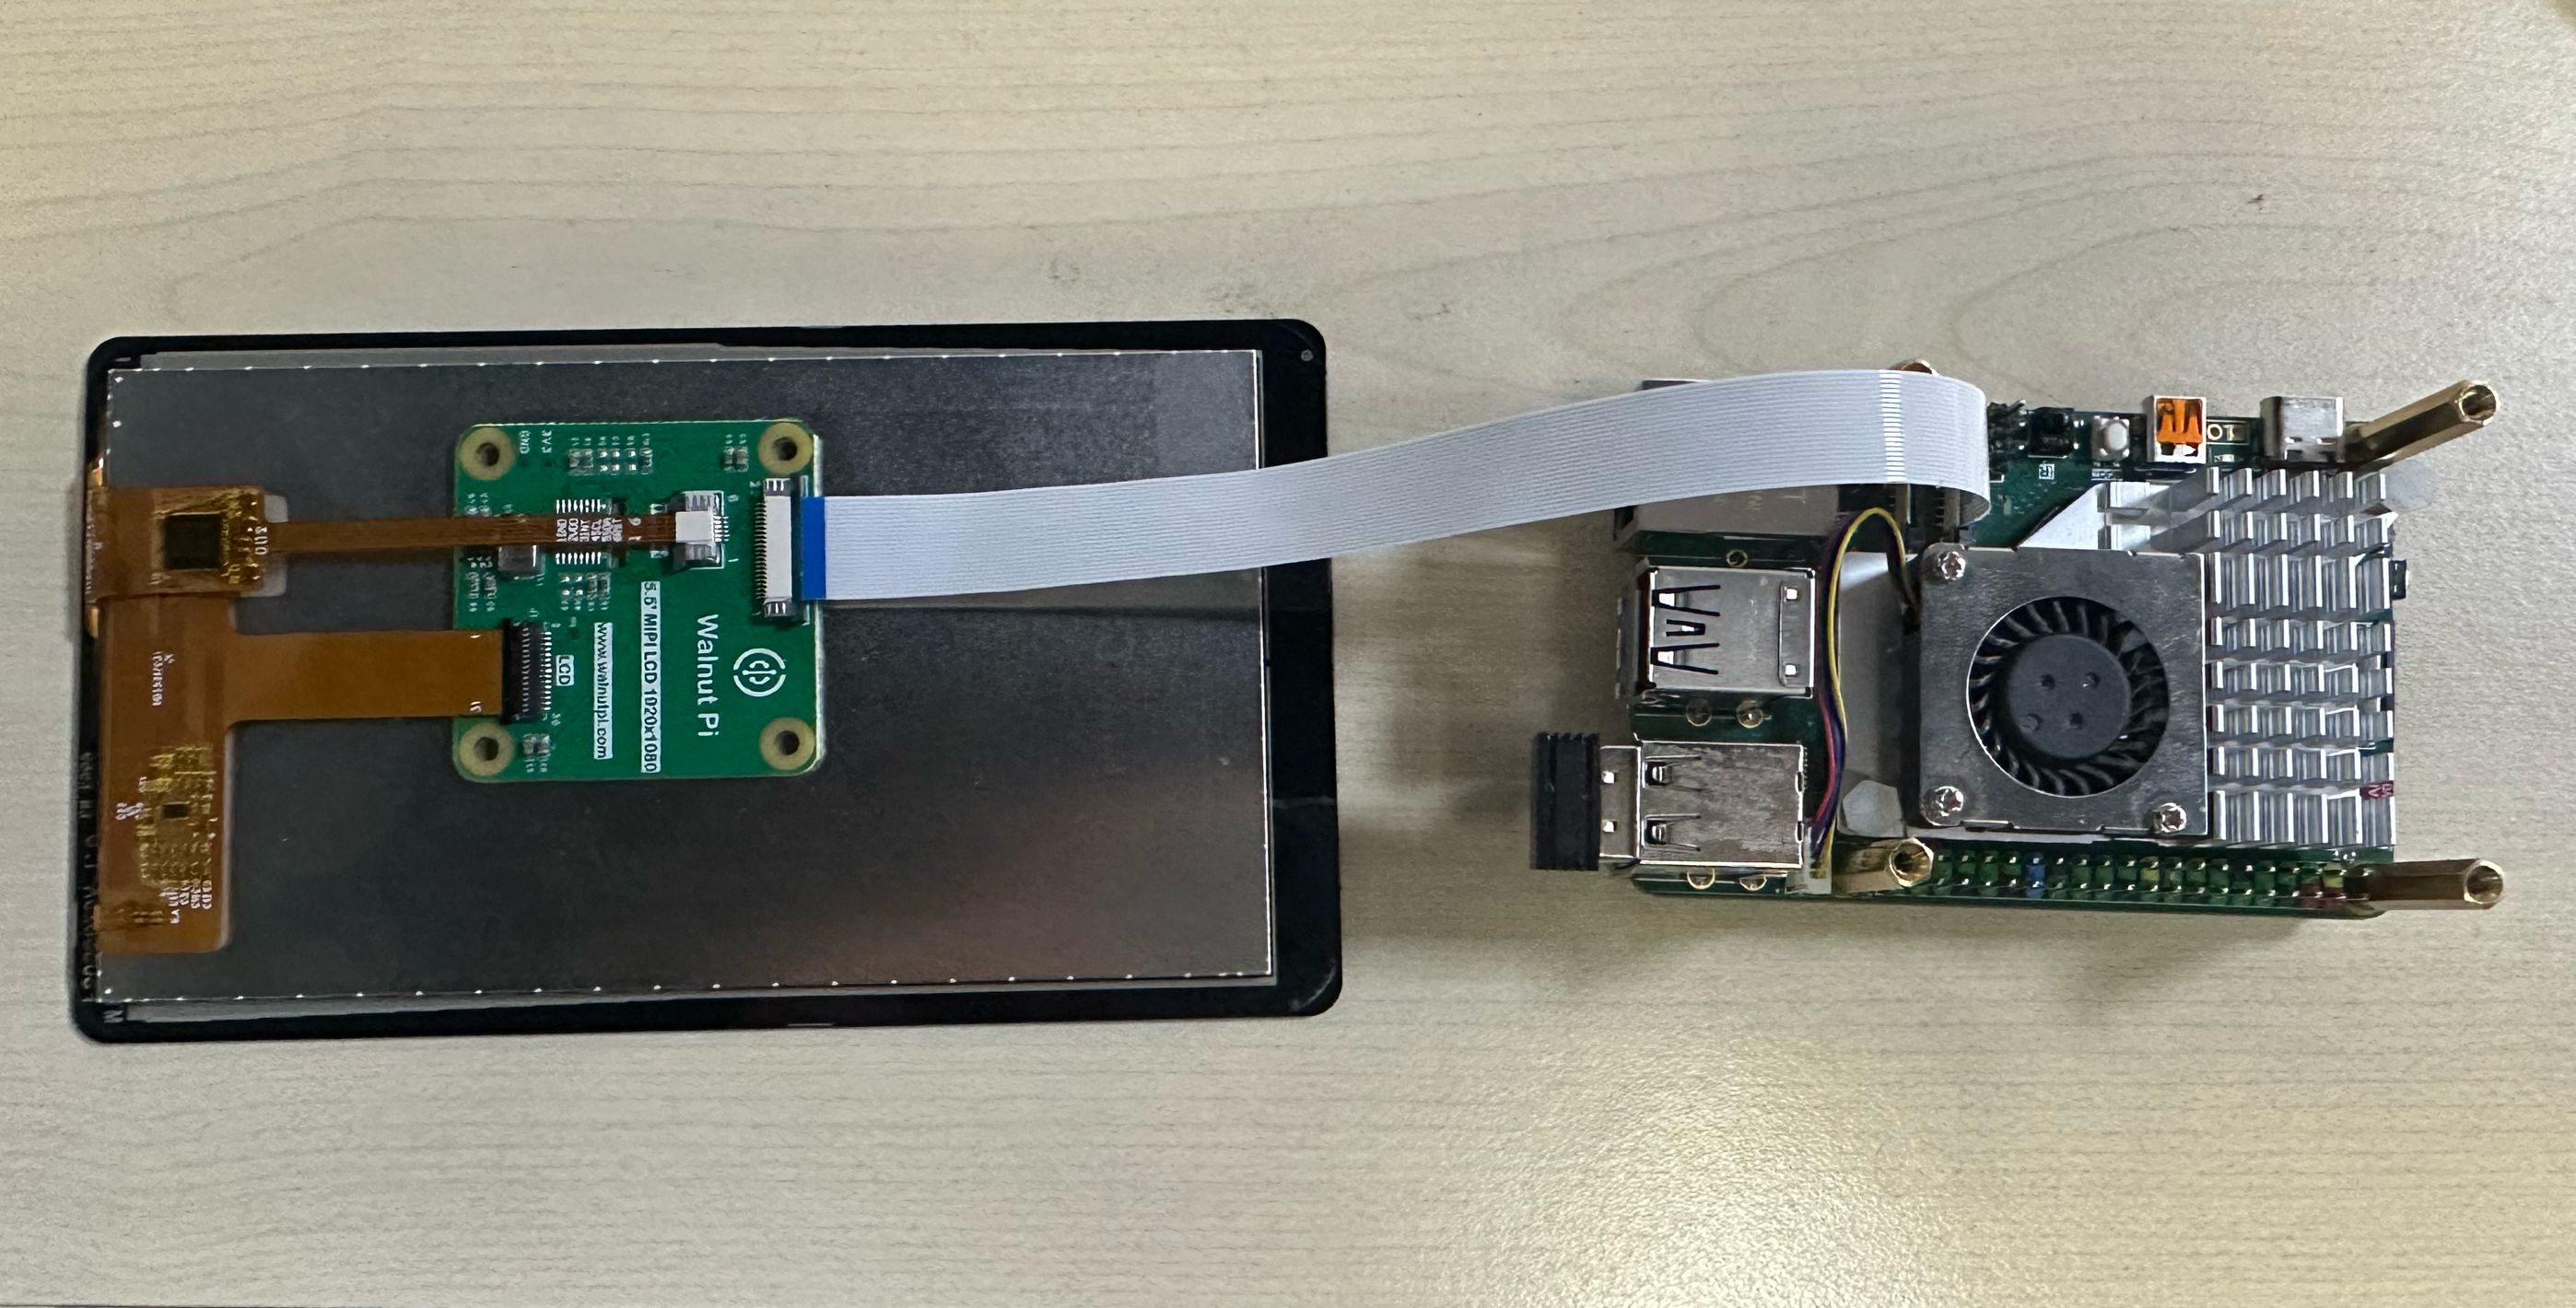
Assembly (With Stand)
An official stand is available for the Walnut Pi 5.5-inch MIPI display, supporting landscape, portrait, and adjustable angle positioning. The main body comes pre-assembled. Buy now >>
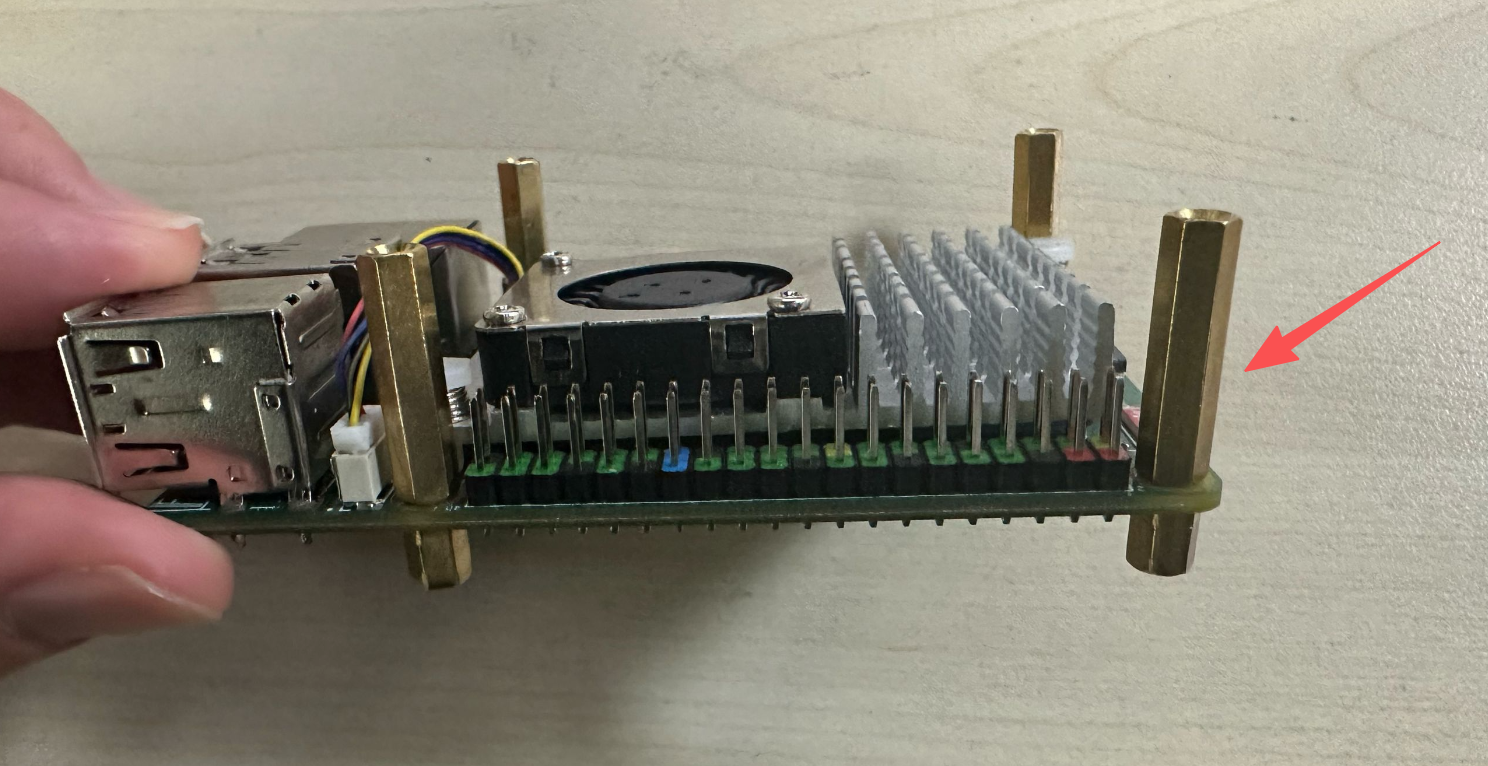
- Install Support Standoffs
Install the included copper standoffs as shown below:
- Install the Stand
Connect the 22-pin ribbon cable to the Walnut Pi DSI interface, then route it through the stand's opening.
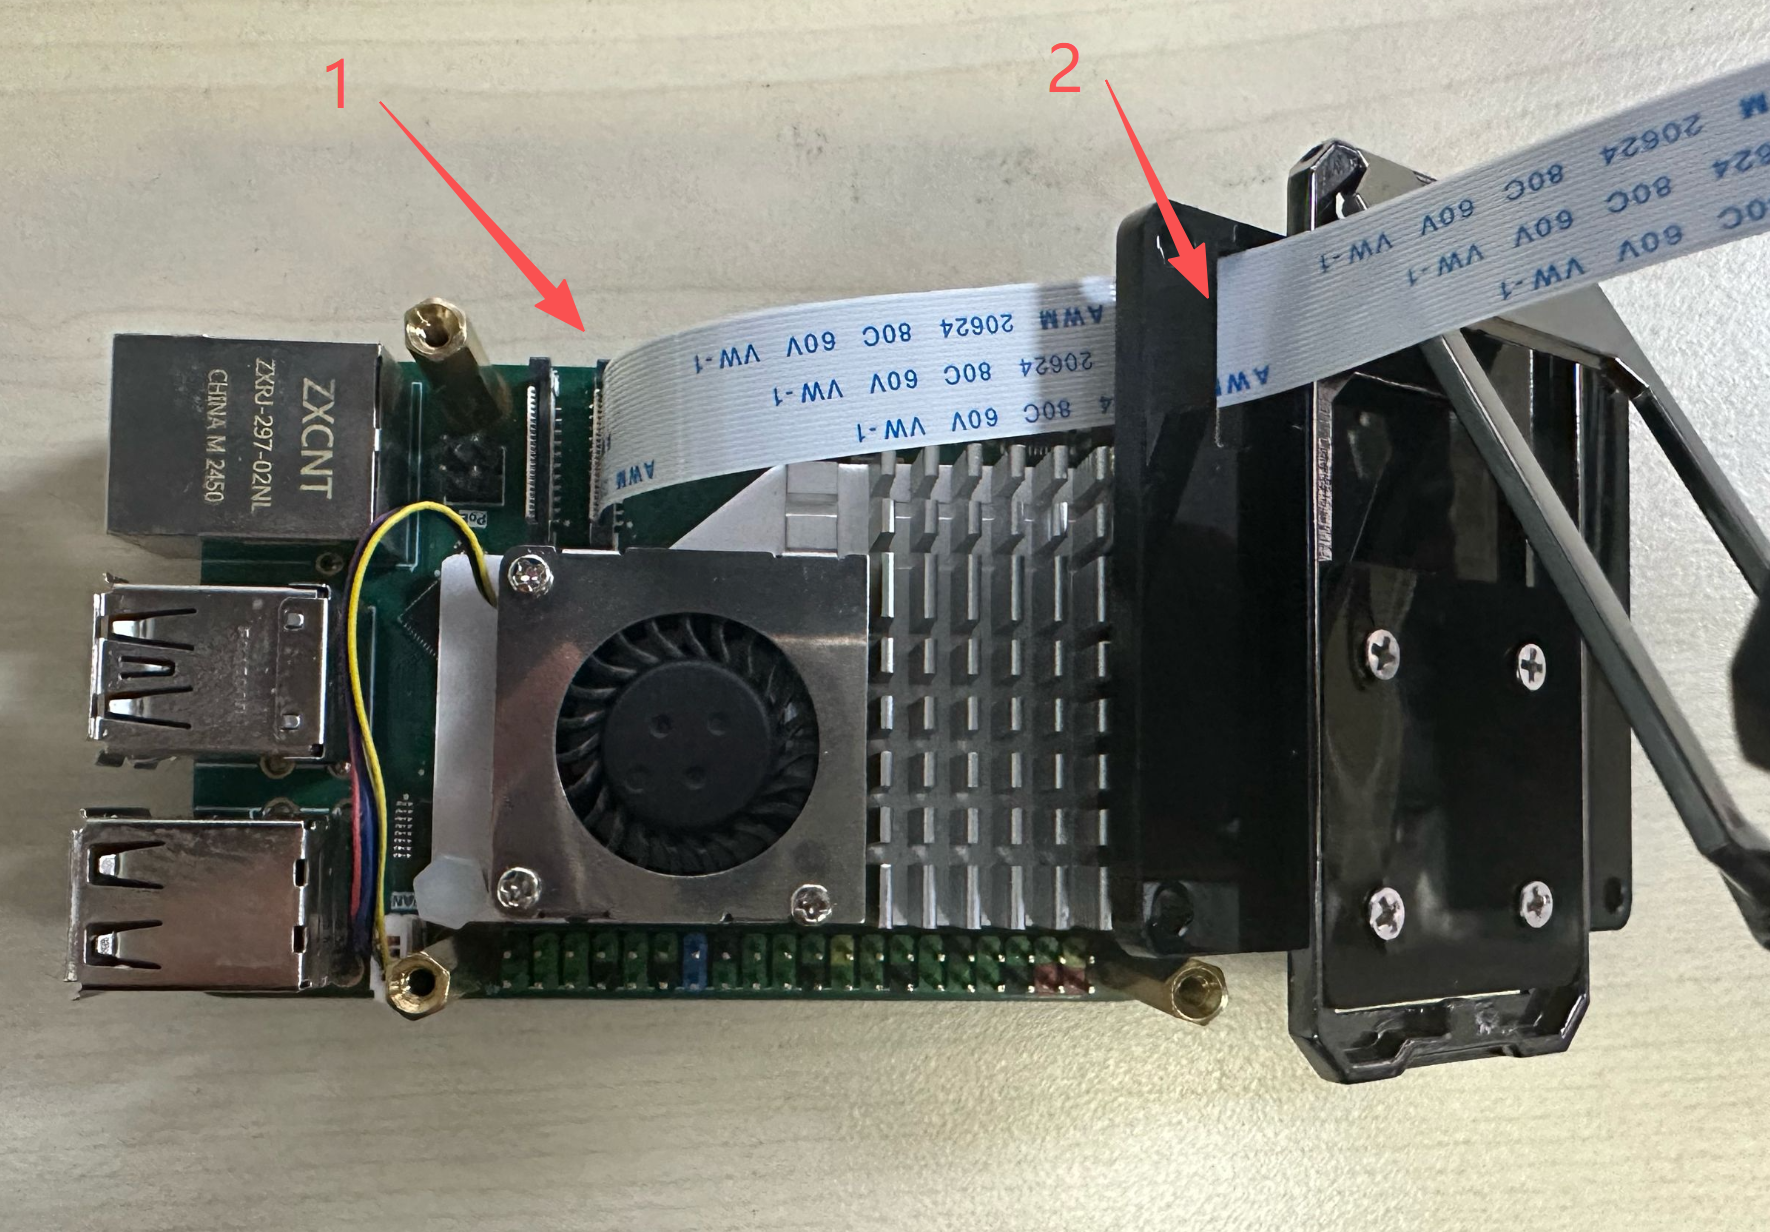
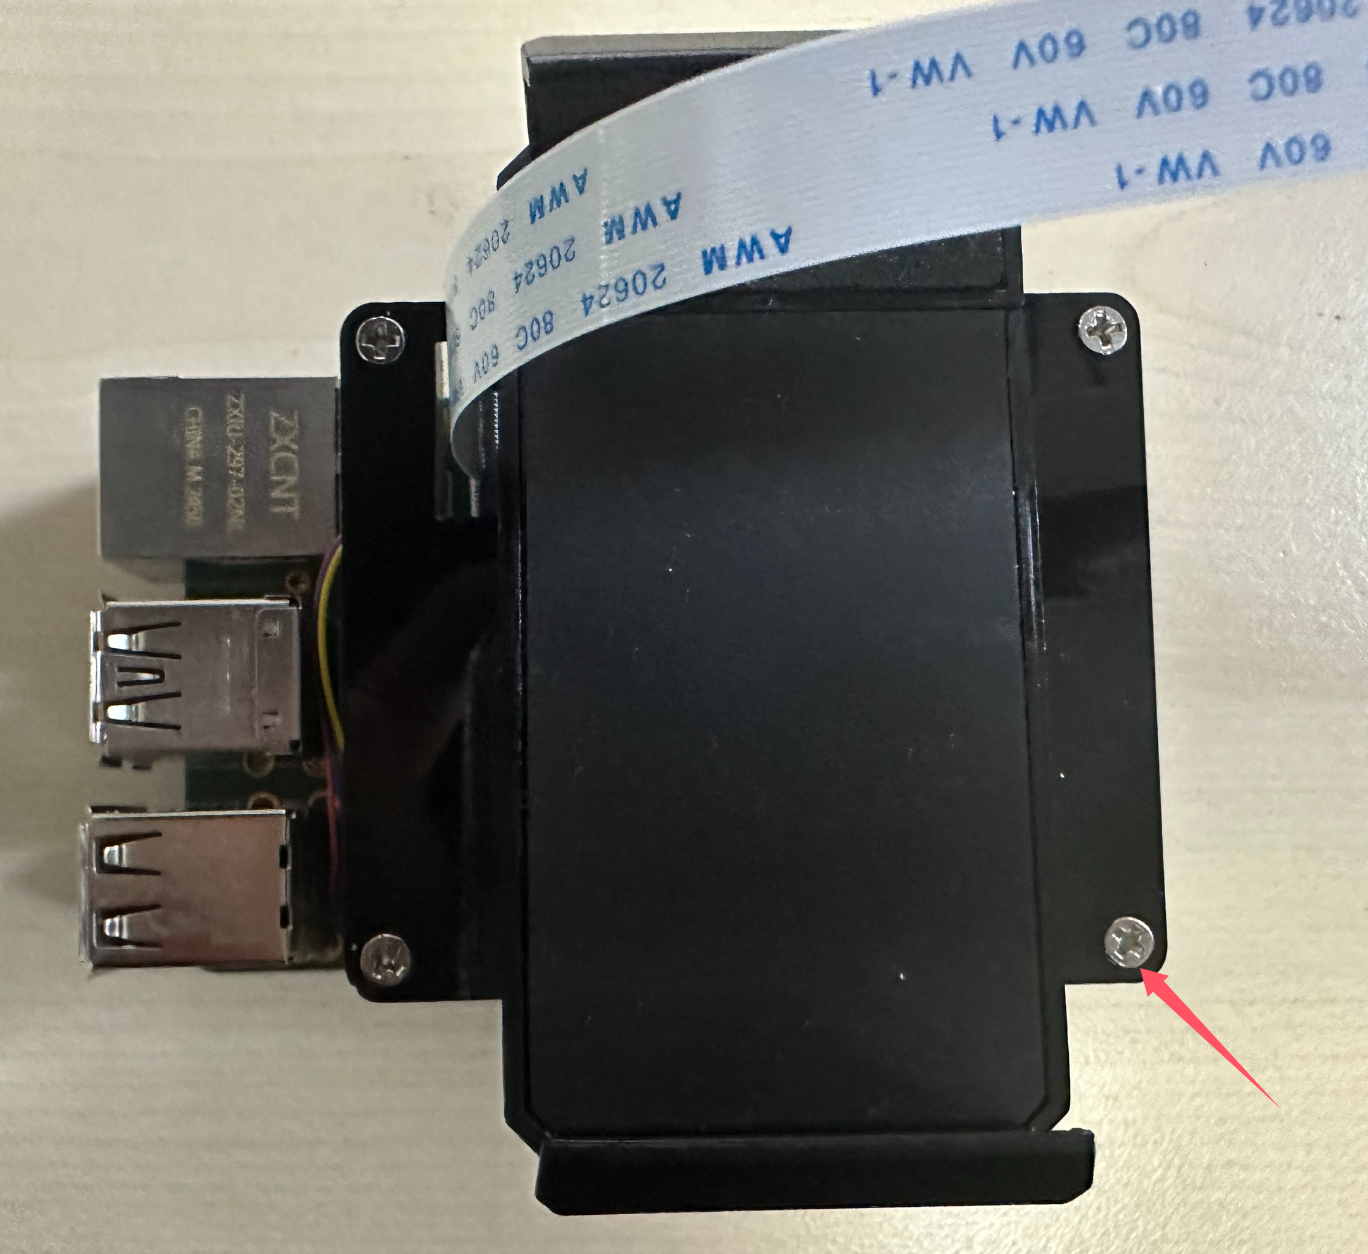
Secure the stand to the standoff positions using screws:
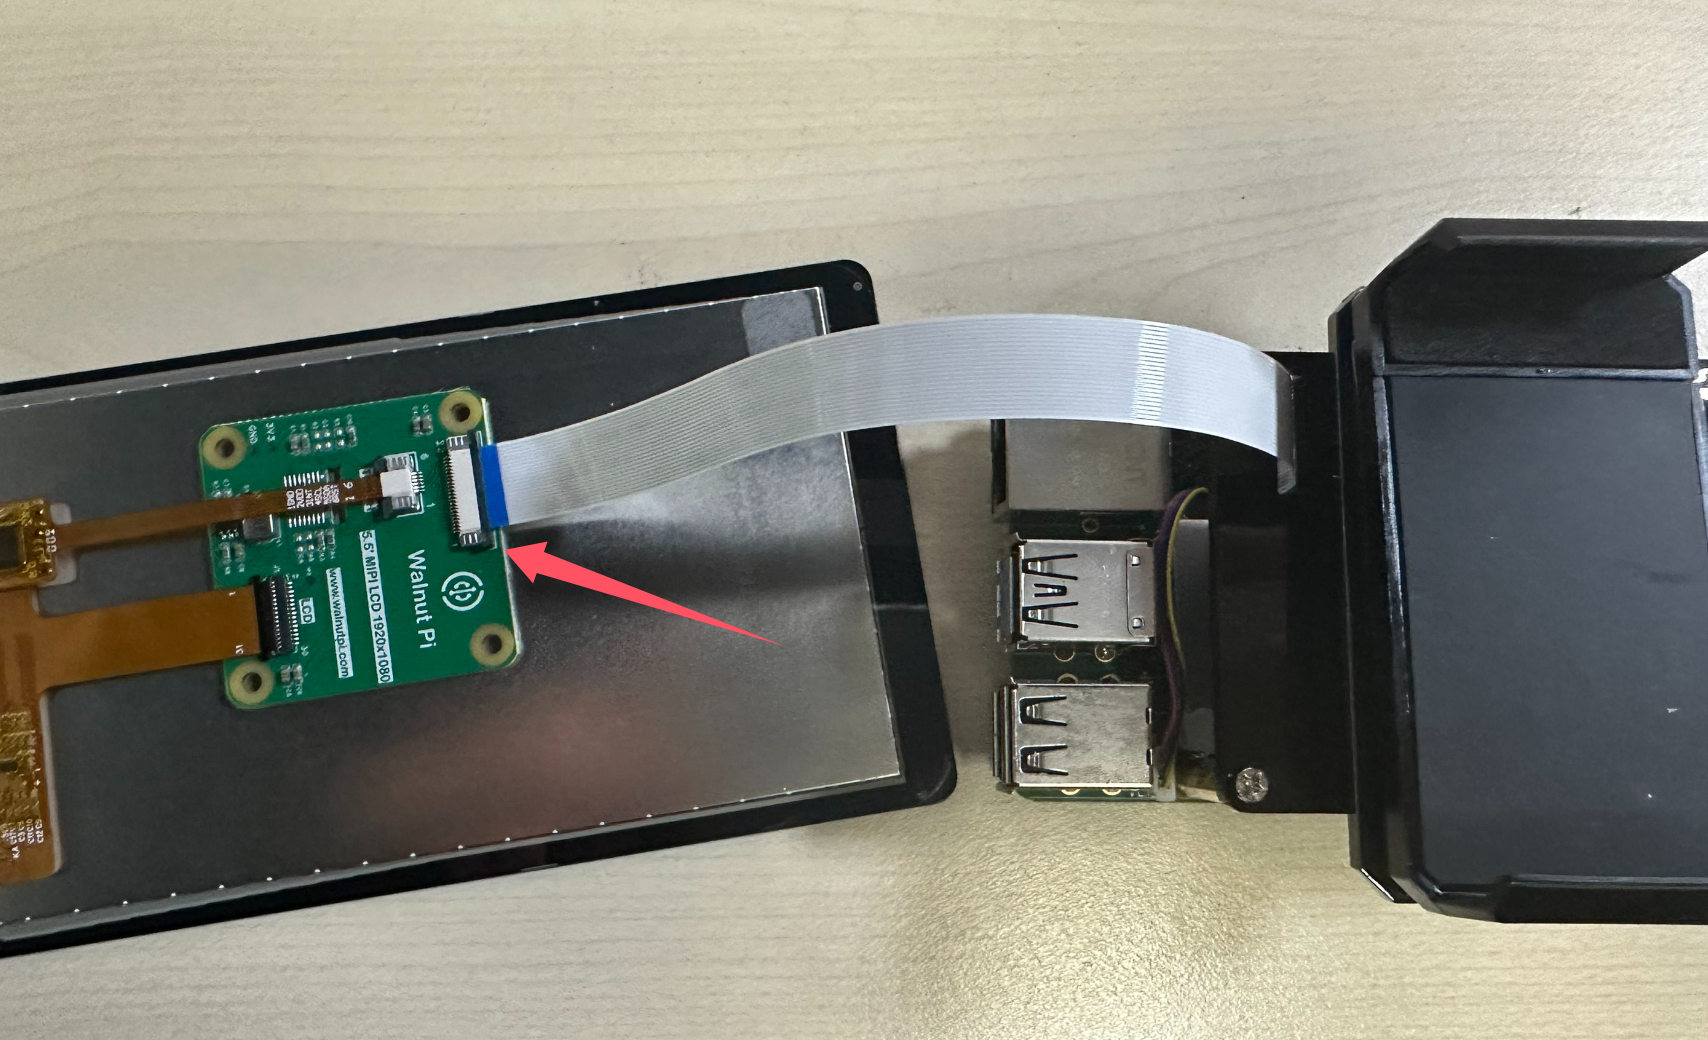
Connect the display with the ribbon cable's gold fingers facing down:
Extend the stand and secure the display as shown below:
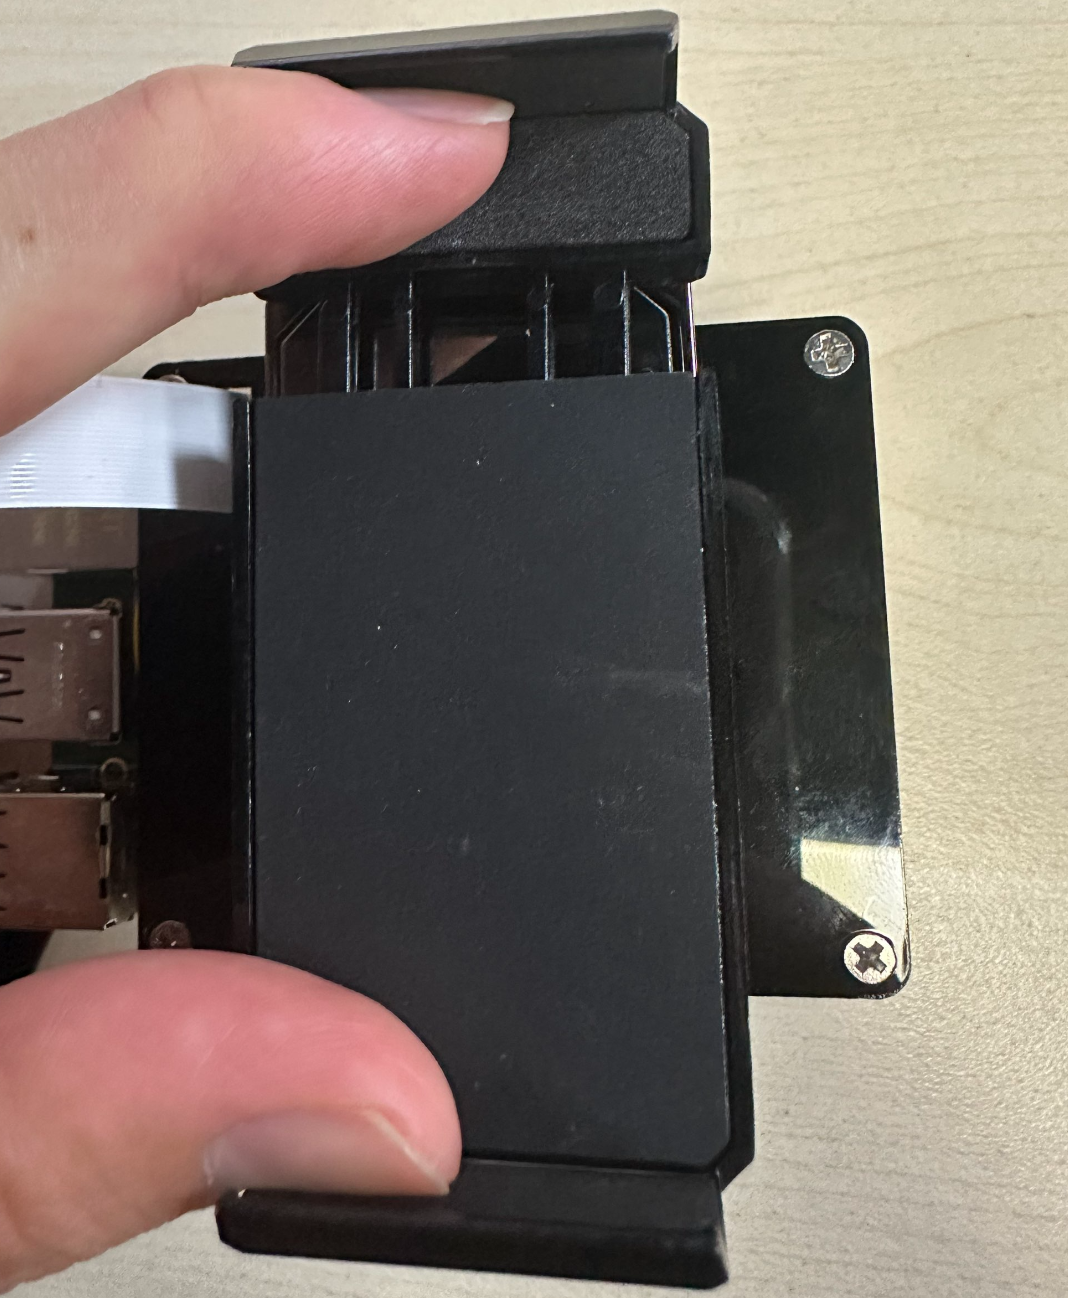
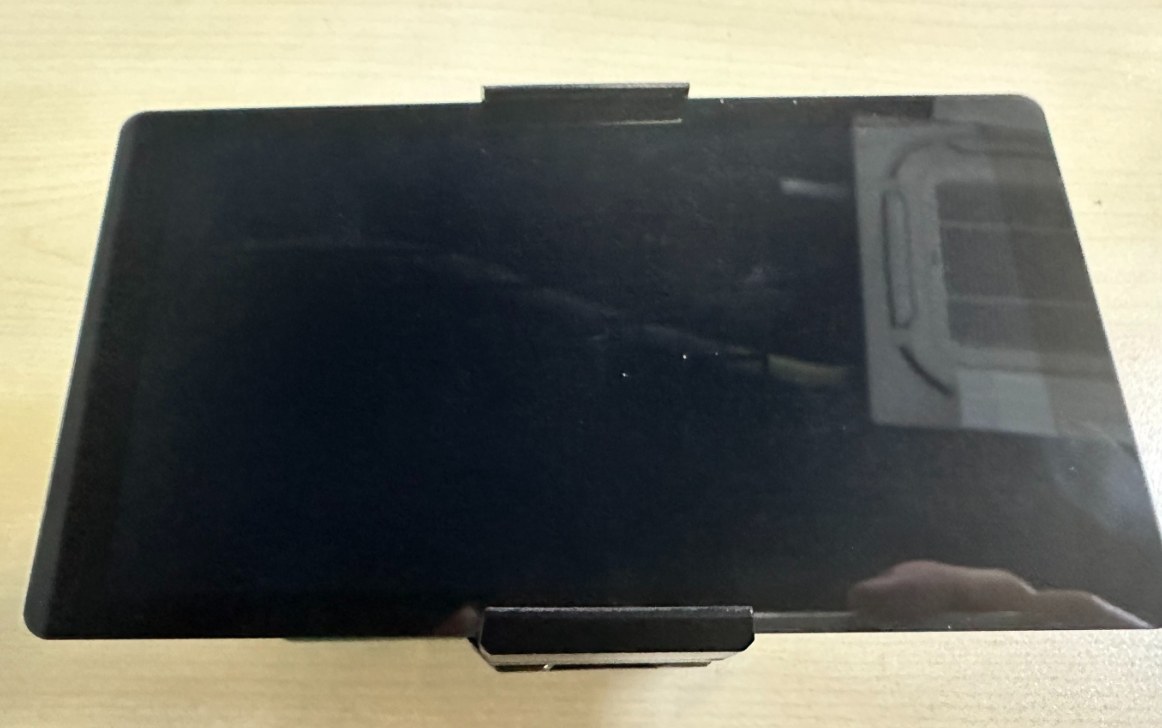
The ribbon cable orientation on the back should look like this:
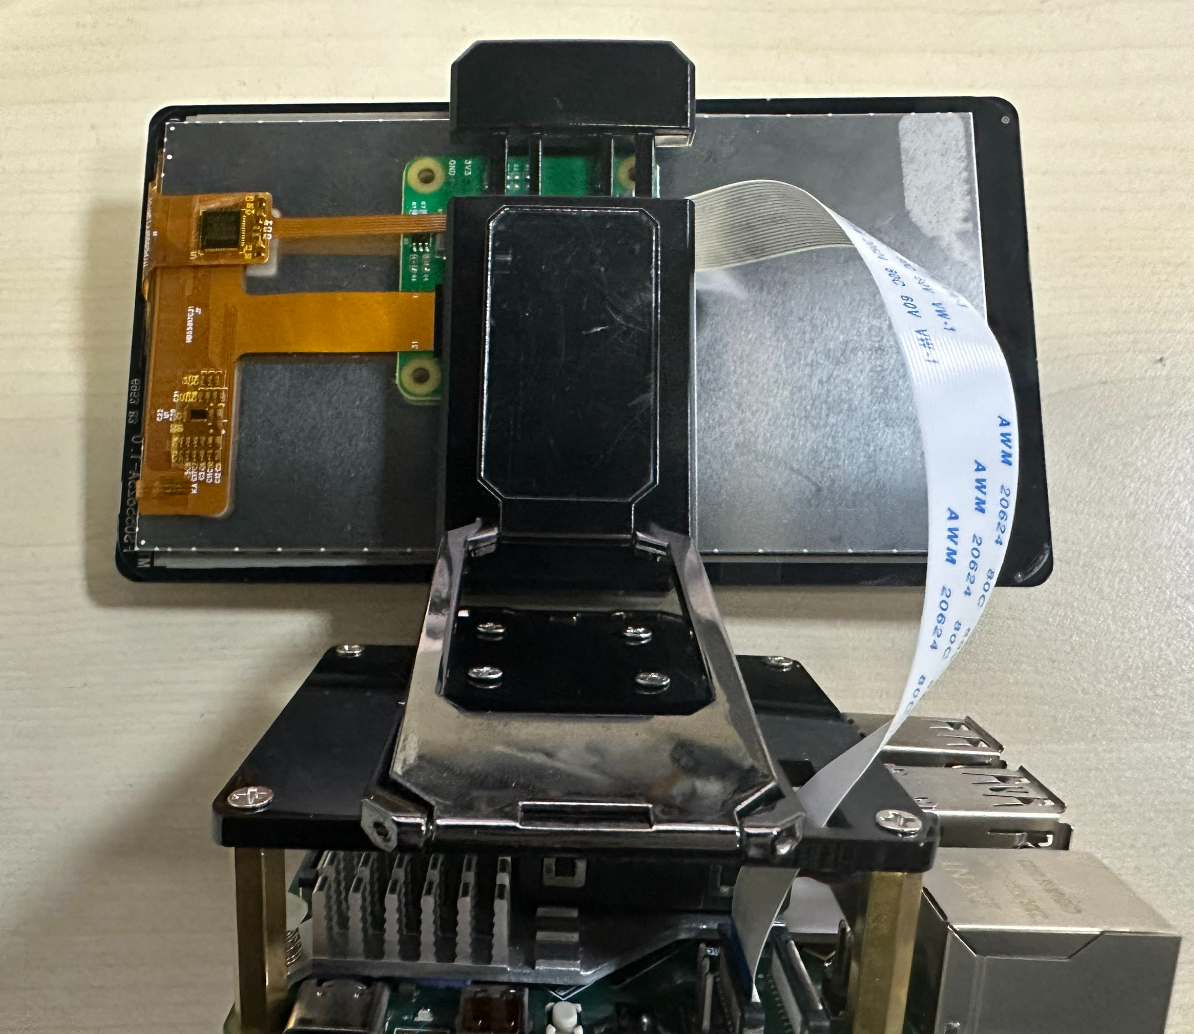
For portrait orientation, rotate the cable as shown below. (Note: when adjusting to portrait, do NOT rotate in the other direction, as it may strain and damage the ribbon cable.)
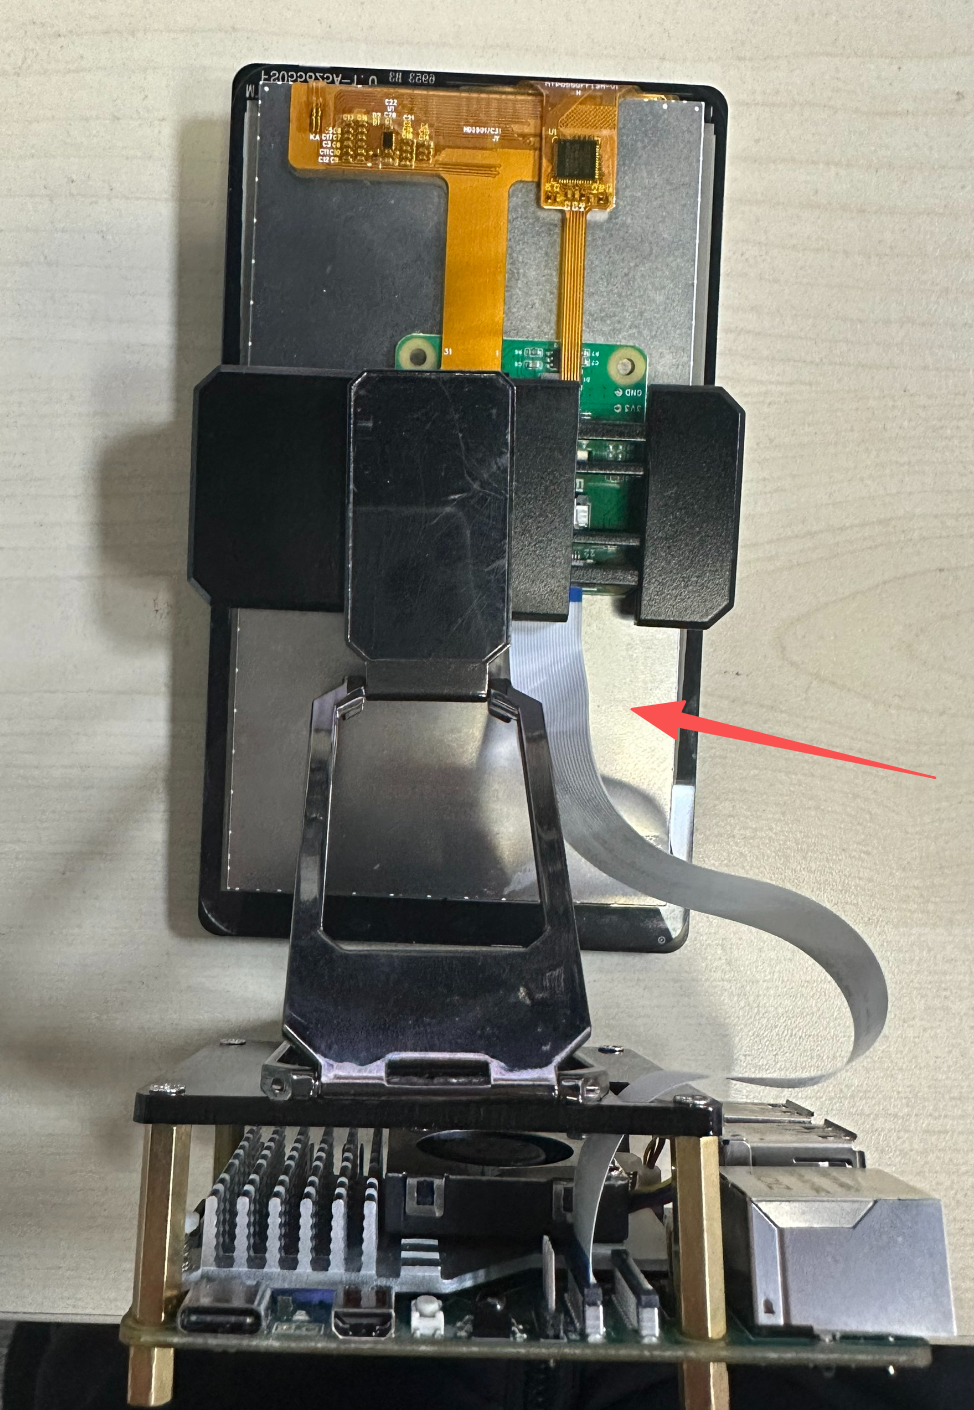
Assembly is now complete.
Enabling LCD Display
The Walnut Pi system already includes the relevant display drivers, supported on both Desktop and Server editions. Use the following command to enable desktop display (supports TAB auto-completion):
sudo set-lcd dsi-1920x1080 install
After configuration, reboot the board:
sudo reboot
You can also configure this by modifying the screen parameter in /boot/config.txt: screen=dsi-1920x1080. config.txt Display Configuration Tutorial
The first reboot after configuration may take a bit longer. After booting, it will appear as shown below:
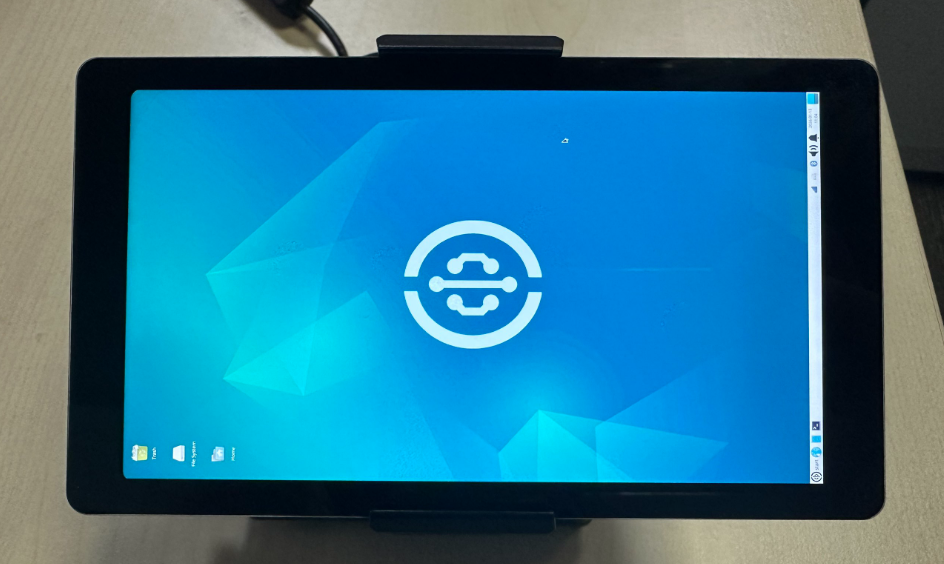
Adjusting Display Orientation and Scaling
Landscape Mode
The default configuration after initial setup is portrait. You can switch to landscape mode as follows:
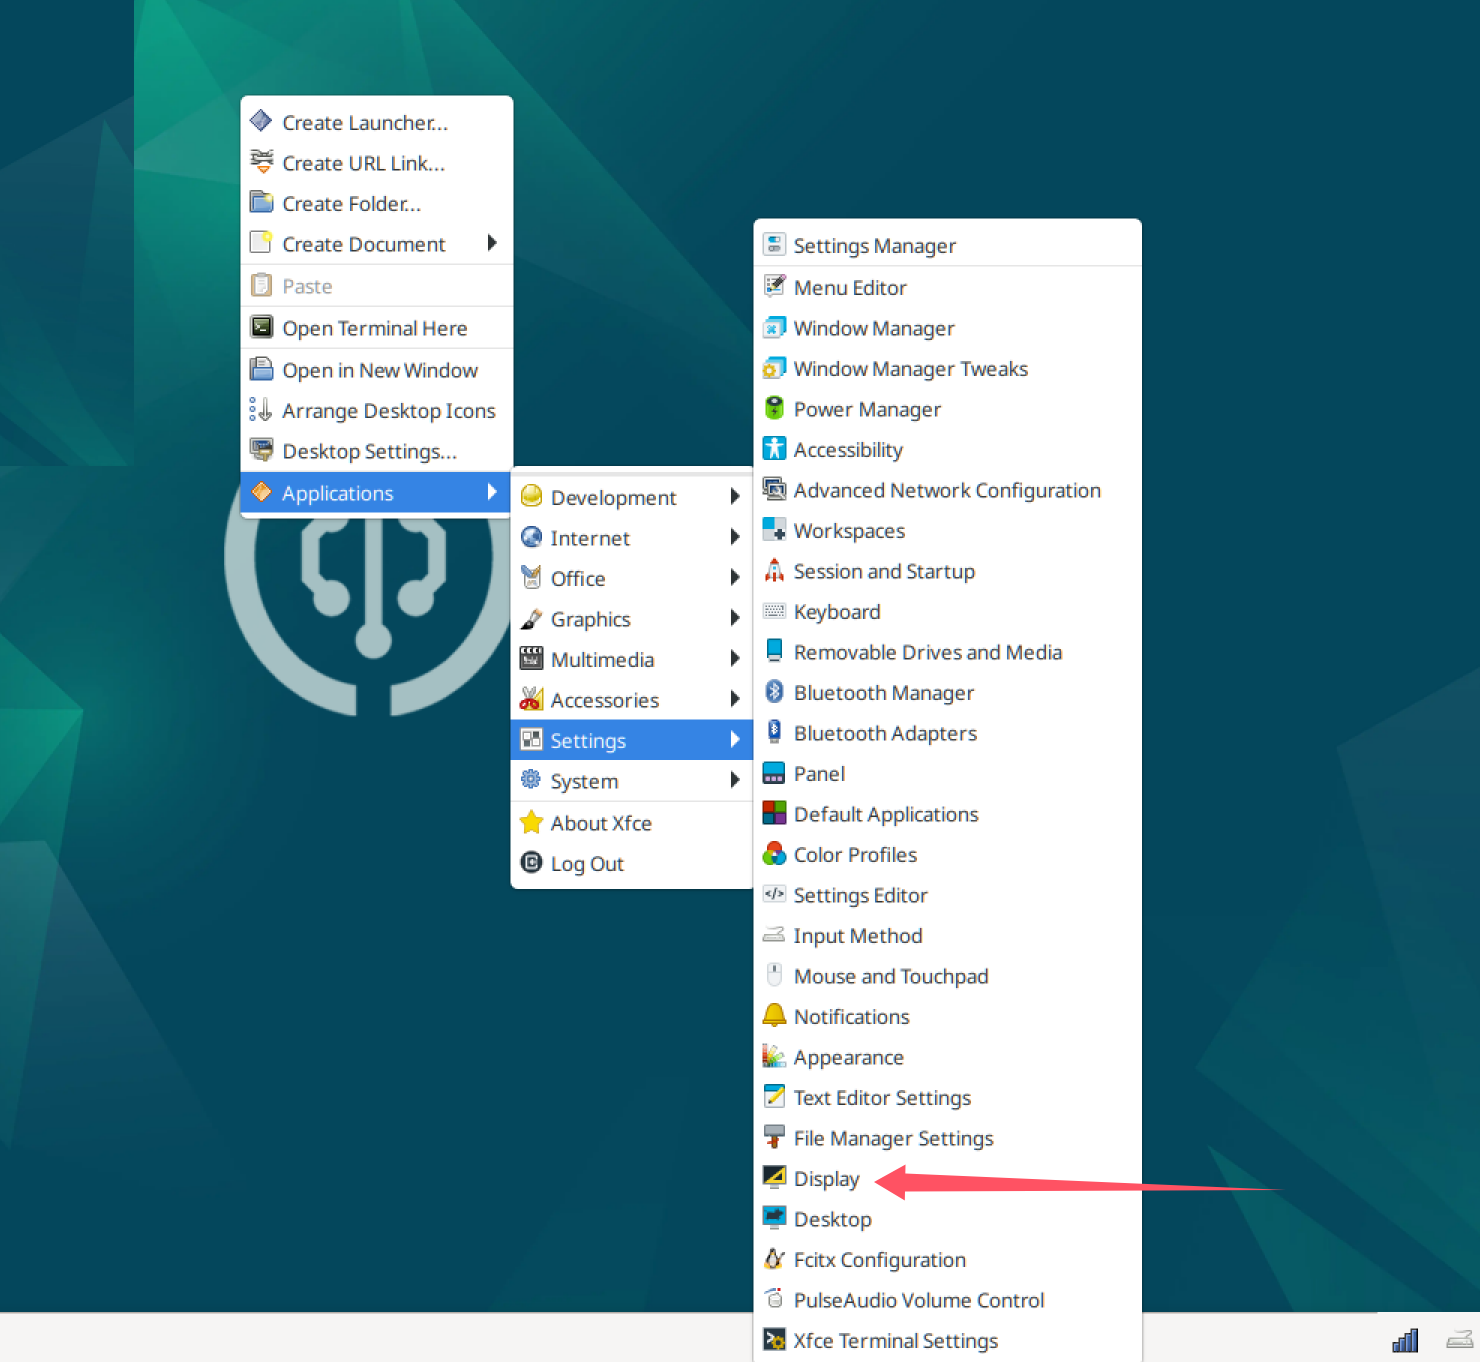
Open Settings - Display:
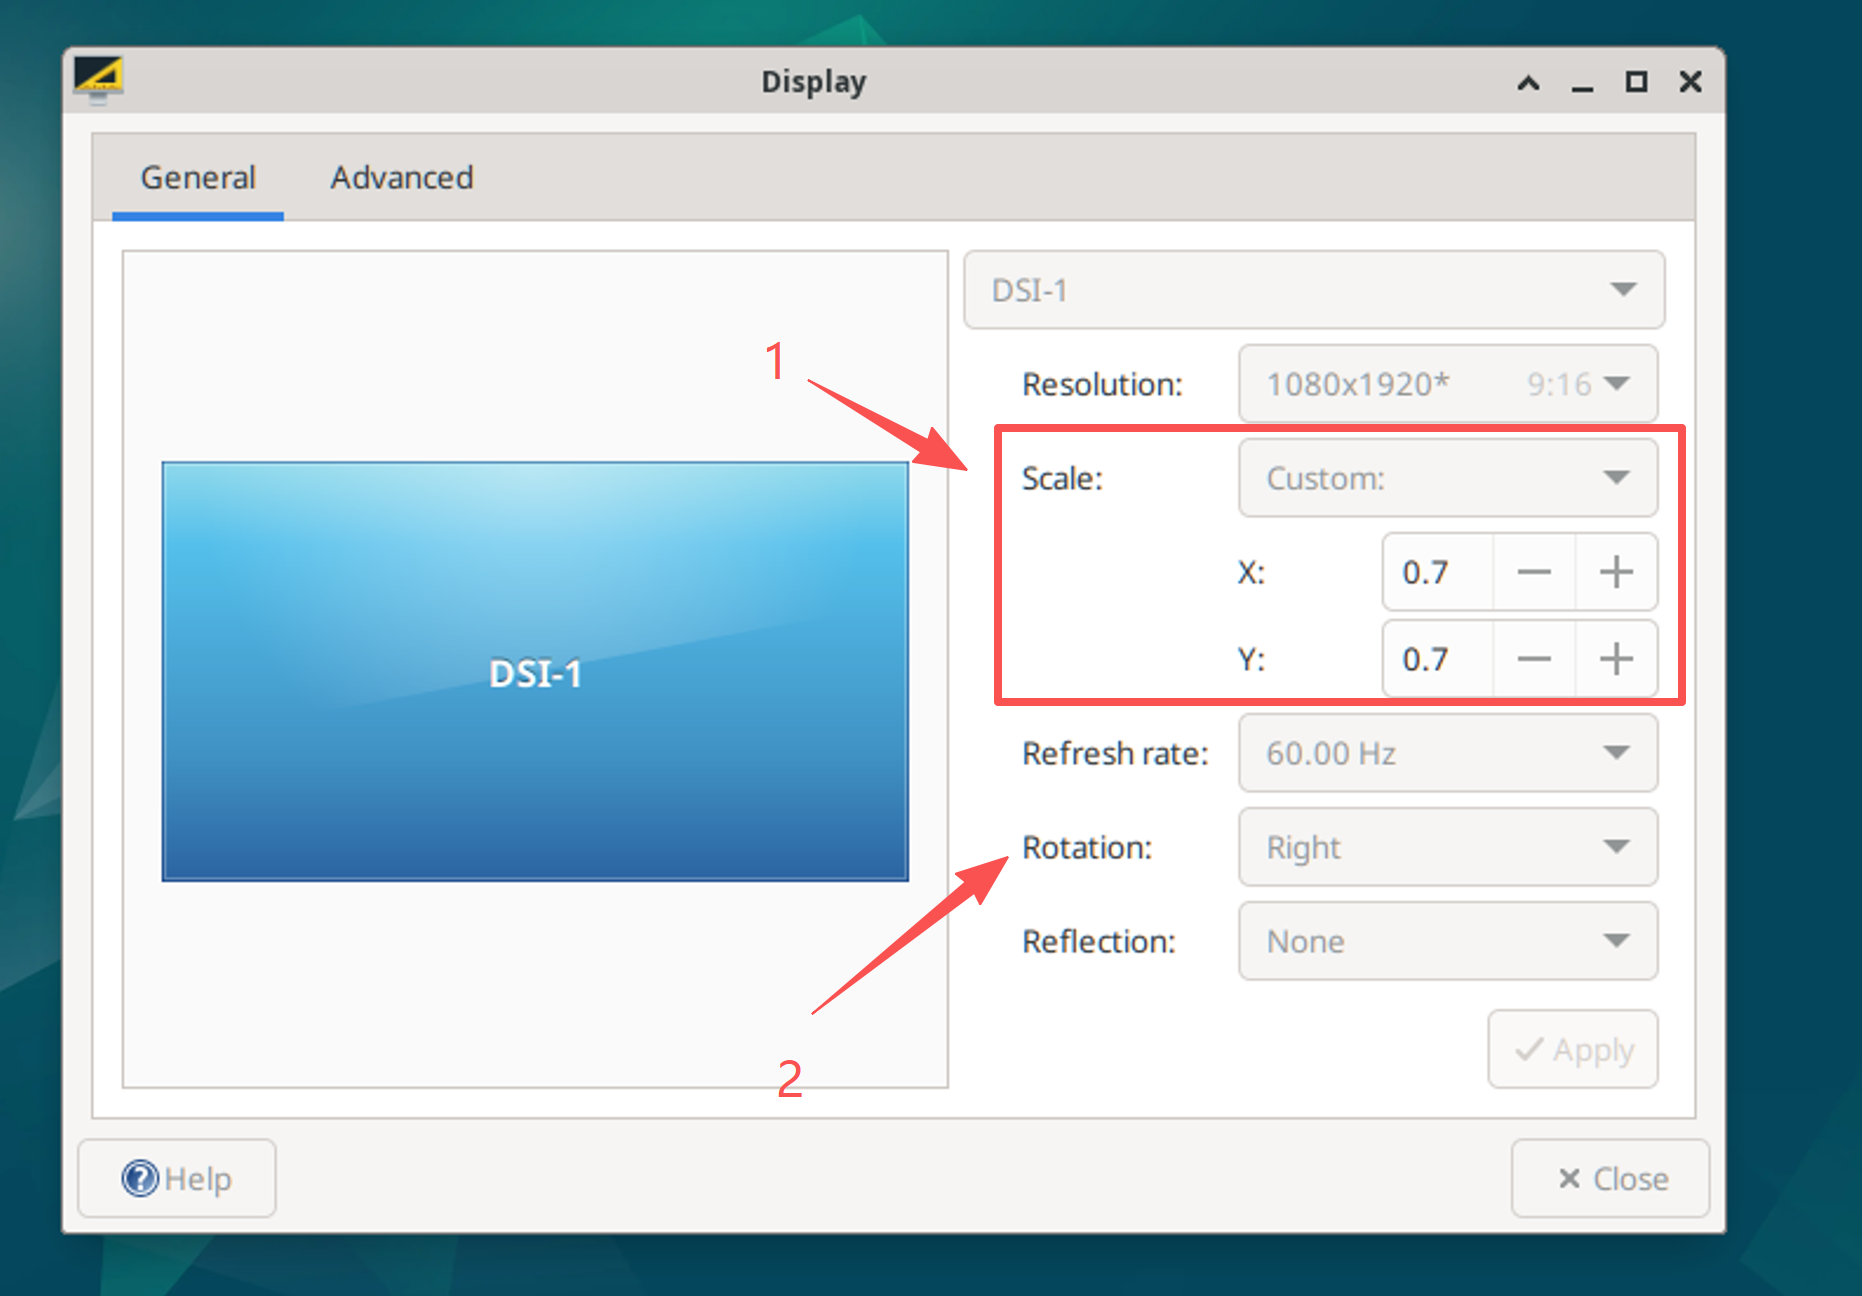
Set Scale to Custom with a value of 0.7 (for larger, more visible icons); set Rotation to Right:
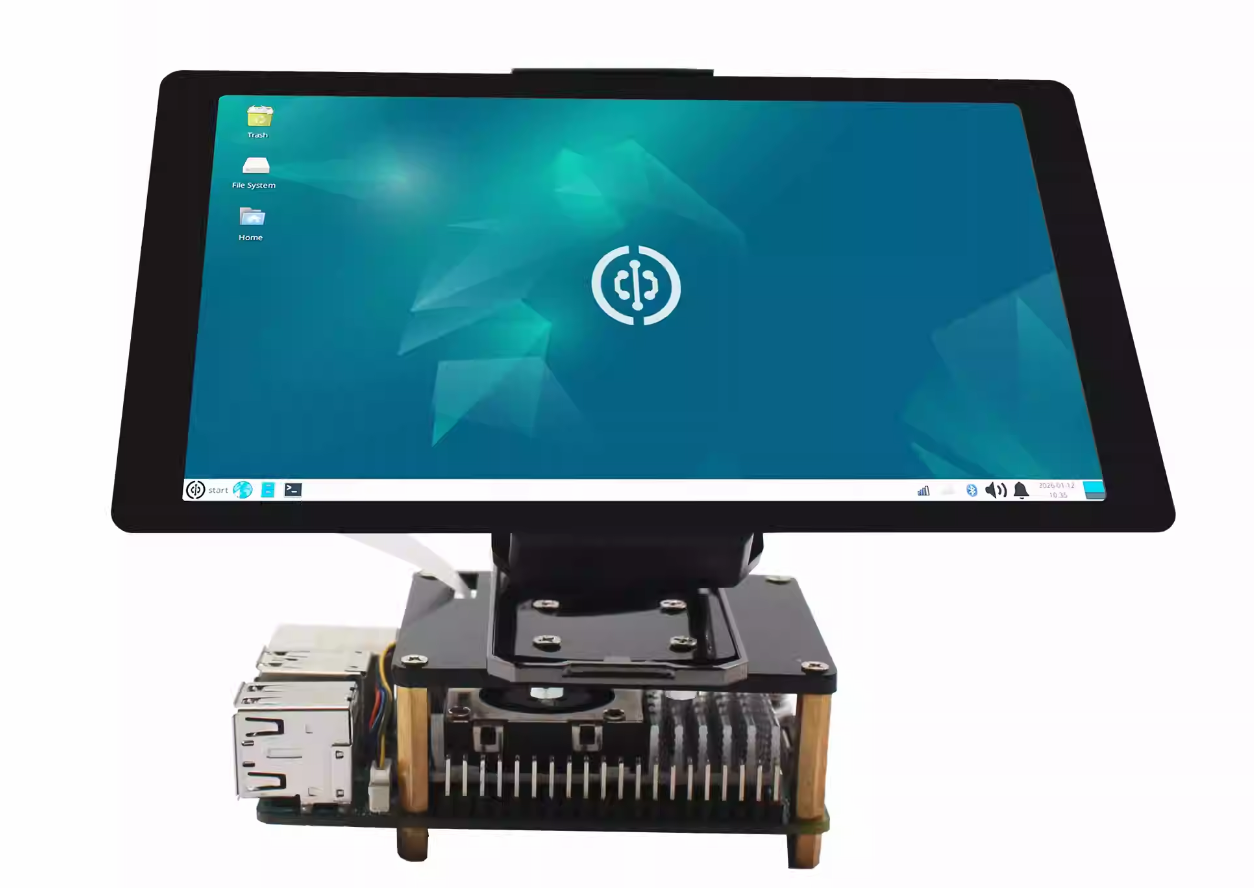
After adjustment, it will appear in landscape mode as shown below. The settings persist after reboot.
Portrait Mode
Set Scale to Custom with a value of 0.7 (for larger, more visible icons); set Rotation to Inverted:
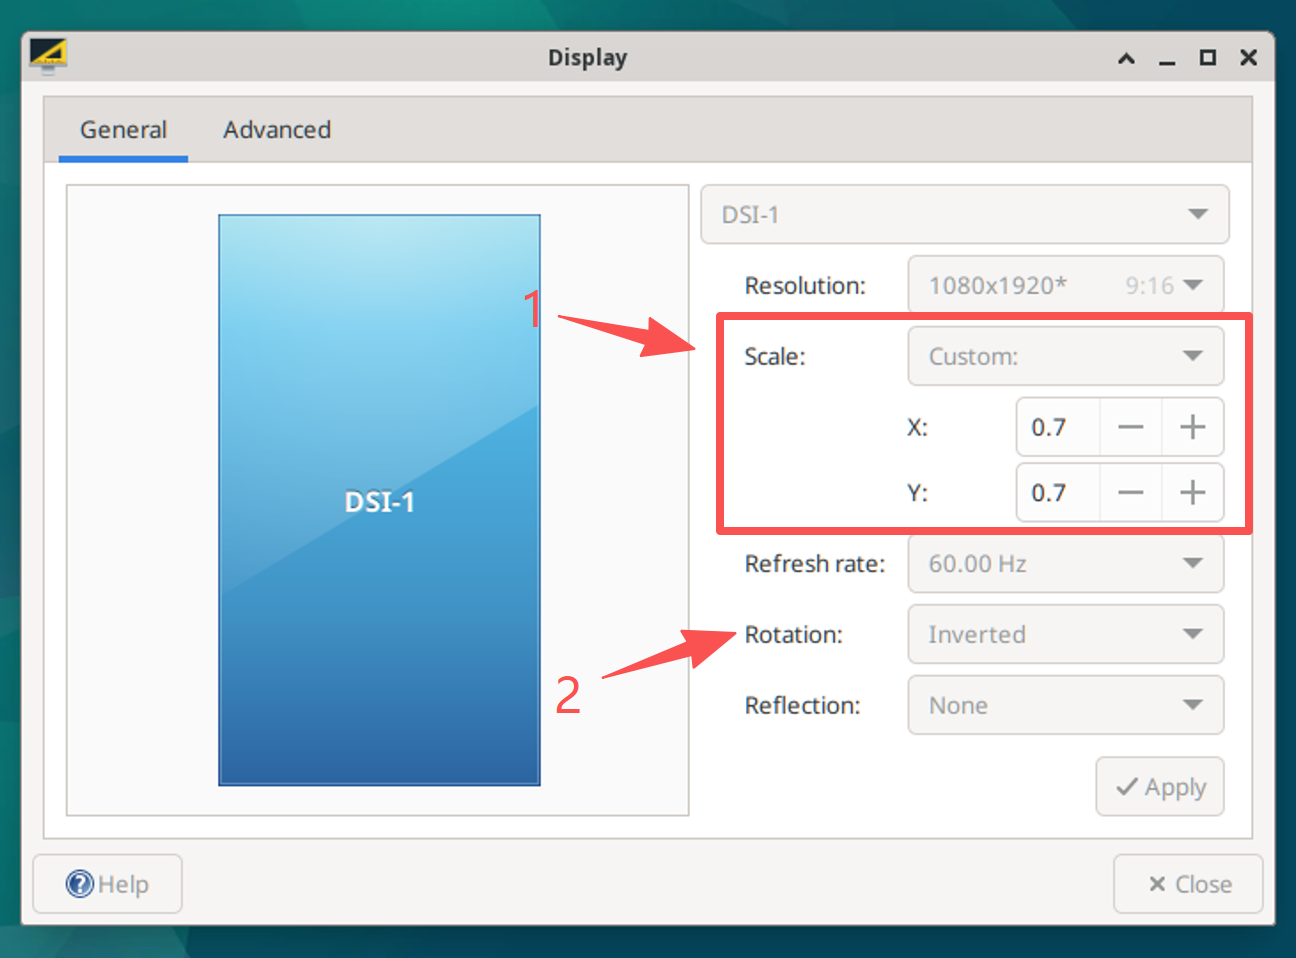
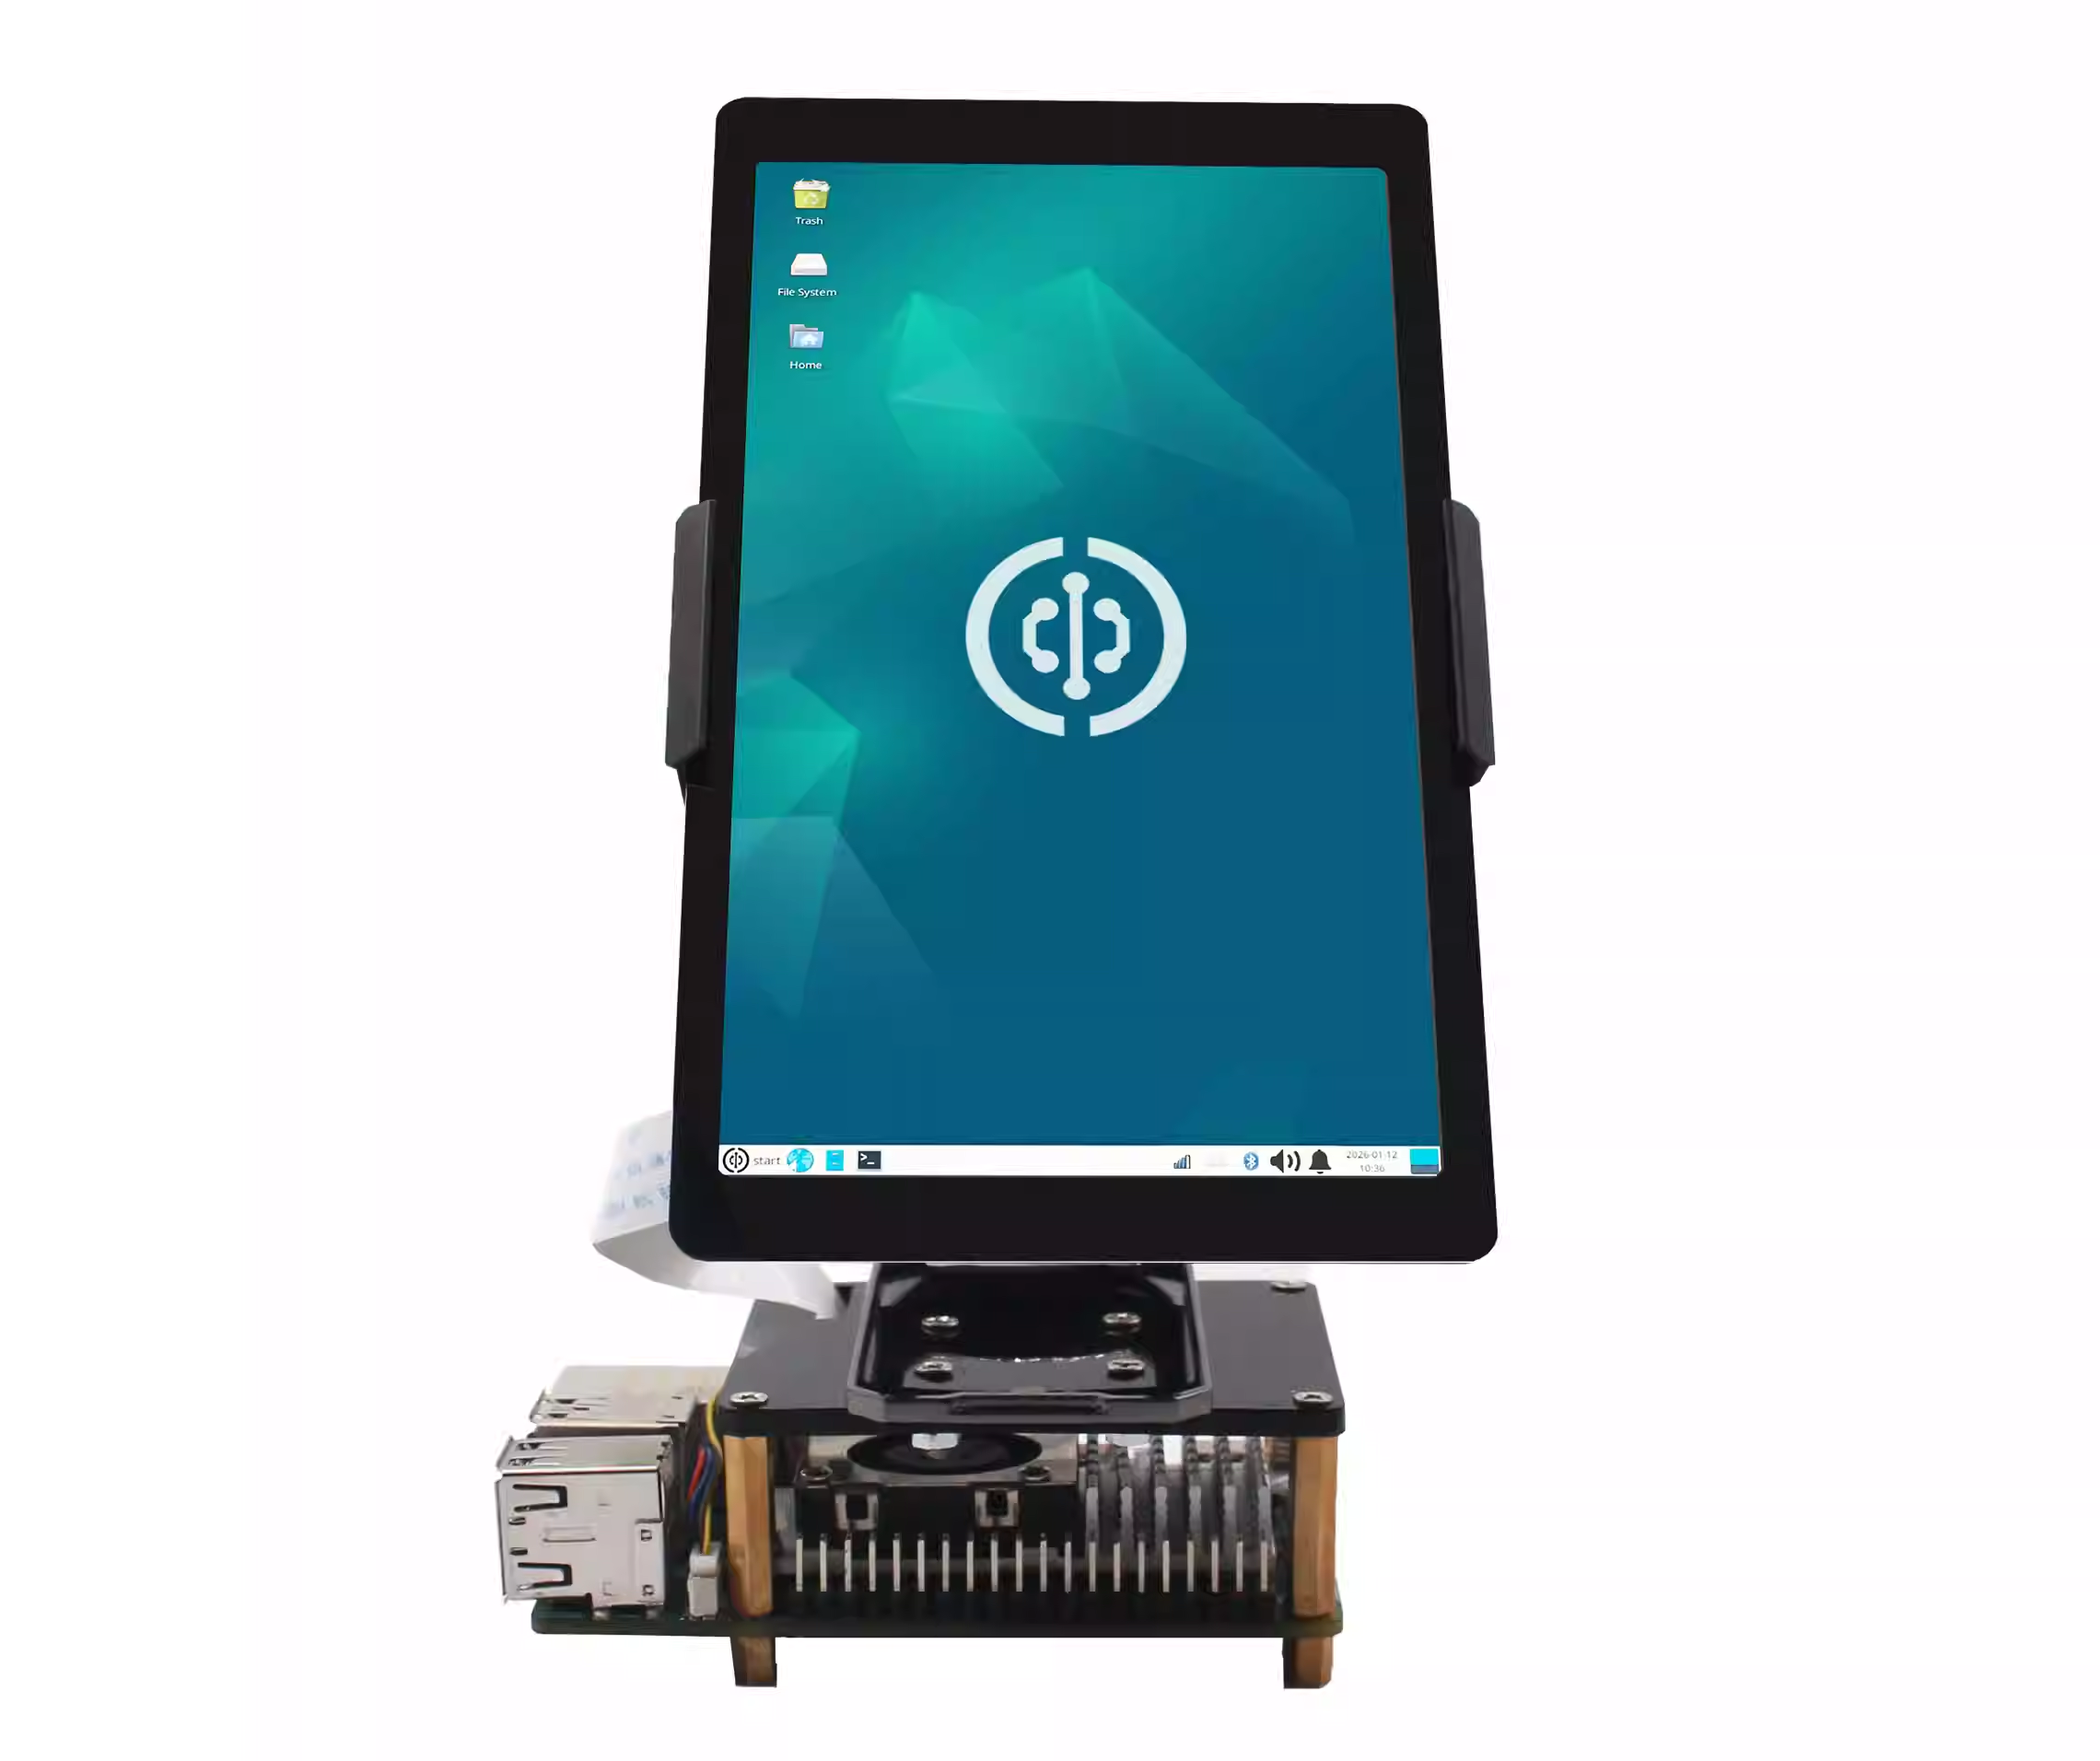
After adjustment, it will appear in portrait mode as shown below. The settings persist after reboot.
If no MIPI display is connected or detected after configuration, the system will determine that MIPI display loading has failed and will automatically reboot into the HDMI desktop.
Dual Display (Extended Desktop)
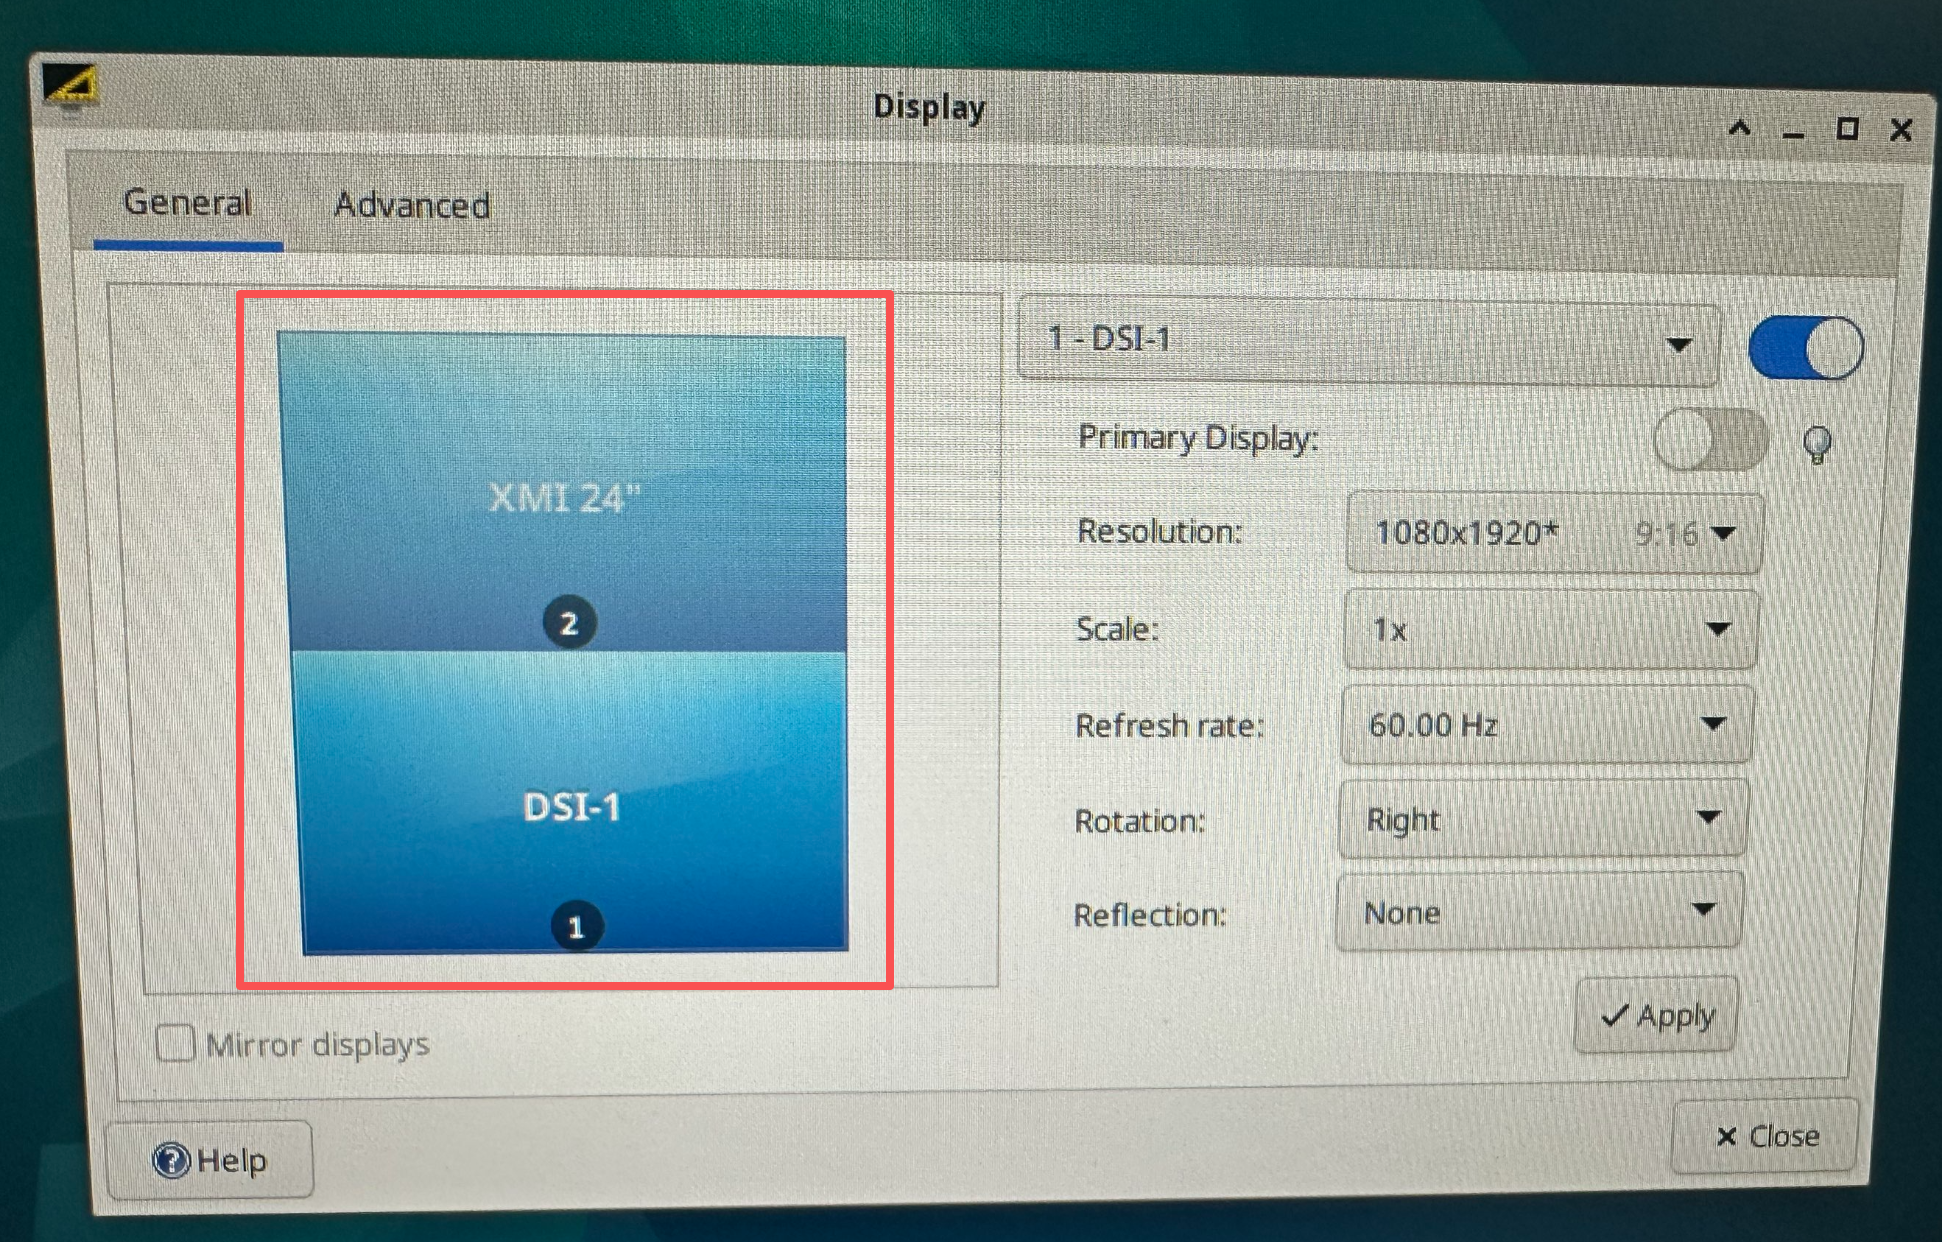
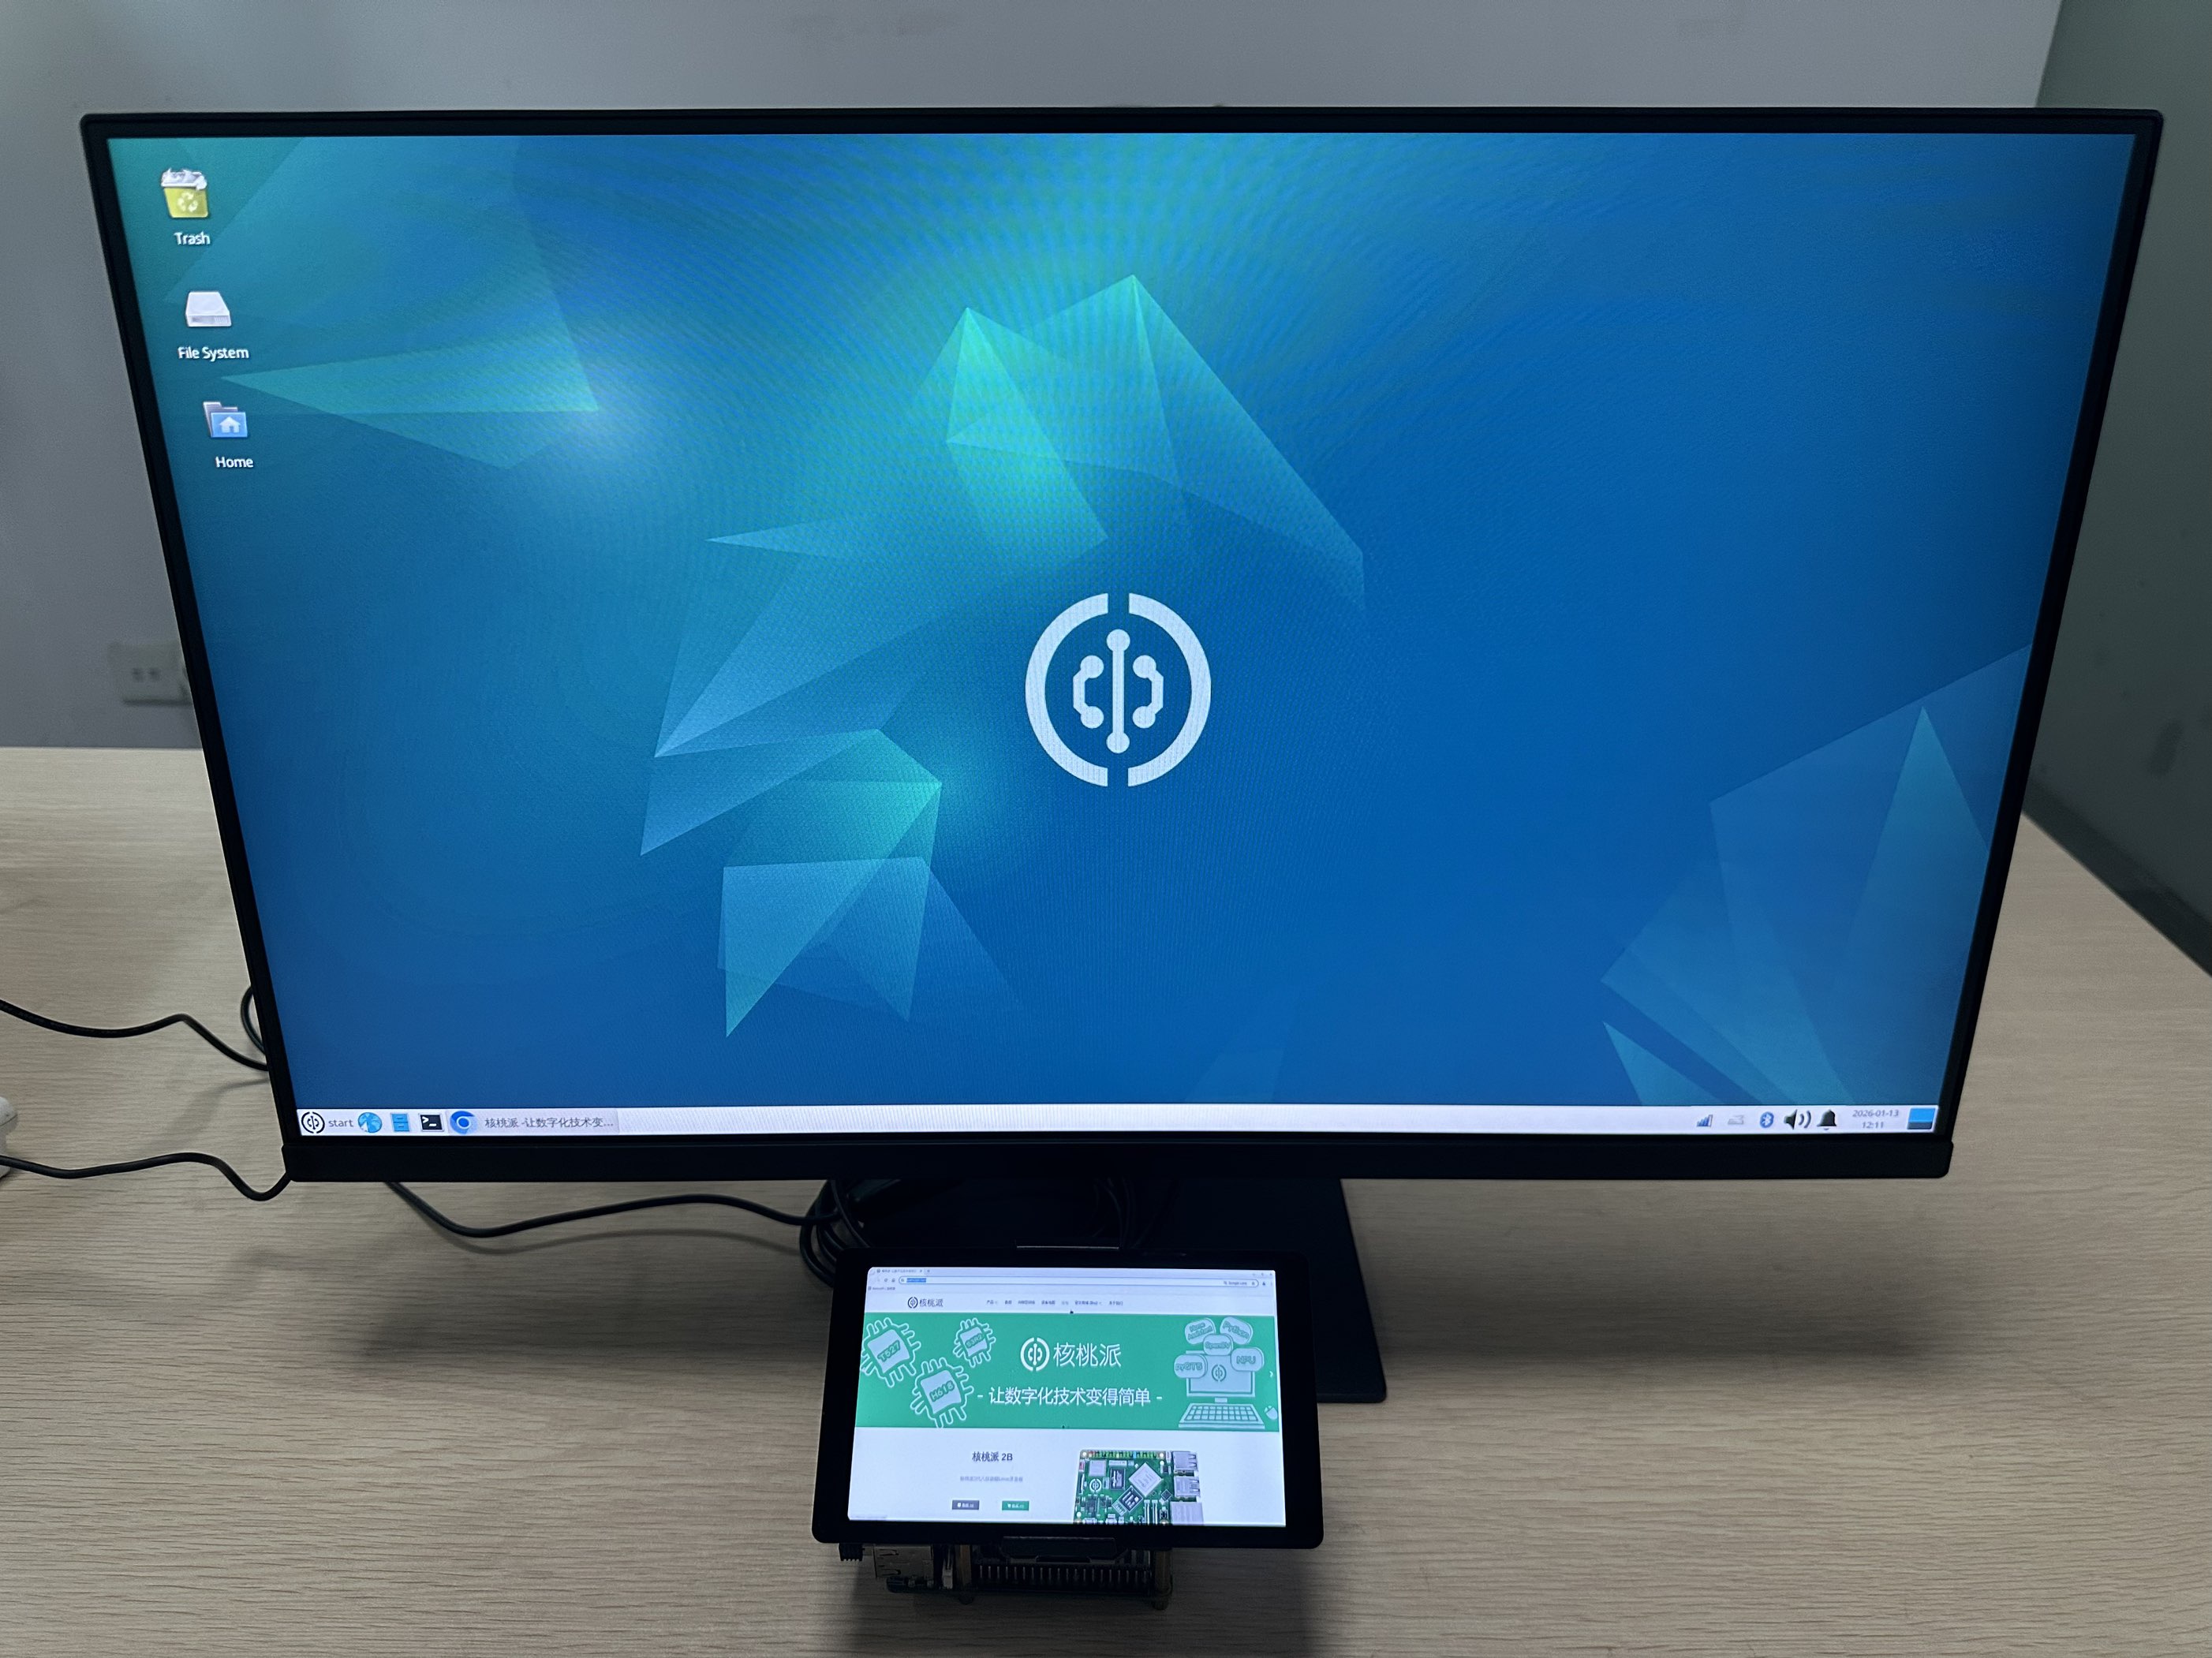
When both a MIPI display and HDMI are connected, the Walnut Pi Desktop edition automatically enters dual-display mode upon boot. You can configure extended display and other display modes through Settings - Display.
Example: In the image below, dragging the dsi-1 window below the HDMI display means that moving the mouse beyond the bottom-left of the HDMI display will enter the MIPI display—similar to extending a desktop on a PC.
The Server edition only supports a single display mode.
Disabling LCD Display
Use the following command to remove the LCD display function and boot from HDMI:
sudo set-lcd dsi-1920x1080 remove